Lab One: Botanical Explorations with the Dissecting Scopes
We worked together to located both of our samples in the greenhouse on campus. After obtaining both samples, we viewed them under the standard dissecting scope at all magnifications, but have the highest and lowest posted below. Under the dissecting scope we were surprised to see crystallized structures on both plants. A lot of pollen and three stamens were also visible on the Kalanchoe. We have posted pictures below, so you can see what we have found and hope you enjoy!
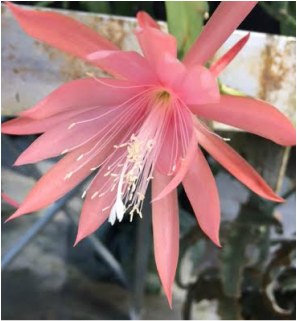
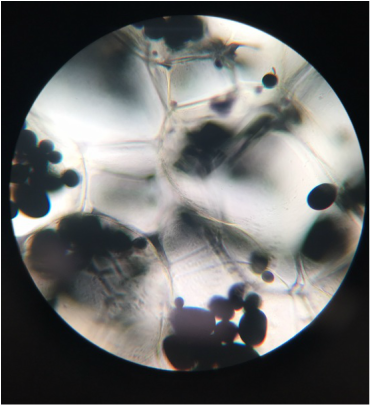
Epiphyllum sp.
Cactaceae
Slide photographed by: Hetal Bhatt

Epiphyllum sp. Cactaceae Total Magnification: 7.5x Slide photographed by: Hetal Bhatt
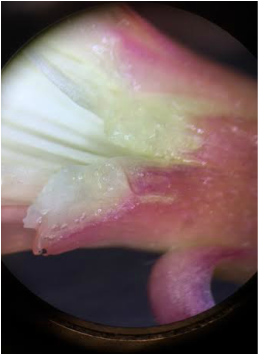
Epiphyllum sp.
Cactaceae
Total Magnification: 50x
Slide photographed by: Hetal Bhatt
|
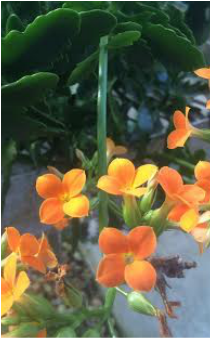
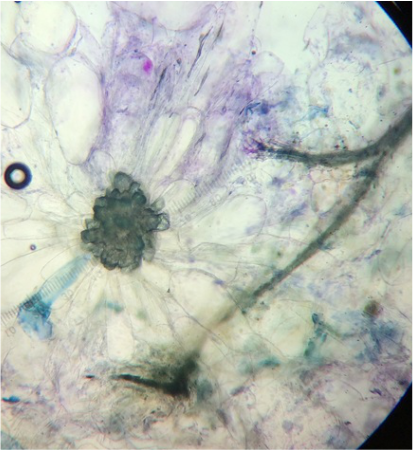
Kalanchoe sp blossfeldiana Image of flower taken with phone. By: Craig Harrell
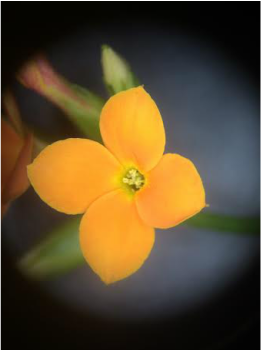
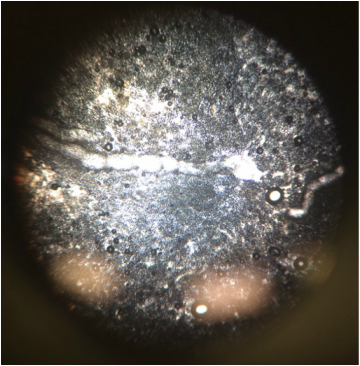
Kalanchoe sp blossfeldiana 7.5x magnification with dissecting scope. Prepared by Craig Harrell
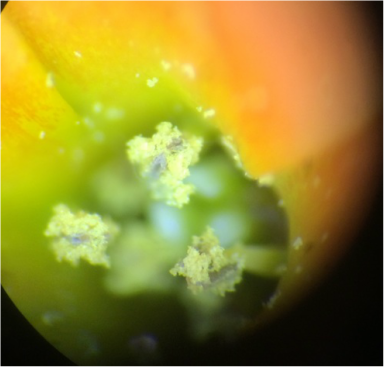
Kalanchoe sp blossfeldiana Stamen with pollen. Total magnification 50x dissecting scope. Photo by Craig Harrell
|
Lab Two: Plant Cells and Scientific Drawings
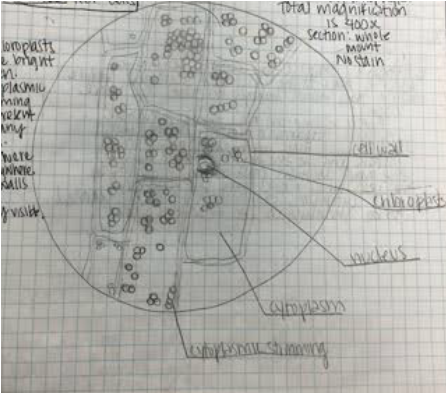
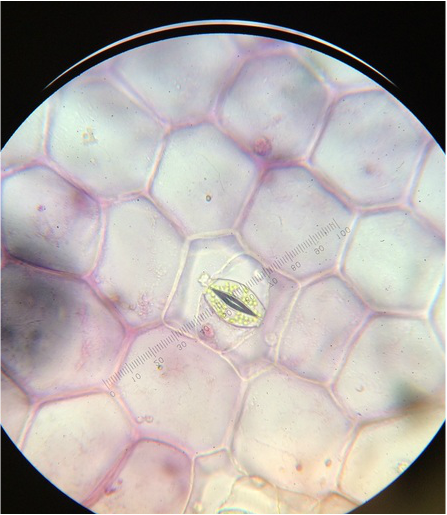
During this activity we were able to view/observe cells under the compound microscope. While looking at the cells, we were able to identify certain items that included: nucleus, cell wall, cytoplasm, chromoplasts, amyloplasts, etc. Some samples were stained with iodine, toluidine blue, or CaCl to facilitate observation of the samples. Below are photographs taken with our phones to document what we observed.
Elodea leaf cells by Hetal Bhatt
Phylum Magnilophyta
Total magnification: 400x
Section: Whole mount
No stain
|
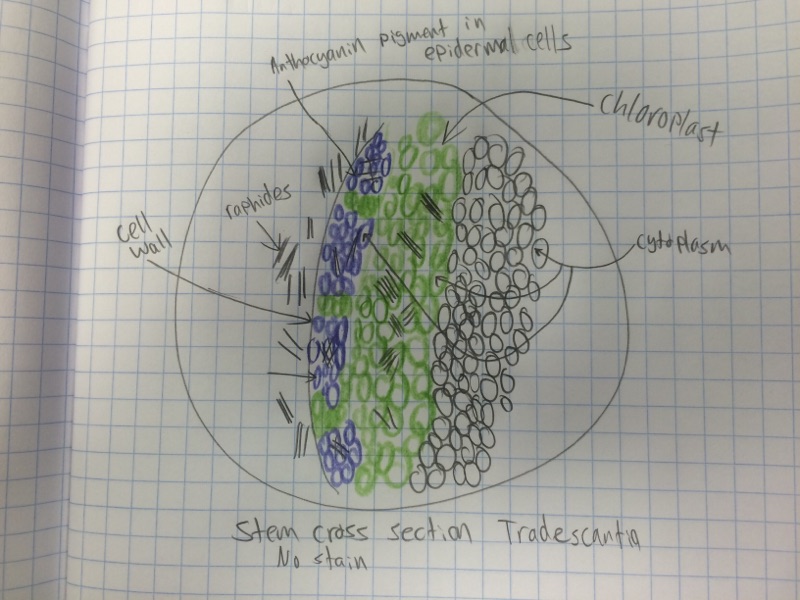
Tradescantia cross section at 100x. No stain. Drawn by Craig Harrell
|

Elodea leaf cells
Total Magnification: 400x
Whole Mount
No Stain
Slide prepared and photographed By: Hetal Bhatt
Before adding the CaCl there was some cytoplasmic streaming present in some cells.
Before adding CaCl
Phylum Magniliophyta
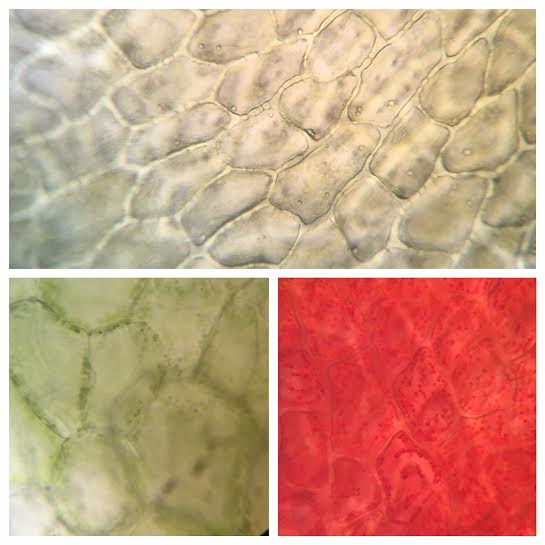
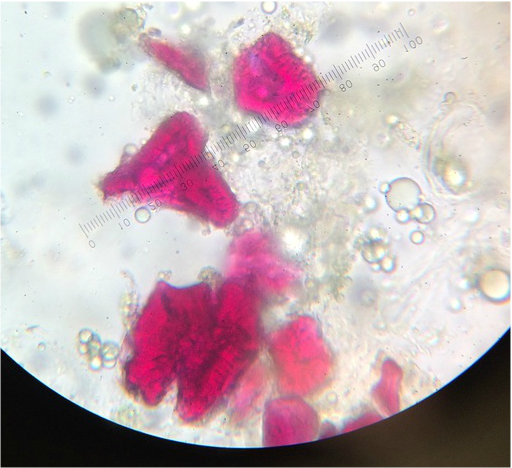
Capsicum annuum Total Magnification: 400x. Section. These are the cells that contain plastids in green bell pepper (lower left), red bell pepper (lower right), and yellow bell pepper (top). Slide prepared and photographed by: Hetal Bhatt
Solanum tuberosum section after staining with iodine. Total magnification 400x. The iodine stained the starch molecules a blue/blue color.
Musa smeared on a slide and stained with iodine. This is an unripe banana sample with has much greater starch content than a ripe banana. This is clear because the iodine stain shows a large amount of starch present.
|

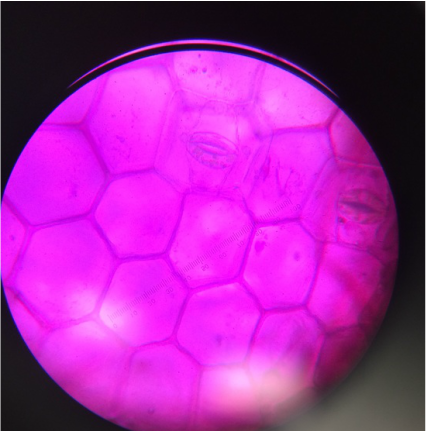
Elodea leaf cells. Total Magnification: 400x. No stain Whole Mount. Slide prepared and photographed By: Hetal Bhatt. After adding CaCl, most of the chloroplast in the cells were pushed to the cell walls. All the cells seemed to be shrinking in size.

Allium cepa after staining with toluidine blue. Total magnification 400X. The difference between the stained and non-stained sections can be clearly seen here. The nuclei are much more visible when stained, as are other structures of the cell. The nuclei is pushed to the cell wall in most of the cells because the vacuole of each cell takes up 90% of the space in each cell.
Tradescantia under compound microscope. 100x total magnification. No stain. Cross section. Slide prepared and photographed by Craig Harrell. A sketch of this slide with labeled parts can be seen at the beginning of lab 2.
|
Hetal: My favorite specimen was the Elodea leaf cells. It was my favorite because it was super neat to be able to see the cytoplasmic streaming and the changes between before and after adding the CaCl.
Craig: I most enjoyed viewing the cross section of the Tradescantia. The majority of the other slides needed to be stained to see the different parts of each cell. With Tradescantia it was easy to see because the anthocyanin pigment and other visible colors were so noticeable. Also I have never seen raphide like structures in anything except corals
Craig: I most enjoyed viewing the cross section of the Tradescantia. The majority of the other slides needed to be stained to see the different parts of each cell. With Tradescantia it was easy to see because the anthocyanin pigment and other visible colors were so noticeable. Also I have never seen raphide like structures in anything except corals
Lab Three: Photosynthesis
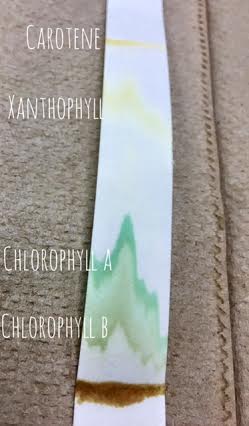
For our lab this week we were able to identify the various color differences in pigments including: Chlorophyll a, Chlorophyll b, xanthophyll, and carotene. We were also able to figure out how photosynthesis pigments are related to plant life and able to experiment with light intensity effect on rate of oxygen production during photosynthesis.
"My favorite part of lab today was the test for starch. I thought it was really interesting and a pretty amusing way to test for it. It is fascinating to see how much starch is actually present in plants. Watching the leaf be decolourized was neat. Ethanol is an organic solvent and so after seeing it put in the solution and we observed it extracting the chlorophyll from the leaf." -Hetal Bhatt
"My favorite part of lab 3 was the chromatograph of the Magnolia grandiflora pigments. It was a very visual experiment and easy to see what was happening and why." - Craig Harrell
Exercise 1: Plant Pigments
|
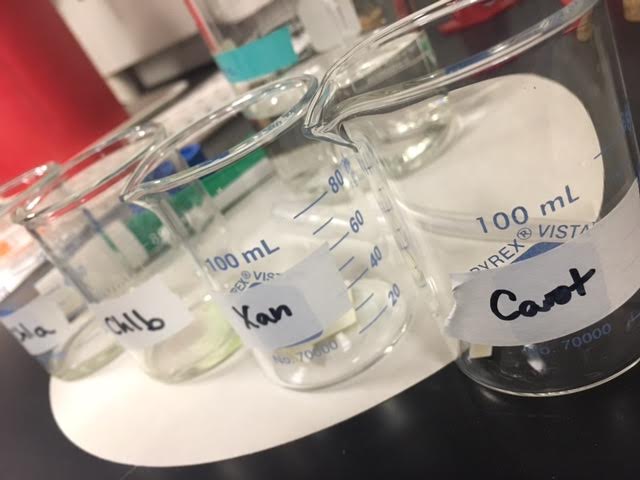
This image shows the Chromatography paper cut out by the different pigments and placed in specific beakers, ready for the solvent. Photographed by Hetal Bhatt
Experiment team: Hetal Bhatt, Craig Harrell, Athena Downes, and Kelsey Hymel.
|
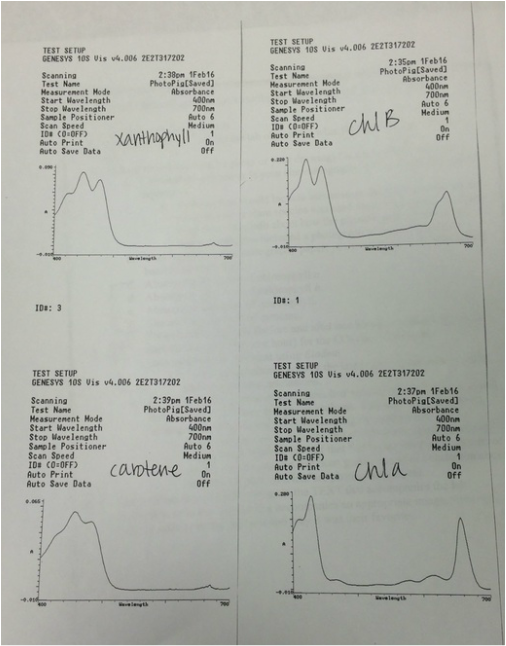
Once the pigments fully dissolved into the solution each was separately analyzed by the spectrophotometer. The graphs show us the absorption spectrum for each pigment. This clearly shows the differences in each pigment. Data collected by Hetal Bhatt, Craig Harrell, Athena Downes, and Kelsey Hymel.
Exercise 2: CO2 Consumption in Photosynthesis
This portion of the lab demonstrates CO2 usage by plants during photosynthesis. The solution that was added to the tubes with the elodea was tap water with about 3 drops of phenol red (a pH indicator). The tap water and phenol red solution was mixed with CO2 by breathing it in using a straw.

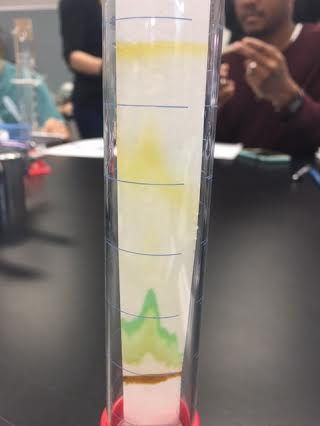
Here we show 4 tubes, all with the CO2 inudated phenol red solution. Tubes 1 & 2 also have Elodea in them and the CO2 inudated phenol red solution. Tubes 3 & 4 have only the CO2 inudated phenol red solution. Tubes 1 & 3 were placed under a lamp while tubes 2 & 4 were placed in a dark lab bench draw. All tubes were left undisturbed for one hour. Photograph by Craig Harrell

After one hour had passed the tubes were taken for observation. There was no change in tube 3 & 4 as excepted because no plant was present to use the CO2 (even though one was in the dark and the other in the light). However, in tube 1 the phenol red solution was depleted of CO2. This tube was left in the light and the aquatic plant photosynthesized over the hour and used all the available CO2 (returning the tap water to the normal neutral level). Tube 2, that was left in the dark, did not change even though it had the Elodea in it. This is because without the presence of light the plant could not photosynthesize which resulted in the CO2 levels remaining the same. Photograph by Craig Harrell
Exercise 3: Test for Starch

All four images above are of the Plectranthus scutellariodes Leaf. The purpose of this experiment was to see whether and how much starch is present. The top left picture shows the leaf before. Top right shows after being in boiling water for about two minutes and all the pink areas containing anthocyanin was removed by the water. The bottom left was after being put in boiling ethanol to which removed the Chlorophyll. The bottom right shows the leaf after being treated with Iodine Starch indicator. The areas shown with dark black spots is where starch is present. Pink areas were shown to be negative result for starch. Green areas of Chlorophyll was a positive result for starch. The green area was the only place was starch was present which shows that photosynthesis is only possible in those areas. Photographed by: Hetal Bhatt
Lab 4: Simple & Complex Tissues
This week we studied the ground tissue system of plants. Several different sectioning techniques were used to observe and compare parenchyma, collenchyma, and sclerenchyma cells and tissues. The complex tissues xylem, phloem, and epidermis were included in our observations. We used Touidine Blue O (TBO) and Phloroglucinol-HCl as stain to highlight the desired cells/tissues. A variety of plants were available for today's activity so there is a great deal of fascinating data that was collected and documented.
Exercise 1: Parenchyma & Collenchyma Cells
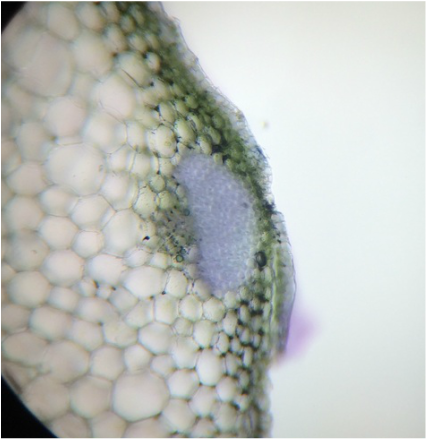
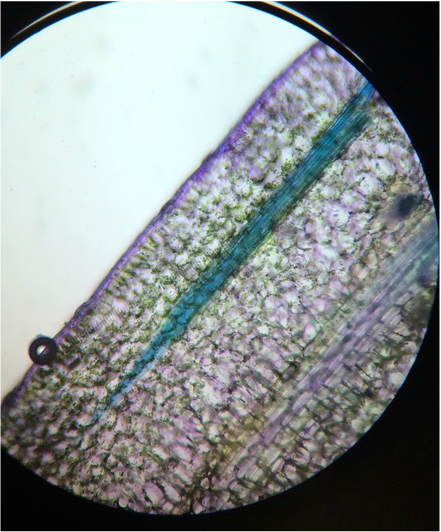
Cross section of Apium graveolens at 100x total magnification with TBO stain. The collenchyma bundles are clearly observable when stained light purple. The dark blue spots mixed in the outer areas of the section are lignins. The parenchyma cells are seen on the left are remain mostly unstained.
Exercise 2: Sclerenchyma Cells
Smear of Pyrus comminus at 400x total magnification and stain with TBO. Here we see a brachysclereid (stone cell) in the center, this gives pears the gritty texture. The structure on the right is a pit canal that runs through the lignified cell walls.
Exercise 3: Dermal Tissues
Tradescantia zebrina upper
|
Tradescantia zebrina lower
|
Lab #5: GMO INVESTIGATIONS PART I
For this weeks lab one of our goals is to test certain foods for the presence of genetically modified organisms. Some of the other objectives included were:
In the second exercise we number 6 PCR tubes which contained a specific DNA and Master Mix. The tubes were kept on ice during each step. After each had been mixed, we placed it in the thermal cycler.
- to explain what a genetically modified organism is.
- describe the process of extracting DNA from store-bought food products.
- describe how polymerase chain reactions amplifies target DNA sequences.
- describe some of the implications for genetic engineering of agricultural crops, both positive and negative, in regards to plant biodiversity, ecosystems, co-evolution of plants and their pests, human health, and economics.
In the second exercise we number 6 PCR tubes which contained a specific DNA and Master Mix. The tubes were kept on ice during each step. After each had been mixed, we placed it in the thermal cycler.
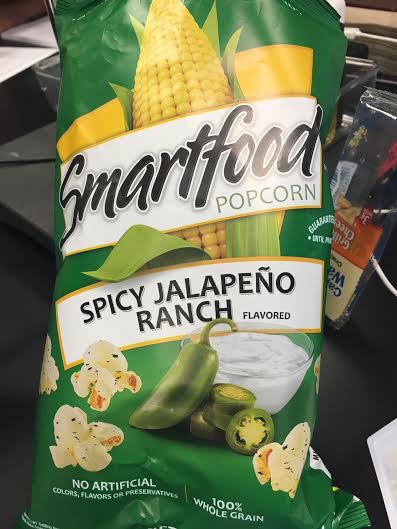
This is our test food sample. Smartfood Popcorn in spicy jalapeño ranch. Predicted to have GMOs.
|

Here are the ingredients for the Smartfood Popcorn in spicy jalapeño ranch. We believe this product will be genetically modified because corn is a crop that is commonly grown using these methods. Also there is no designation on the packaging stating it is non-GMO.
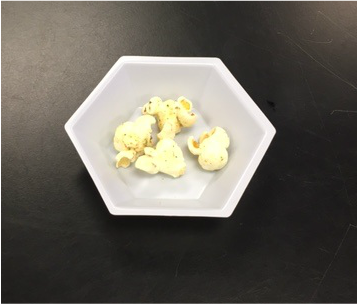
A photo of the popcorn before the processing took place.
|
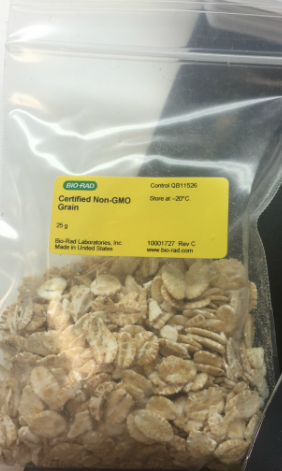
Certified Non-GMO Grain. This sample is our negative control to help test whether this contamination or not.
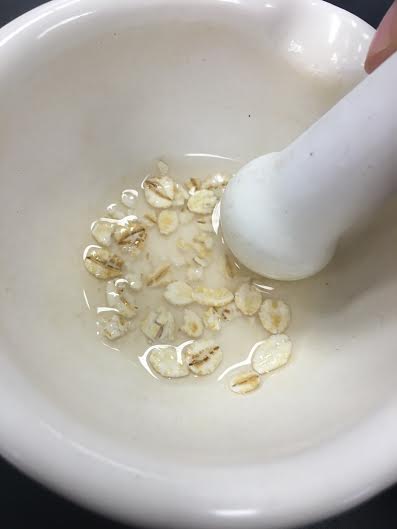
This is our control during grinding with mortar/pestle.
|
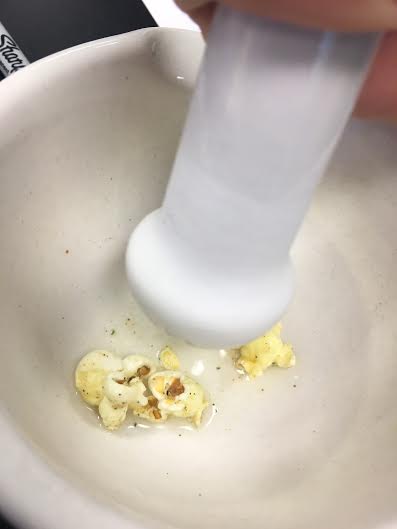
Here is an image of our Smartfood Popcorn being grinded with mortar/pestle. It is very important to disrupt the tissue in order to liberate the DNA from the cells. If that didn't happen than it wouldn't be able to be extracted.
|
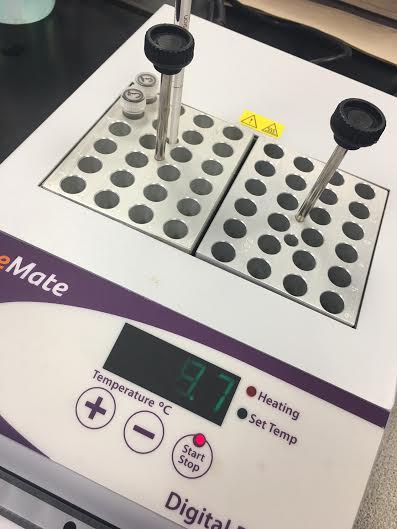
This image shows samples in the water bath. The time when the samples are in the waterbath is useful because it allows you to extract DNA without degradation. Boiling the samples destroys the enzymes.
PCR Tube Preparation
Here we prepare our samples for the PCR to determine if there a GMO is present. Also we are confirming that the oats test negative as a GMO. We used different mixes with the samples: Plant Master Mix (PMM), GMO Master Mix (GMM), and GMO + mix (control). The PMM has primers that will locate DNA that is present in all plant (this way we will be sure we have successfully extracted the DNA). The GMM has primers that indicate if GMO + DNA is present. The DNA that we are interested in are CaMV 35S, and NOS, one or both or these are very commonly found in GM plants.
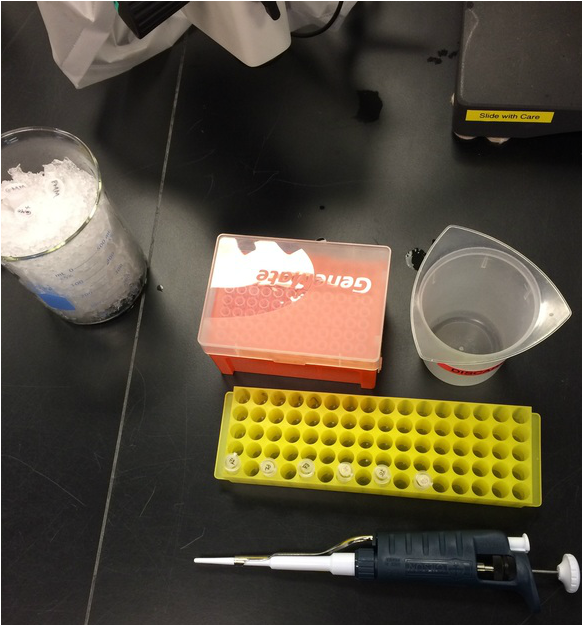
Here are the master mixes on ice, and DNA in the yellow rack. 20 micro-liters of mix were added to the appropriate PCR tubes containg our DNA smples.
|
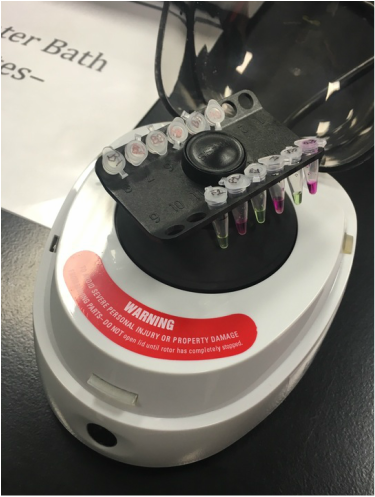
Once the Master Mixes were added to the PCR tubes we placed them in the centrifuge to ensure thorough mixing.
|
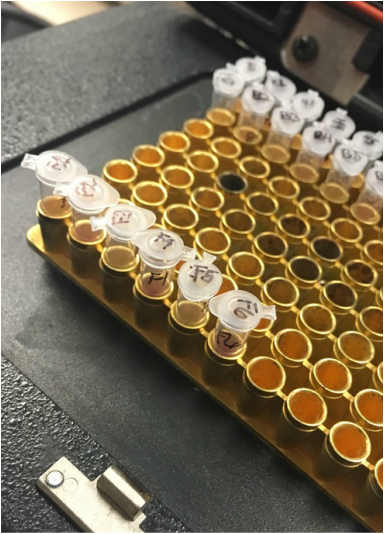
Once the DNA and Master Mix steps were complete we placed our PCR tubes in the thermocycler. This machine puts the DNA through three different temperature stages to amplify the DNA; denaturation (increase temp), annealing (decrease temp), and elongation (increase temp). The result is the DNA is separated into two single strands. This prepares the samples for the PCR.
We halted our experiment on 02/22/2016 and will obtain the final results using gel electrophoresis on 02/29/2016.
Lab #6: GMO INVESTIGATIONS PART II
For this weeks lab one of our goals was to use electrophoresis to test certain foods for the presence of genetically modified organisms. Some of the other objectives included were:
For this lab, we set up our gel electrophoresis apparatus as instructed, obtained our PCR tube from the thermal cycler, using a fresh tip each time, added 10 microliters of Orange G loading dye (LD) to each sample and mix well, Loaded 20 microliters of the molecular weight ruler and 20 microliters of each sample into your gel in order as instructed. Than the run time and voltage was 30 min at 100 V. Stain in Safe View DNA stain.
- to explain the process of electrophoresis
- interpret the results of gel electrophoresis of your PCR samples from last week.
- describe how both positive and negative controls were necessary in order to assess the visibility of our results for the investigation.
- discuss some of the implications for genetic engineering of agricultural crops, both positive and negative, in regards to plant biodiversity, ecosystems, co-evolution of both plants and their pests, human health and economics.
For this lab, we set up our gel electrophoresis apparatus as instructed, obtained our PCR tube from the thermal cycler, using a fresh tip each time, added 10 microliters of Orange G loading dye (LD) to each sample and mix well, Loaded 20 microliters of the molecular weight ruler and 20 microliters of each sample into your gel in order as instructed. Than the run time and voltage was 30 min at 100 V. Stain in Safe View DNA stain.
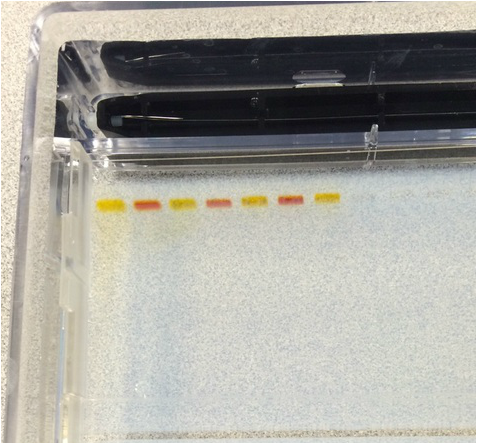
Here is an image of our GMO testing samples in a gel electrophoresis. Electrophoresis is a technique used in laboratories in order to separate macromolecules based on size. The technique applies a negative charge so proteins move towards a positive charge. This is used for both DNA and RNA analysis. Each sample was mixed with the loading dye and 20 micro liters of the solution was dispensed into the slots at the top of the 2% agarose gel. The machine was then run of 30 minutes at 100 volts.
|
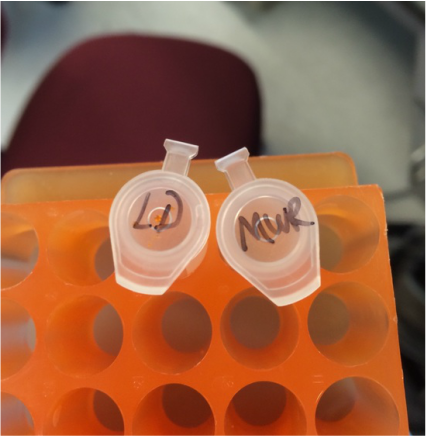
The LD is the loading dye that was mixed with GMO testing samples prior to dispensing into the agarose gel. The MWR is a molecular wieght reader that is dispensed into the seventh slot and used as a measuring technique (it makes a band on each level of the gel).
|
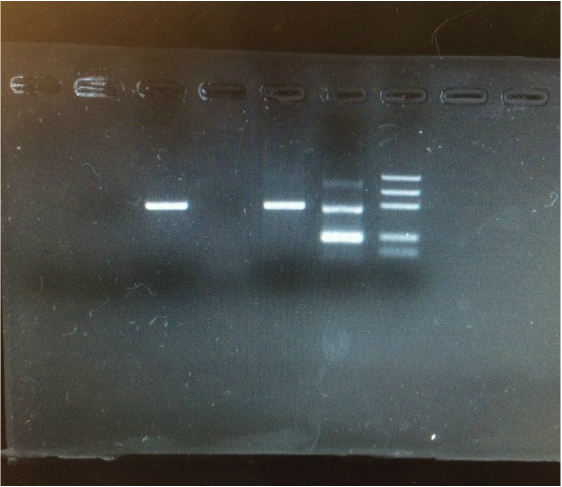
Electrophoresis results- Control non GMO food w/ plant primers (line 1) had no bands, this means no DNA was extracted. Control non GMO food w/ GMO primers (line 2) had no bands, this confirms it is non GMO. Popcorn sample showed a band at 455 bp (line 3) confirming that it is a plant that we tested. Popcorn sample with GMO primers (lane 4) showed no bands, this means our test food was non GMO. GMO + control with plant primers (line 5) has a band at 455 bp showing that it is a plant. GMO + control with GMO primers (line 6) shows a band at 200 bp confirming GMO +.
Results for our Smartfood Popcorn showed a GMO negative result! There was another group in class that had the same exact test food as us and received the same results as us. Our food did not generate a 200 bp band with GMO primer, which indicated that it was GMO negative.
LAB #7: BRYOPHYTES (NON-VASCULAR PLANTS) & FERNS (SEED-FREE VASCULAR)
Some of the objectives for this weeks lab included the following:
- Recognize representatives of the Phylum Bryophyta and the Phylum Hepaticophyta (non-vascular plants).
- Recognize representatives of the seed-free vascular plants--the Monilophytes (also known as ferns) at both the microscopic and macroscopic level.
- Use the nomenclature, both scientific and common, associated with each nonvascular taxon observed.
- Describe the sequence of events that occur during the life cycles of each taxon observed and recognize the gametophyte and sporophyte generations.
- Describe the general characteristics of the nonvascular taxa observed, and how those characters are used in their classification.
Whole Mount of Moss Spores (Polytrichum sp.) This slide was prepared by Dr. L-P with a dissecting scope at 30x Total Magnification. It is located in the Sporangia of the Sporophye which is grown out of the female archegonia on the female gametophye. After they will grow into a new male or female gametophyte after germination. Photo credit: Hetal Bhatt.
|
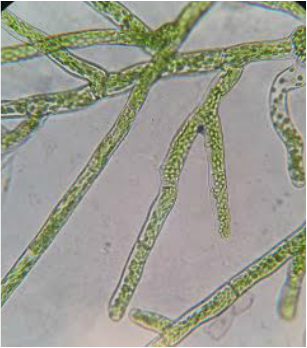
Living Moss Protonema and Bud. Whole mount and viewed with compound microscope at 400x total magnification. Some of the spores germinate and grow into protonema, then become a male gametophyte. Whichever spores don't become protonema became the female gametophyte. Slide prepared and photographed by Hetal Bhatt.
|

The left picture shows the drawing of Moss Gametophytes with Sporophyte attached. Drawing and photographed by Hetal Bhatt.
The left picture is the Moss Gametophytes with Sporophye Attached. The species was not identified. Photo taken by Hetal Bhatt
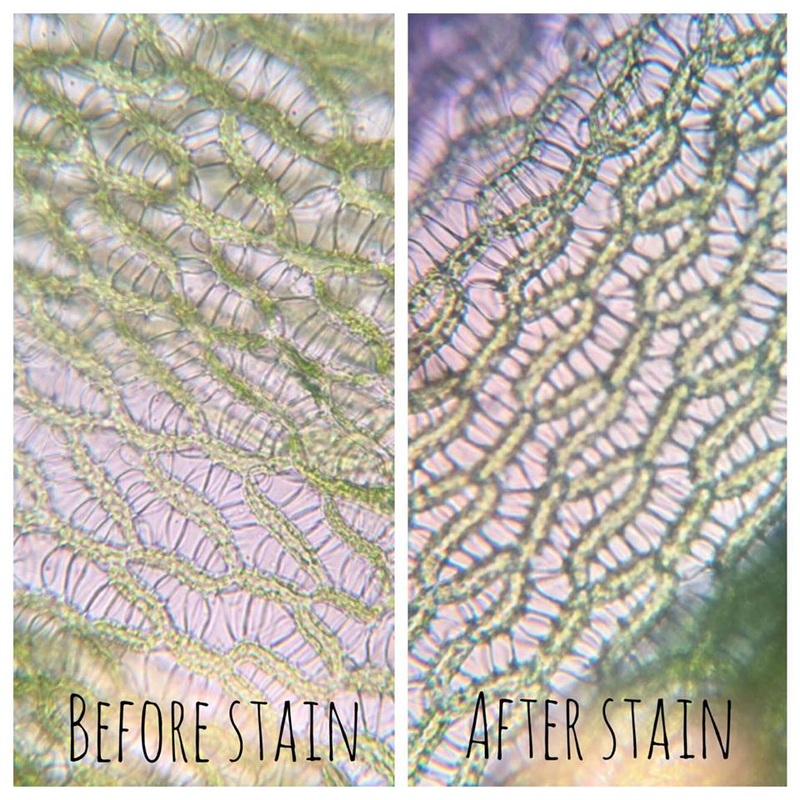
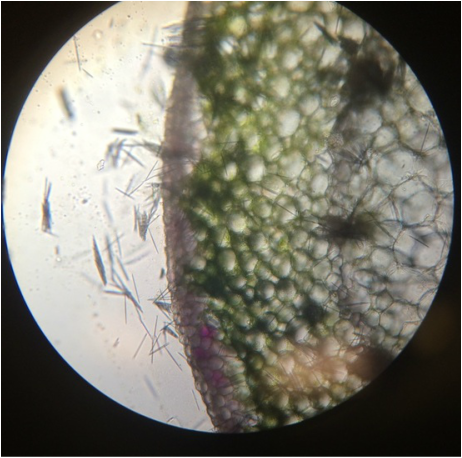
The left side shows the whole mount of Spagnum Moss with no stain. It's viewed under the compound microscope at a total magnification at 400x. Slide prepared and photographed by Hetal Bhatt.
The Right picture shows the whole mount of Sphagnum Moss with a TBO Stain applied to it. It's viewed under a compound microscope at a total magnification of 400x. Slide prepared and photographed by Hetal Bhatt.
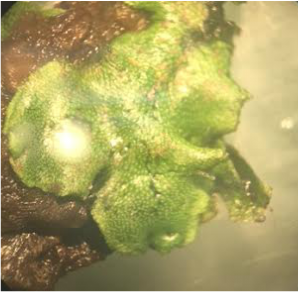
Liverwort Thallus (Marchantia sp.) Phylum Hepaticophyta. We viewed this under the dissection scope at 30x total magnification. The pores are visible all over it and what occurs in these pores is gas exchange. That is because there is no stomata. This was prepared by Dr. L-P and photographed by Hetal Bhatt.

Fern drawing with labeling of major parts. Drawn by Craig Harrell
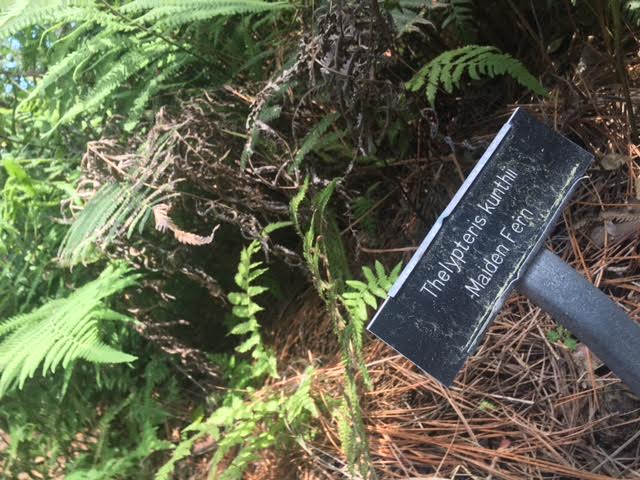
During class we left and went outside the building next to the science center, jenkins, and found this Maiden Fern (Thelypteris kunthii ) We collected this to examine under a dissecting scope in lab. Sporophytes produce spores via meiosis within the Sporangia. Photo taken by Hetal Bhatt.
|
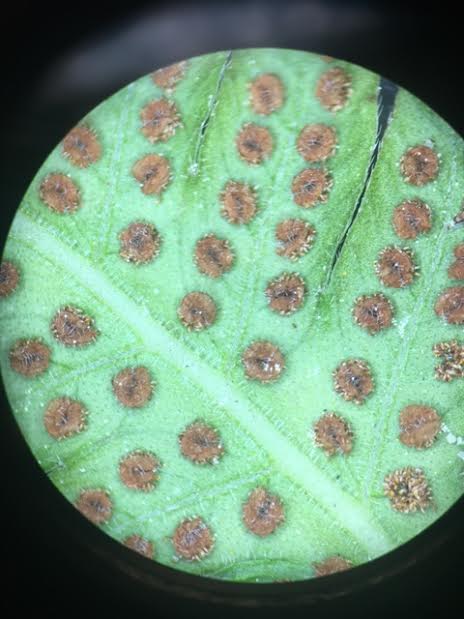
This is a picture taken under the dissecting scope of the Sporangia Clustered into Sori on Abaxial Surface of Fern Frond ( Thelypteris kunthii). Total Magnification is 30x and photographed by Hetal Bhatt
|
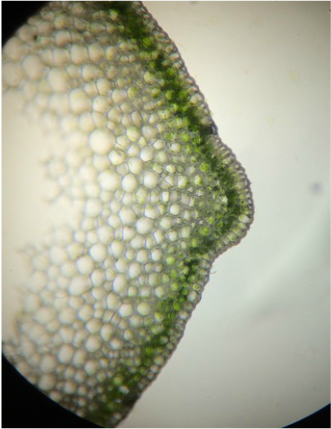
Pistolum fern stem cross section at 100x stained with TBO stain. Here we can see the lignin stain purple in the outer layer of cells. These cover the inner photosynthetic cells. Photo credit Craig Harrell.
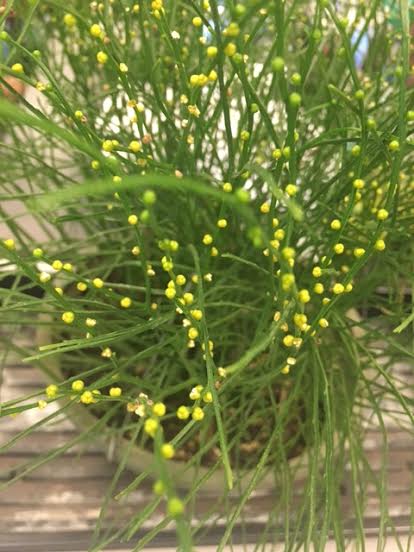
This is a picture of the Psilotum sp. "Whisk" Fern. The yellow you see at the tips are Sporangia. Photo taken by Hetal Bhatt

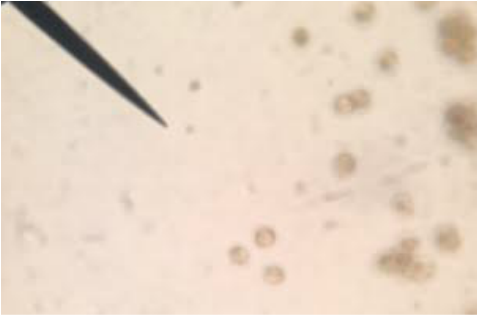
C-Fern Gametophytes on an agar plate. This was viewed under a dissecting scope at 7.5x total magnification. The large one is a Hermaphrodite and the smaller ones surrounding it is a Minuscule males. Photo taken by Hetal Bhatt
|
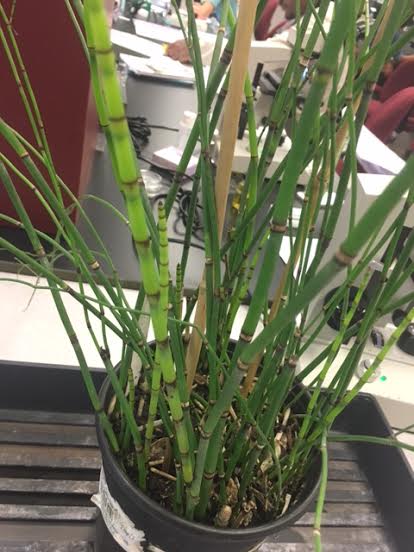
Equisetum sp. "Horsetail" Fern. Photo taken by Hetal Bhatt
This is a video of the C-fern Male Gametophyte viewed under the compound microscope at a total magnification of 400x. Slide prepared and videographed by Hetal Bhatt. What you see is the sperm swimming around.
|
Lab #8: Gymnosperms & Angiosperms (Seed Plants)
During this lab that focused on gymnosperms and angiosperms structures (macro & micro) we were able to:
- Recognize representatives of the angiosperms and gymnosperms
-Describe the sequence of events that occur during the life cycles of each taxon observed and recognize the gametophyte and sporophyte generations.
- Identify the parts of a flower and describe their function.
- Understand the terms related to ovary position, presence and absence of floral organs, and floral symmetry -- and be able to use them to describe a specimen.
- Prepare diagrams to record important features revealed during floral dissection.
We observed and collected data on several different species of plants and plant structures. Below is documentation of our findings.
Favorite specimen/part of this lab:
My favorite part of this lab was selecting a flower from campus for dissection. I chose Antirrhinum majus (snapdragon) to dissect because of its unique structure. I thought it would be interesting to work with in the lab. - Craig Harrell
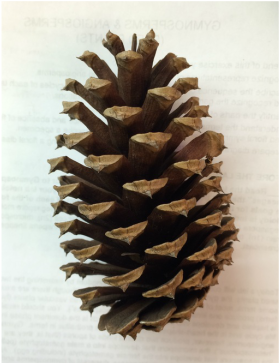
Female cone from a pine tree. Contains many scales that each carry ovules. Unknown species from U.S. Photo by Craig Harrell.
|
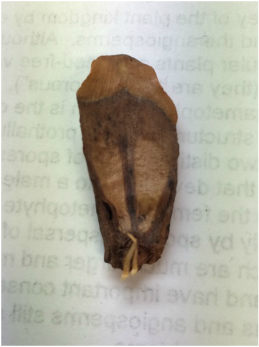
Female cone scale from pine tree. The depressions where the ovules turn to seeds are noticeable here in the lower half of the scale. Photo by Craig Harrell.
|
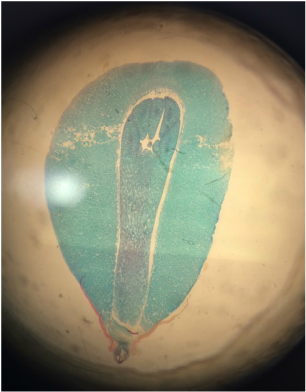
Prepared slide of a Pinus mature embryo. Longitudinal section under a dissecting scope at 5x total magnification. Image by Craig Harrell. This grows in the scales. Note the shape matches the space that they grow in the picture above.
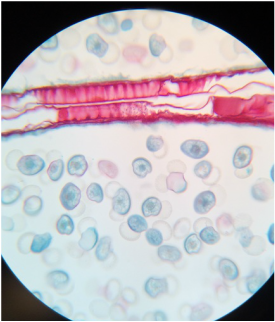
Mature pine pollen on prepared slides. Longitudinal section. Total magnification 400x Image by Craig Harrell.
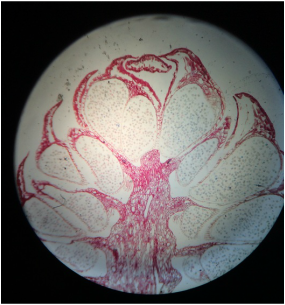
Mature Male Pine (Pinus sp. ) Cone on prepared slide. Viewed using compound microscope at 40X total magnification Photo by Craig Harrell.
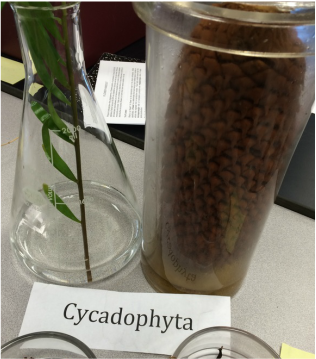
This is a preserved female cone from a Sago palm ( Cycas revoluta ). These are very common plants. Photo by Craig Harrell.
|

Here is a preserved branch of a ginkgo tree ( Ginkgo biloba ) brach with leaves. This is the only still existing species of Ginkgo. Photo by Craig Harrell.
|

Dawn Redwood (Metasequoia glyptostrobiodes). Representative of Phylum Coniferaphyta. A deciduous conifer. Photo Craig Harrell.
|

Here are cones of a Canadian Hemlock ( Tsuga canadenus ) that have already released their embryos. This is a representative of Coniferaphyta. Photo by Craig Harrell.
|
Craig Harrell - Dissection of Antirrhinum (Snapdragon)
All Snapdragon images taken by Craig Harrell.
All Snapdragon images taken by Craig Harrell.
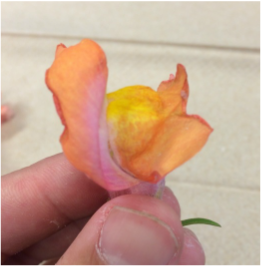
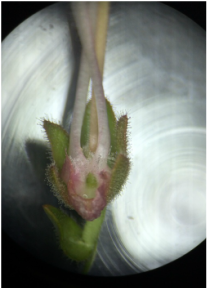
Here is a Snapdragon that was collected from the International garden at Armstrong State University. This is a zygomorphic flower, meaning it has bilateral symmetry.
|
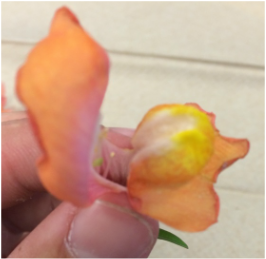
These flowers have a unique structure. When squeezed about half way up the flower the two petals open, exposing the stamen and carpel.
|

Here the petals have been split to observe the inner workings of the flower. We can see that it is a perfect flower, meaning it has both male and female components.
|
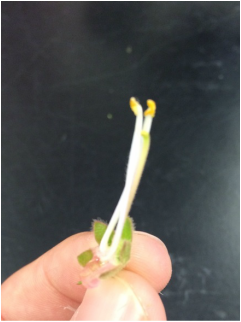
The petals have been completely removed and we can see that the Snapdragon is a complete. This means the flower has all four floral organs; carpel, stamen, petal, and sepal.
|
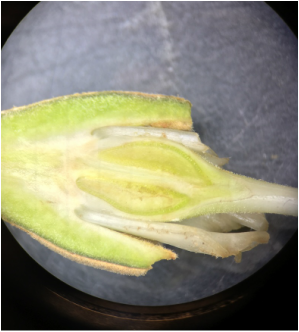
After cutting the flower in half with razor, it is clear that the position of the ovary is superior (attached above the sepals, petals, and stamen). Observed under dissecting scope at 10x total magnification.
|
Hetal Bhatt - Flower dissection

|

|

|

|
|
Lab #9: Roots and C-Fern Observations (& Shoot Cuttings)
The objectives of this lab are to be able to:
-identify external features of plant roots, including root hairs.
-identify internal anatomy of plant roots.
-distinguish monocot roots from those of dicots, both from external morphology and from internal anatomy.
-describe the principle functions of roots.
During this lab we worked with several different plant species (focusing on the root structure) that were provided for us. We also observed our C-fern cultures that we prepared a couple weeks ago.
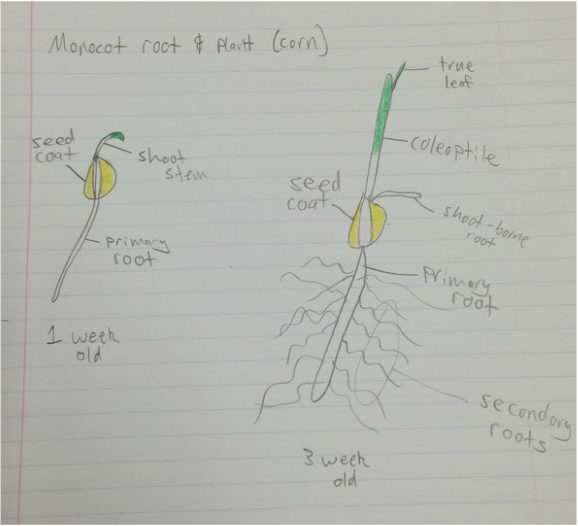
Sketch of Monocot Corn (Zea mays ) Seedlings at Age 1 Week and Age 3 Weeks by Craig Harrell. Photo Credit: Craig Harrell. This shows the primary root at Week 1 that is short-lived and develops into a Fibrous Root System Composed of Adventitious Roots.

Sketch of Dicot Pea ( Pisum sativum ) Seedling at Age 1 week and age 3 weeks by Hetal Bhatt. Photo credit: Hetal Bhatt. The Primary root develops as a taproot which gives rise to the secondary roots.
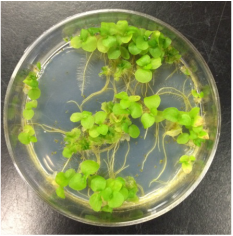
This is a C-Fern culture that was inoculated two weeks ago with spores. The spores have developed into sporophytes. Photo by Craig Harrell.
|
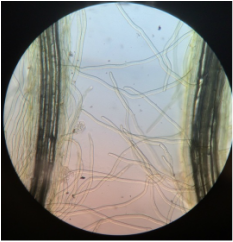
These are the roots of a C-Fern sporophyte under a compound microscope with 100x total magnification. The root hairs are clearly visible here. Photo by Craig Harrell.
|
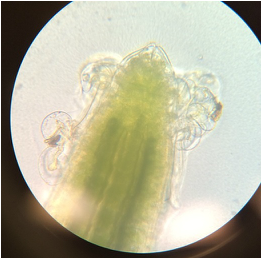
This is the root tip of a C-Fern sporophyte under a compound microscope at 400x total magnification. The layer of dead cells can be seen peeling back as the root grows. Photo Craig Harrell.
|
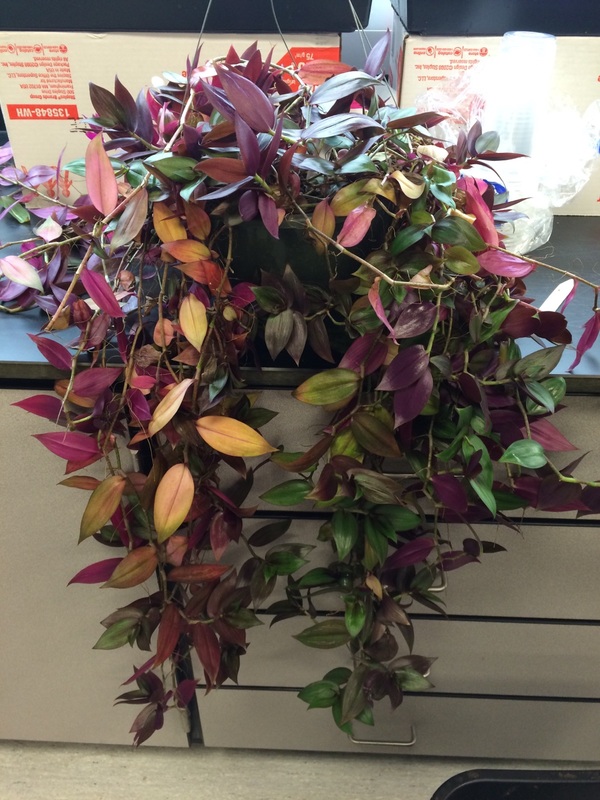
The inch plant ( Tradescantia zebrina ) that our lab class took cutting from. Photo Craig Harrell.
|
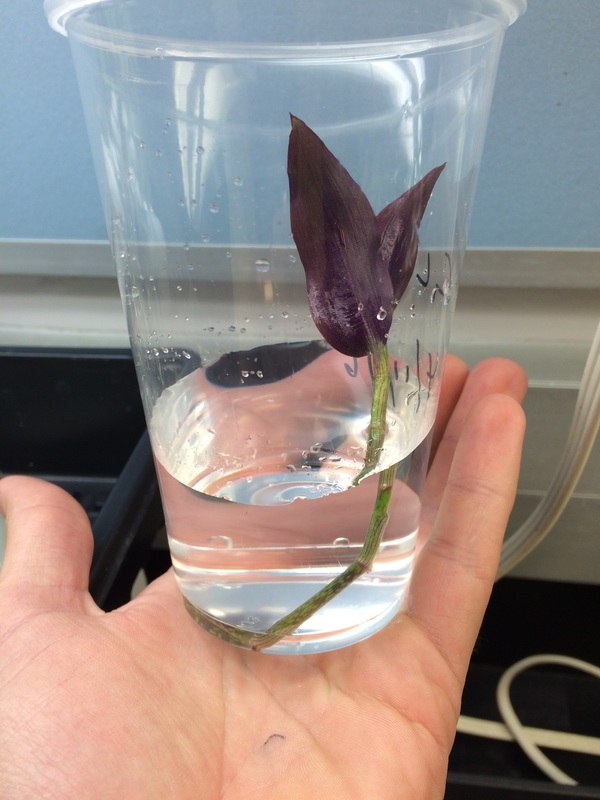
My cutting from Tradescantia zebrina . The cutting was from the end of a stem of the plant. All leaves were removed except three from the very end. The cutting was then placed in tap water so it could grow new roots. Photo by Craig Harrell.
|
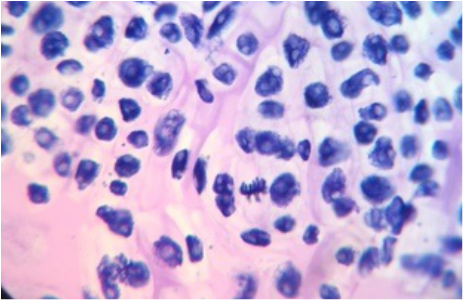
Mitotic Squash of Allium cepa (Onion) Root. Slide prepared by Hetal Bhatt and Photo Credit: Hetal Bhatt. Compound Microscope - Total Magnification: 400x. Metaphase is visible in the middle.
|
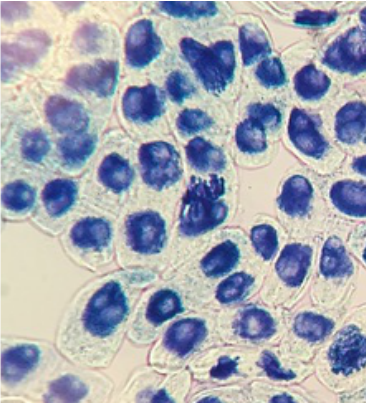
Mitotic Squash of Allium cepa (Onion) Root. Slide prepared by Hetal Bhatt and Photo Credit: Hetal Bhatt. Compound Microscope - Total Magnification: 400x. Prophase is visible in the bottom right corner.
|
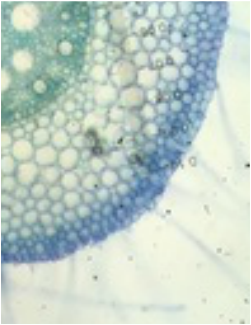
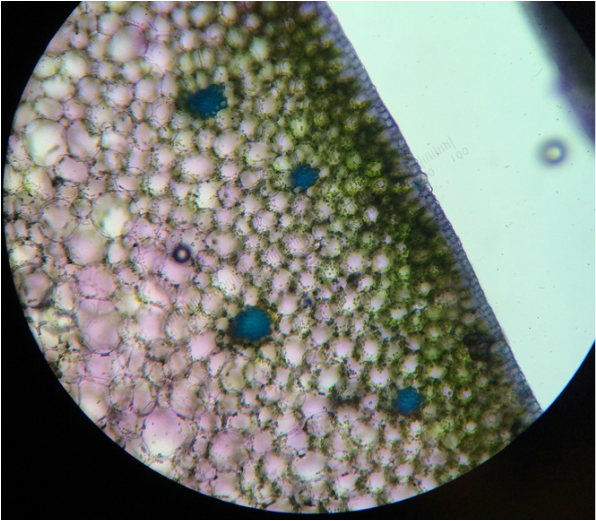
C.S. of monocot primary root ( Zea Mays ) at one week. Small phloem tubes and larger xylem tubes are visible in center of cell. TBO stain used in order to make lignified cells walls turn purple. Photo and slide by Craig Harrell.
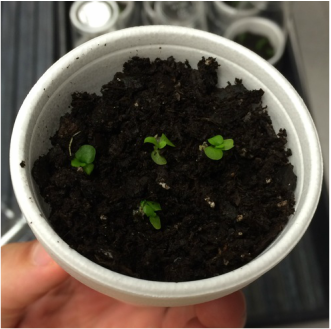
Here are the C-Fern sporophytes after being transplanted into a foam cup. The cup has a wick in the bottom to pull water into the soil. Also a plastic cup was placed over this cup to seal in the moisture. Transplant and photo by Craig Harrell.
