Christine Agosto, Michelle Shane, & Bryana Rounds
Botanical Explorations with the Dissecting Scopes, Week 1, 1/11/16
Objectives:
Objectives:
- familiarize students with usefulness and applications of the dissecting scopes
- develop student skills in use of dissecting scopes
- stimulate curiosity for botanical study and encourage questions
- establish relationships between students and develop safe atmosphere for cooperative learning
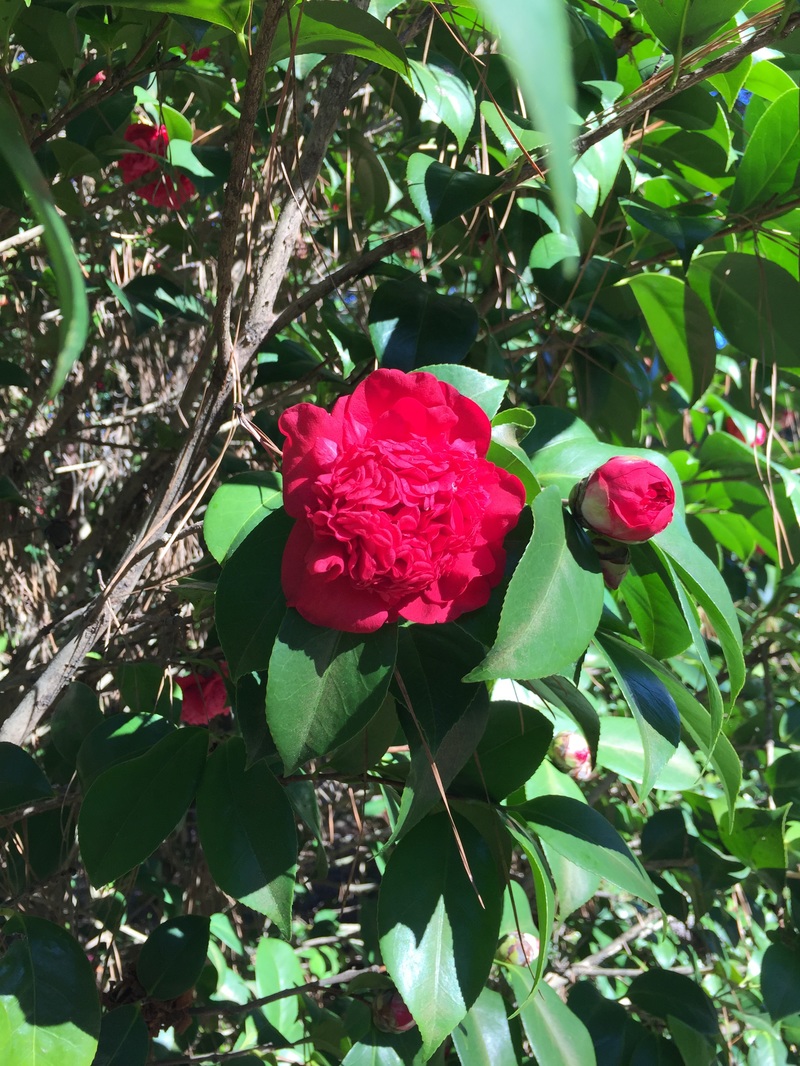
Camellia still on the bush at the original location it was found, next to the bench between the Science Center and the library, large/tall bush with dark pink flowers
- Christine
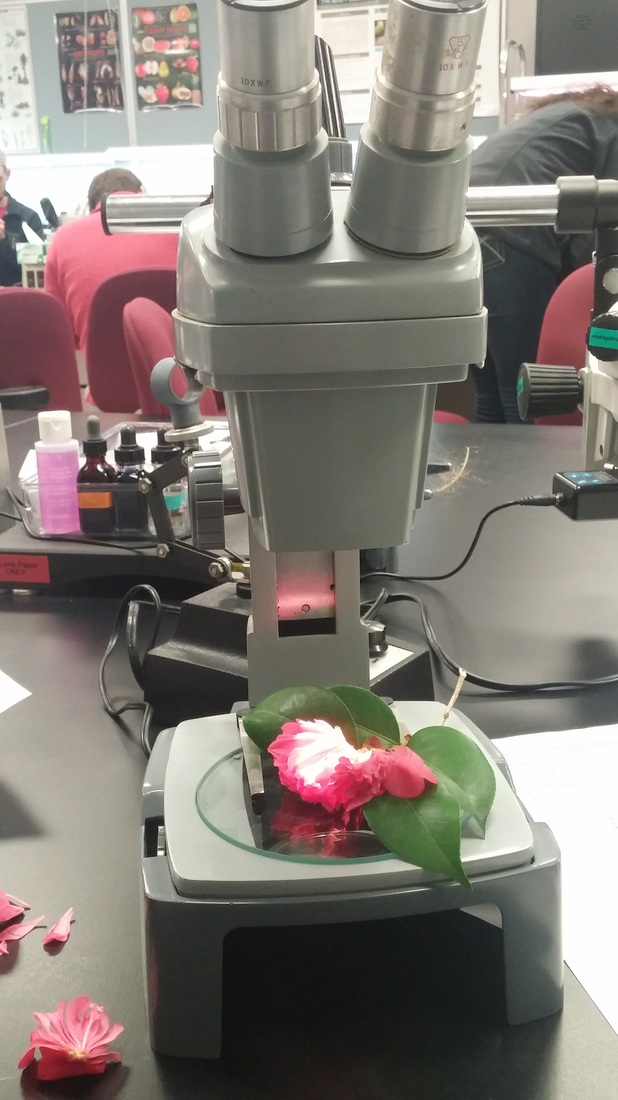
Camellia under the standard dissecting microscope;
specimen was plucked of its petals to view reproductive parts
- Christine
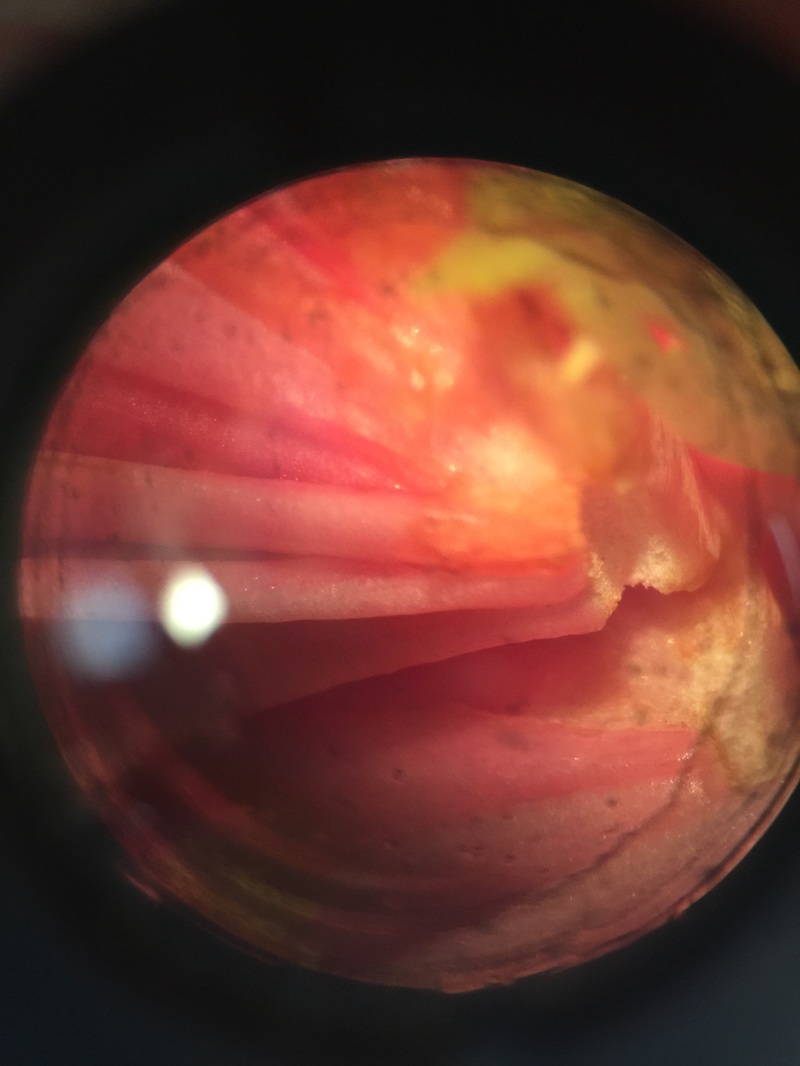
Camellia shimmery dark pink petals with indented light brown spots resembling pores; some petals were plucked to capture this particular portion of the flower. Photo taken at 7x total magnification (lowest magnification), standard dissecting microscope
- Christine
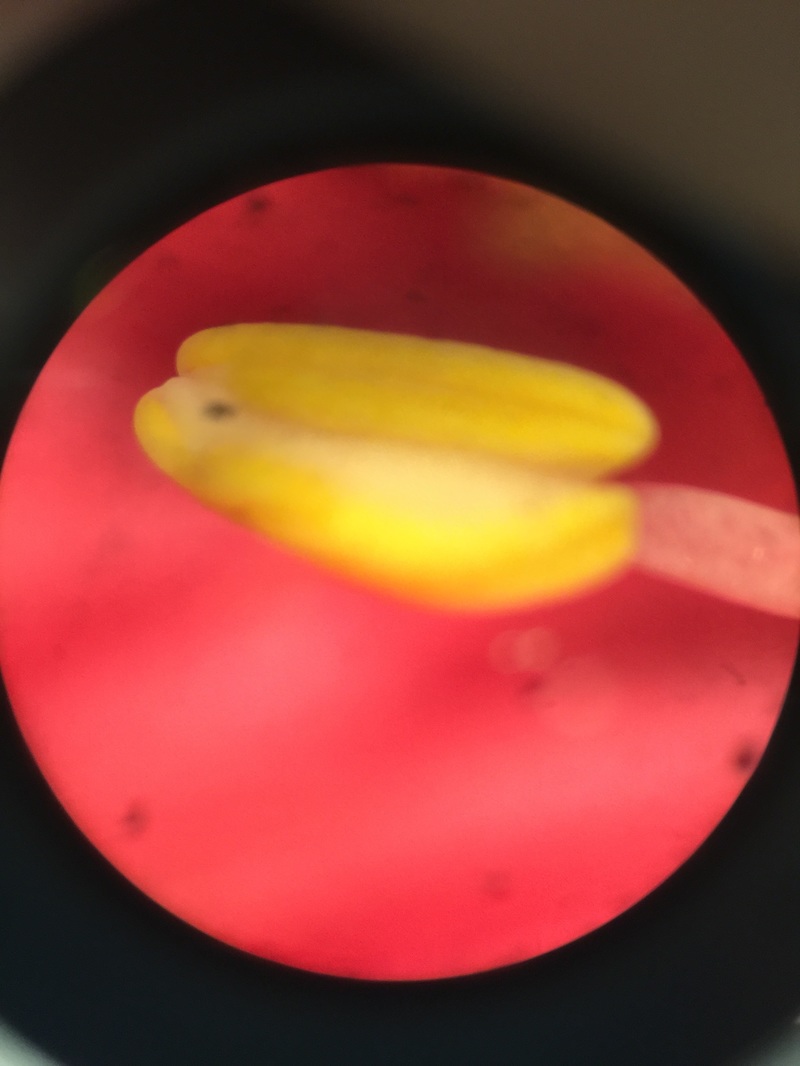
The bright yellow anther of the Camellia with it's shimmery dark pink petals in the background. Photo taken at 30x total magnification (highest magnification), standard dissecting microscope
- Christine
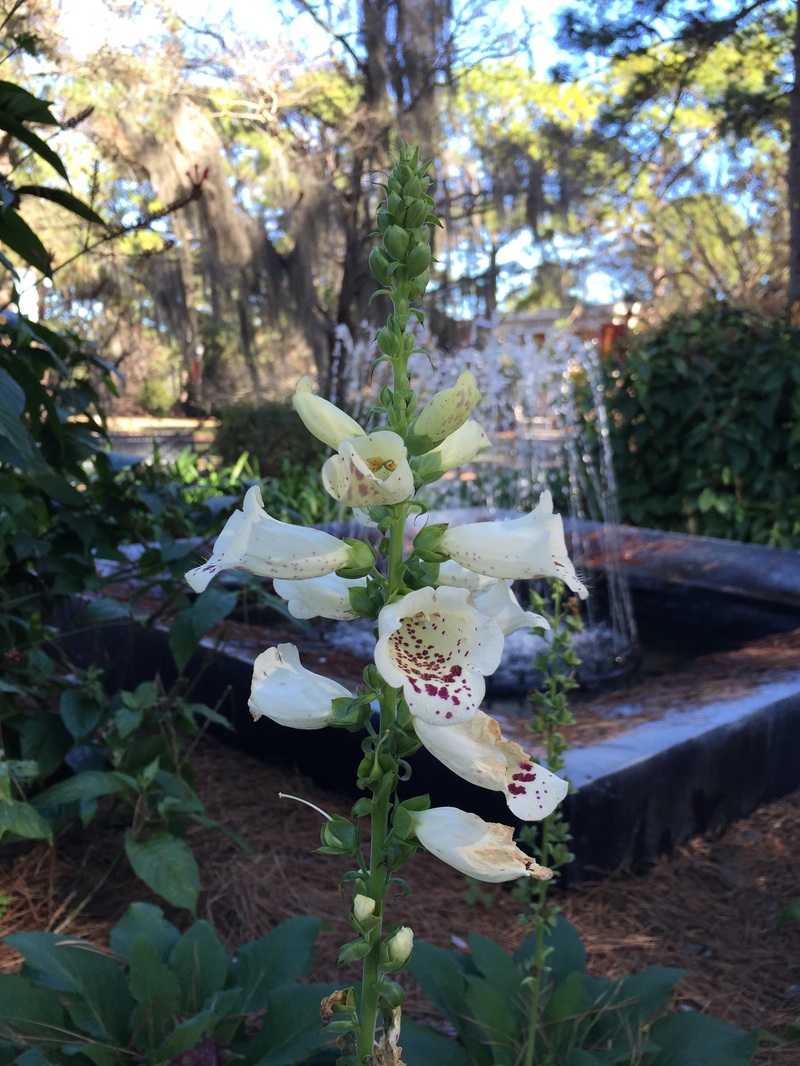
White Foxglove (Digitalis purpurea) at it's original location in front of the fountain near the library of ASU, white trumpet-shaped flower with red markings and fine hair-like structures on the inside of it's petals
- Michelle

White Foxglove anthers shown up close, white petals with red markings in the background, photo taken at 7x total magnification (lowest magnification), standard microscope
- Michelle
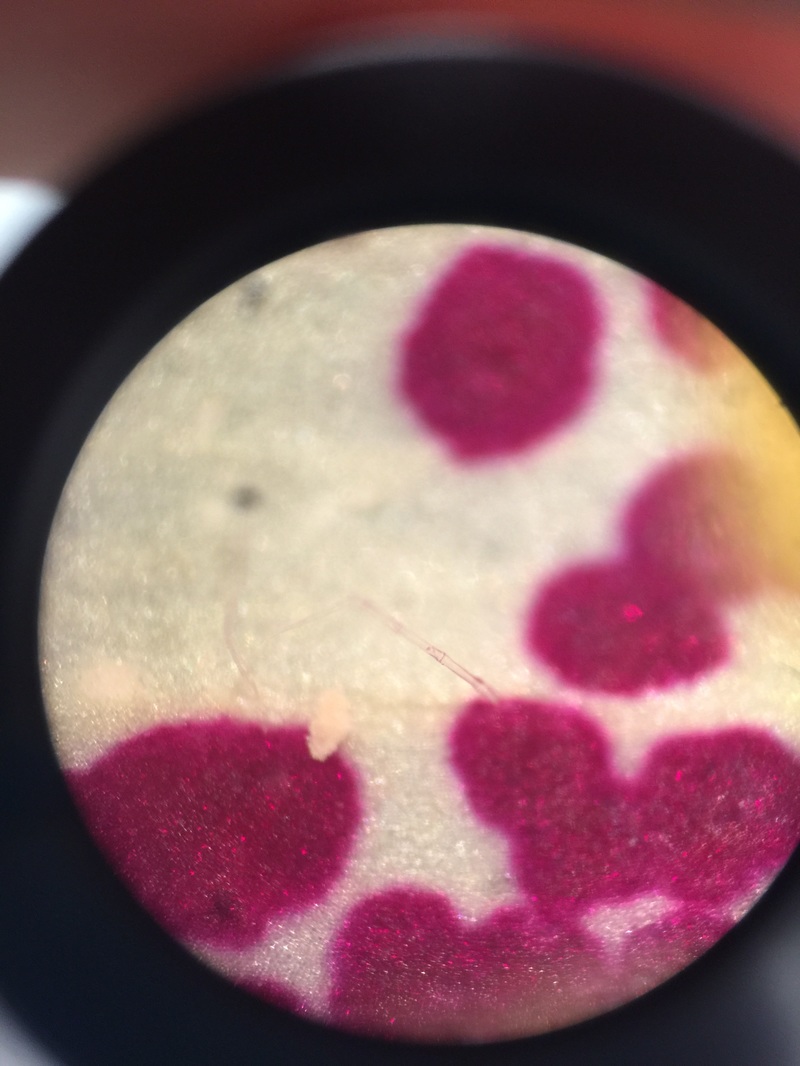
Foxglove's fine hairs on the inside of the flower shown, shimmery white petals with red markings in the background, photo taken at 10x total magnification, standard microscope
- Michelle
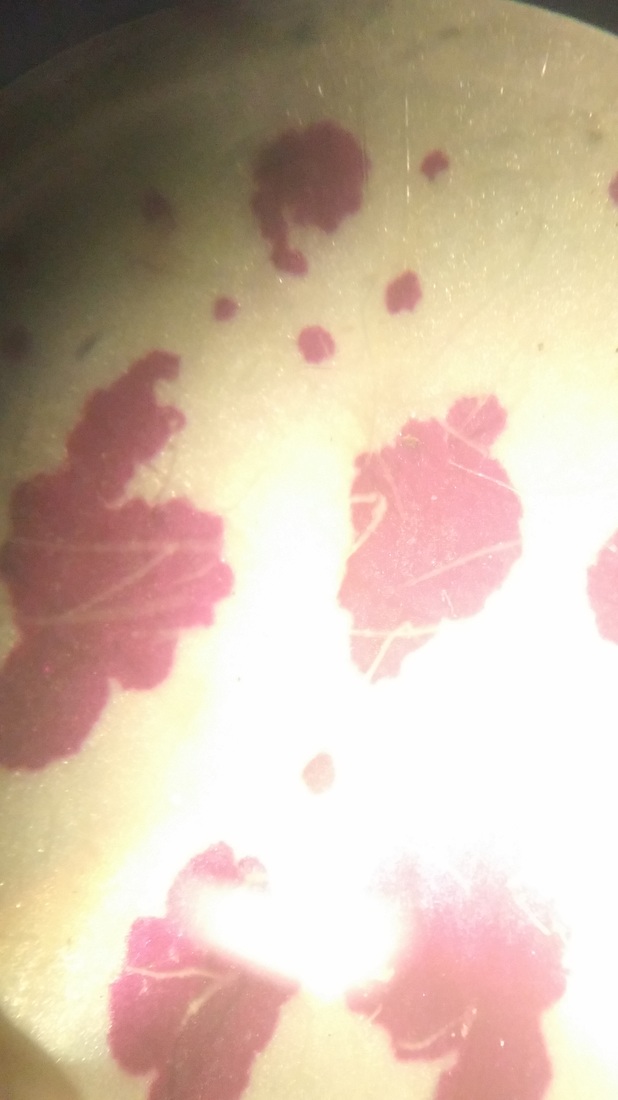
White foxglove close up of fine hair appears to be clear and segmented, petals appear as shimmery droplets of white and what looked like red markings to the unaided eye now appear to be dark pink, photo taken at 30x total magnification (highest magnification), standard microscope
- Michelle
Plant Cells and Scientific Drawings
January 25,2016
The purpose of this lab was to practice making wet slides to be studied with a compound microscope. Wet slides were created using the epidermis of Allium cepa (onion) cells; Elodea canadensis (Canadian Pondweed) leaves; Capsicum annuum (bell pepper) fruit; Tradescantia (spiderwort) stem; Solanum tuberousum (potato) parenchyma as well as the parenchyma of the banana fruit.
Different techniques were used to help differentiate structures in each cellular wet mount. Toluidine blue was used to illuminate the cell wall and nucleus of the allium cepa cells. Calcium chloride was added to the elodea canadensis to demonstrate osmosis of water into the cells, thus condensing the chloroplasts visible under the compound microscope as well as illuminating cytostreaming in the cell. The plastids of red, yellow and green capsicum annum fruit were compared at 400x total magnification to delineate the size difference of each plastid type amongst the three peppers. The stamen hairs of the tradescantia plant were studied utilizing the compound microscope after a wet slide was prepared. Special attention was paid to the anthocyanin pigment found in the tradescantia cells which indicated the location of vacuoles to the viewer. Wet mounts from unripened and over-ripened banana fields were prepared with iodine to show the difference in the amount of starch available in the ripened banana versus the unripened banana; the unripened banana was found to contain more starch than it's ripened counterpart. Lastly, the solanum tubersoum plants were also treated with iodine to help detect the presence of amyloplasts within the cell.
Different techniques were used to help differentiate structures in each cellular wet mount. Toluidine blue was used to illuminate the cell wall and nucleus of the allium cepa cells. Calcium chloride was added to the elodea canadensis to demonstrate osmosis of water into the cells, thus condensing the chloroplasts visible under the compound microscope as well as illuminating cytostreaming in the cell. The plastids of red, yellow and green capsicum annum fruit were compared at 400x total magnification to delineate the size difference of each plastid type amongst the three peppers. The stamen hairs of the tradescantia plant were studied utilizing the compound microscope after a wet slide was prepared. Special attention was paid to the anthocyanin pigment found in the tradescantia cells which indicated the location of vacuoles to the viewer. Wet mounts from unripened and over-ripened banana fields were prepared with iodine to show the difference in the amount of starch available in the ripened banana versus the unripened banana; the unripened banana was found to contain more starch than it's ripened counterpart. Lastly, the solanum tubersoum plants were also treated with iodine to help detect the presence of amyloplasts within the cell.
Exercise 2a: Epidermis of Allium Cepa (onion) cells
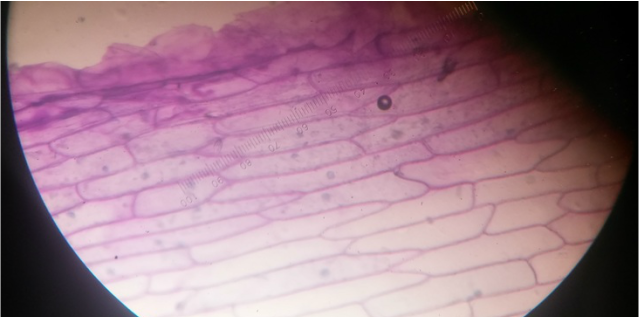
Image 1. Wet mount slide of allium cepa (onion) epidermal cells. The slide was prepared with toluidine blue to help bring illuminate the cell wall (appearing in purple) as well as the nucleus (appearing blue - violet) in the cells. Photograph was taken at 400x total magnification using the dry 40x objective of the microscope. - Michelle
|

Epidermis cells of Allium cepa (onion) stained with toluidine blue, TBO. TBO stained the polysaccharides in the cell wall purple and the nucleic acids in the nucleus light blue. Photo taken at 400x total magnification, compound microscope . Sample obtained by peeling the thin epidermal skin layer off of the onion. - Christine
|
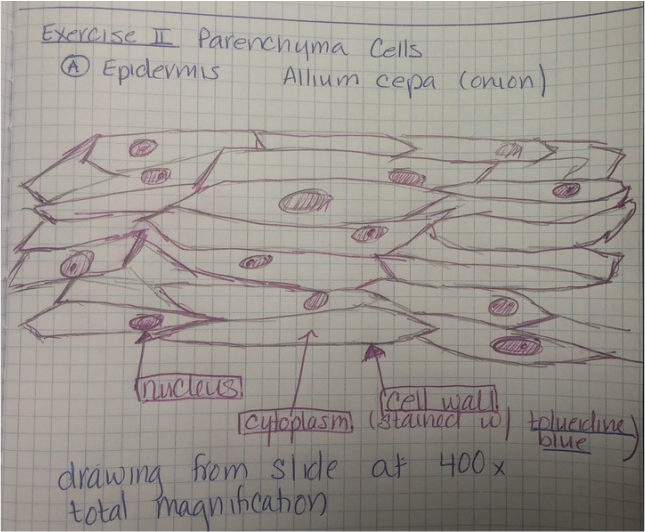
Image 2. Photograph taken of sketch made of the Allium cepa after being stained with toluidine blue in Michelle Shane's lab notebook.
The nucleus, cytoplasm and cell wall are noted in the diagram. The total magnification of the compound microscope was 400x.
The nucleus, cytoplasm and cell wall are noted in the diagram. The total magnification of the compound microscope was 400x.
Exercise 2b: Observation of Canadian Pondweed (elodea canadensis)
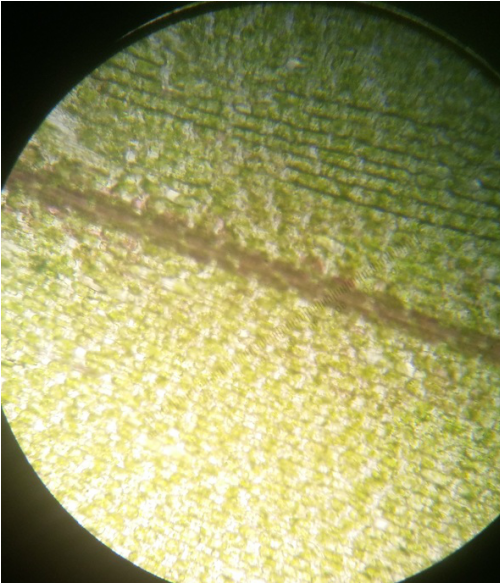
Elodea canadensis prior to the addition of calcium chloride (CaCl). Photographed at 400x total magnification, the chloroplasts appear evenly distributed amongst the cells. The dark line in the dissecting the specimen is the vascular tissue of the leaf. - Michelle
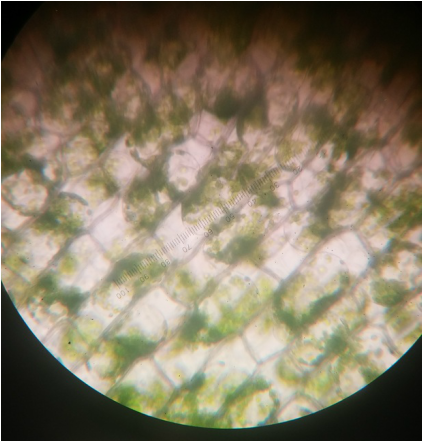
Elodea canadensis at 400x total magnification. Cytoplasmic streaming was observed at this magnification as CaCl was added to the wet mount. It also appears that the once evenly distributed chloroplasts have migrated to the edges of the cell, most likely due to osmotic movement of water into the cells.
-Michelle
-Michelle
|
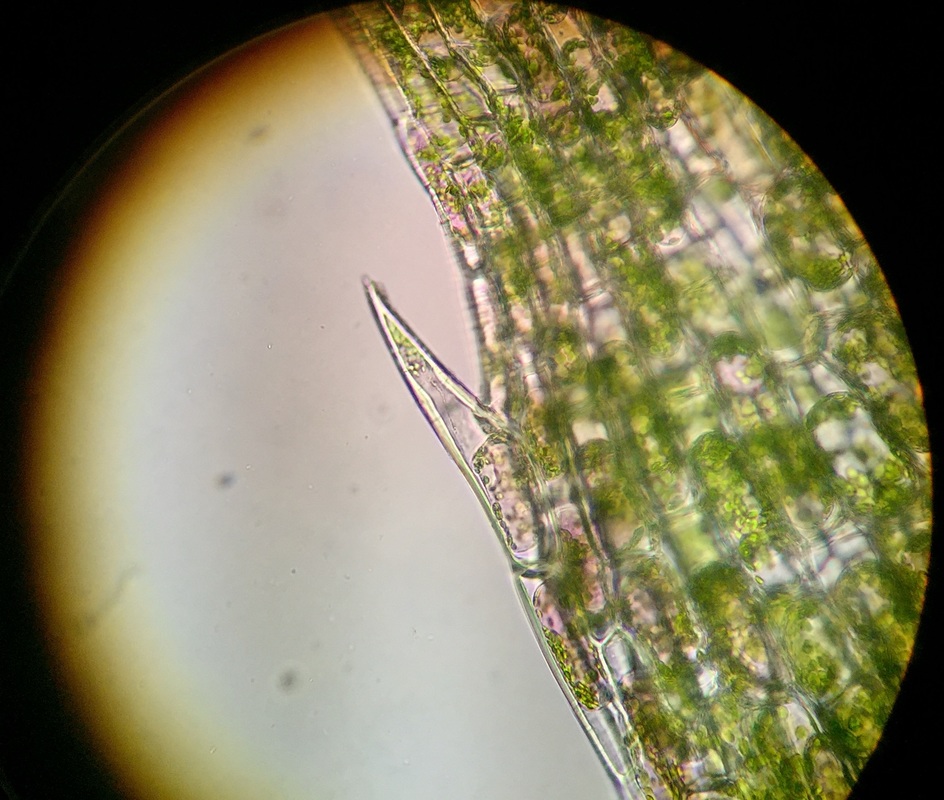
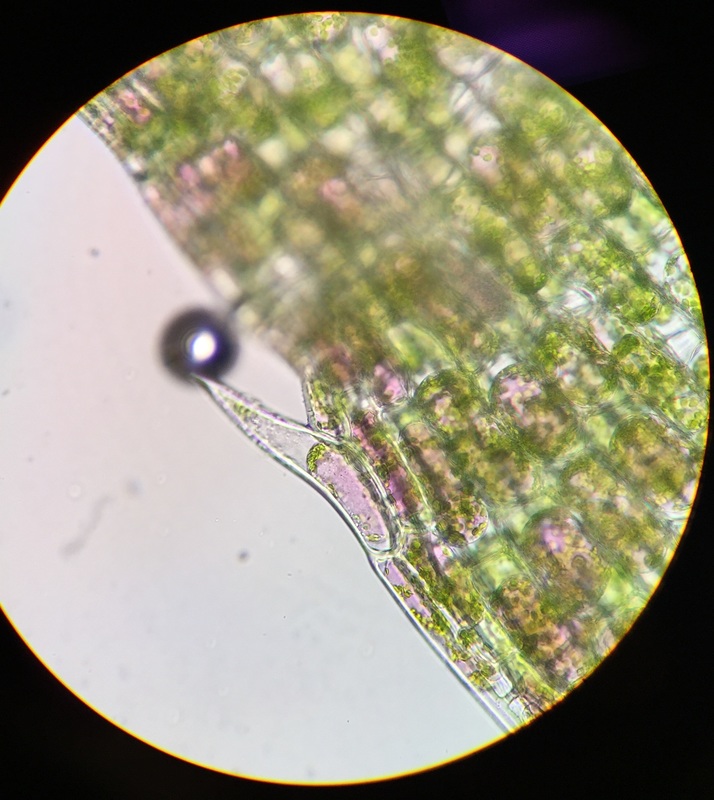
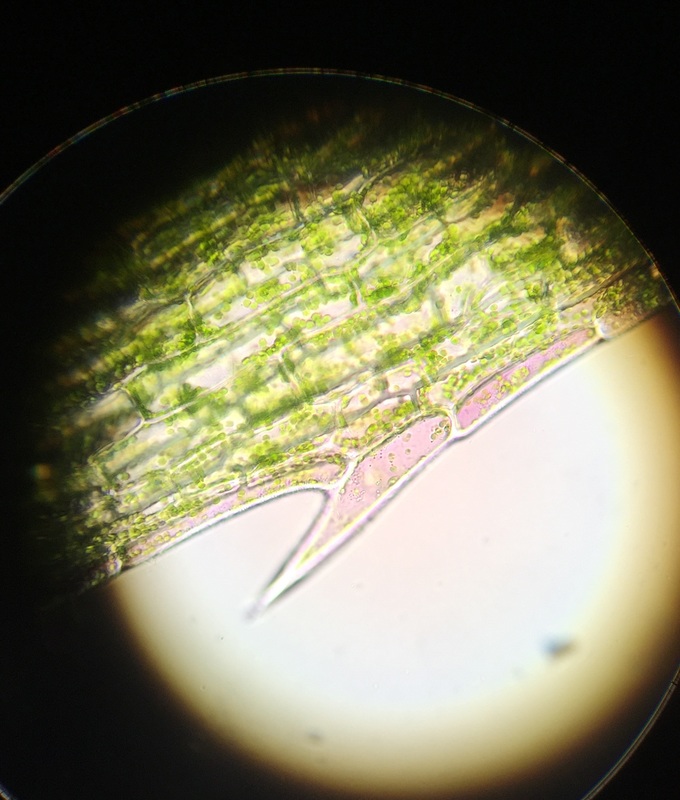
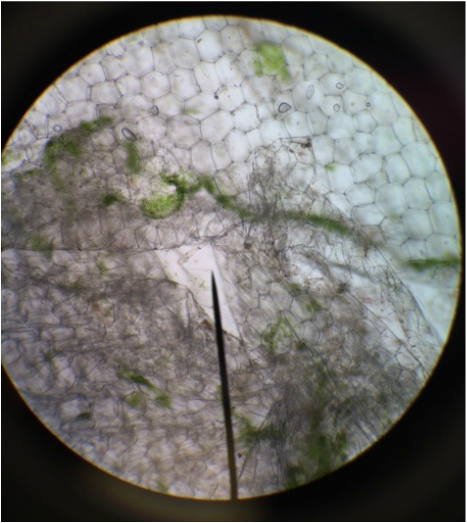
Trichome (hair) found at the edge of an Elodea leaf. Trichomes have fewer chloroplasts making it easier to see the nuclei and vacuole. We can see the cell wall surrounding the trichome, the green chloroplasts, and the vacuole whose contents are purplish-pink. No stain was used. These three photos of trichomes were all taken at 400x magnification, compound microscope. - Christine
|
|
Exercise 2c: Observation of Plastids in Cells of Bell Pepper (Capsicum annum)
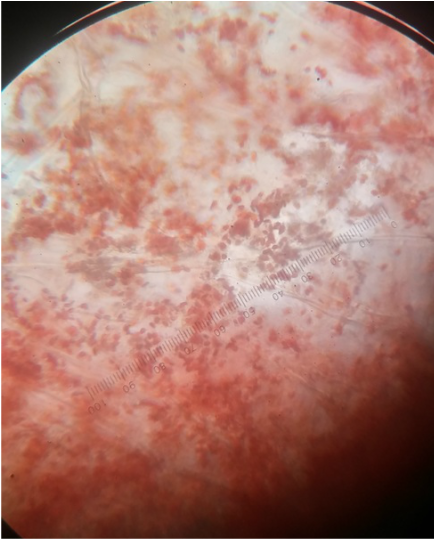
Photograph of a red capsicum annuum (bell pepper) while magnified at 400x total magnification using a oil-immersion objective. The chromoplasts of the cell appear as red dots amongst the cells and were found to be the largest chromoplasts between the three peppers studied.-Michelle

Plastids of the yellow capsicum annum under 400x total magnification. An oil-immersion objective was used to capture details that a 40x dry objective can't. The chromoplasts of the yellow bell pepper are smaller than the chromoplasts of the red bell pepper-Michelle
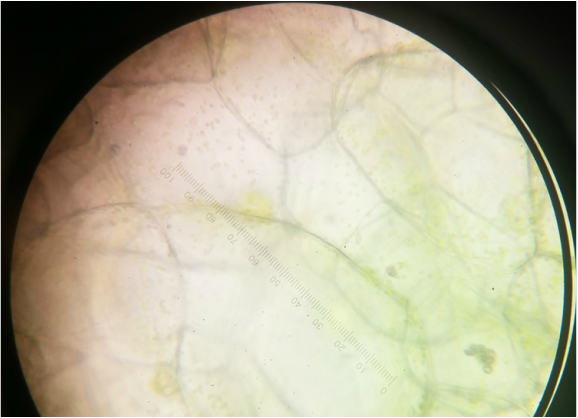
Image of a green capsicum annum under 400x magnification using an oil-immersion objective. The amount of chloroplast appears to be less in comparison to the number of plastids in the red and yellow capsicum annuum. They also appear to be the smallest in size. - Michelle
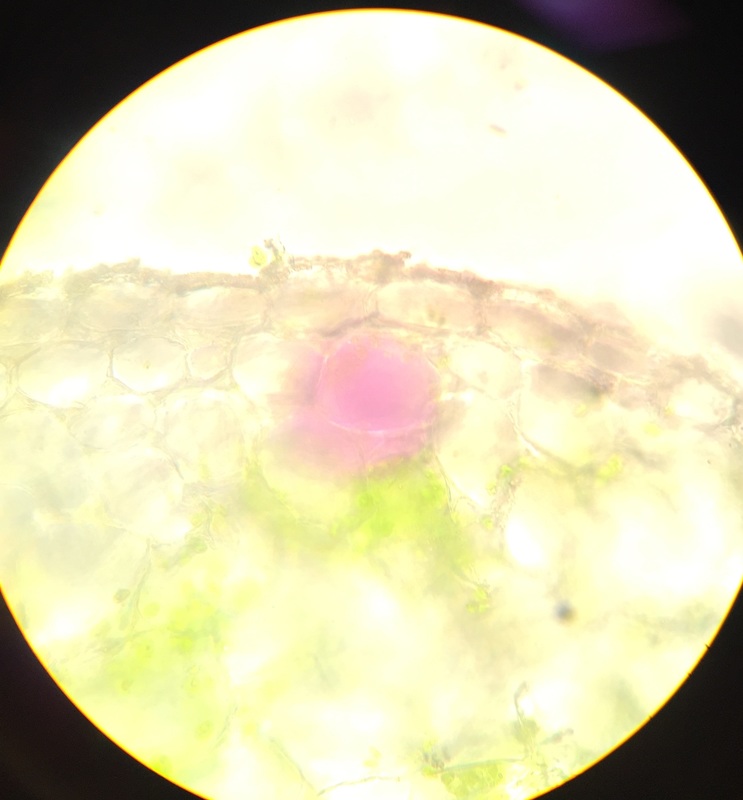
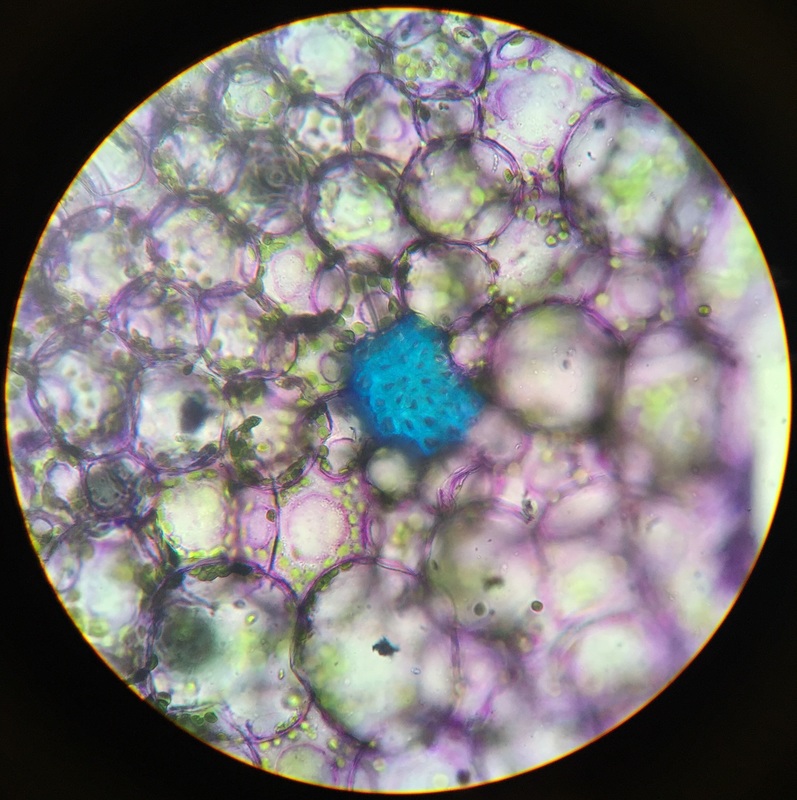
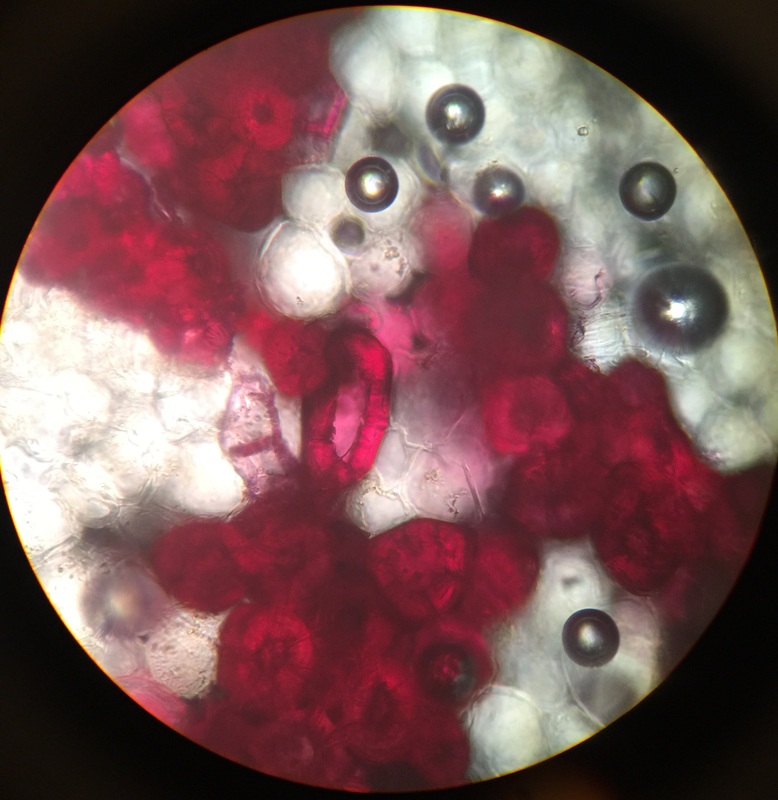
Image shows a stem cross-section (lavender purple) of Tradescantia. The color comes from anthocyanin pigments contained within the vacuole. Chloroplasts are also seen (green). Photo taken at 400x total magnification, compound microscope. Sample was prepared by doing a wet mount of a cross section of Tradescantia. - Christine
|
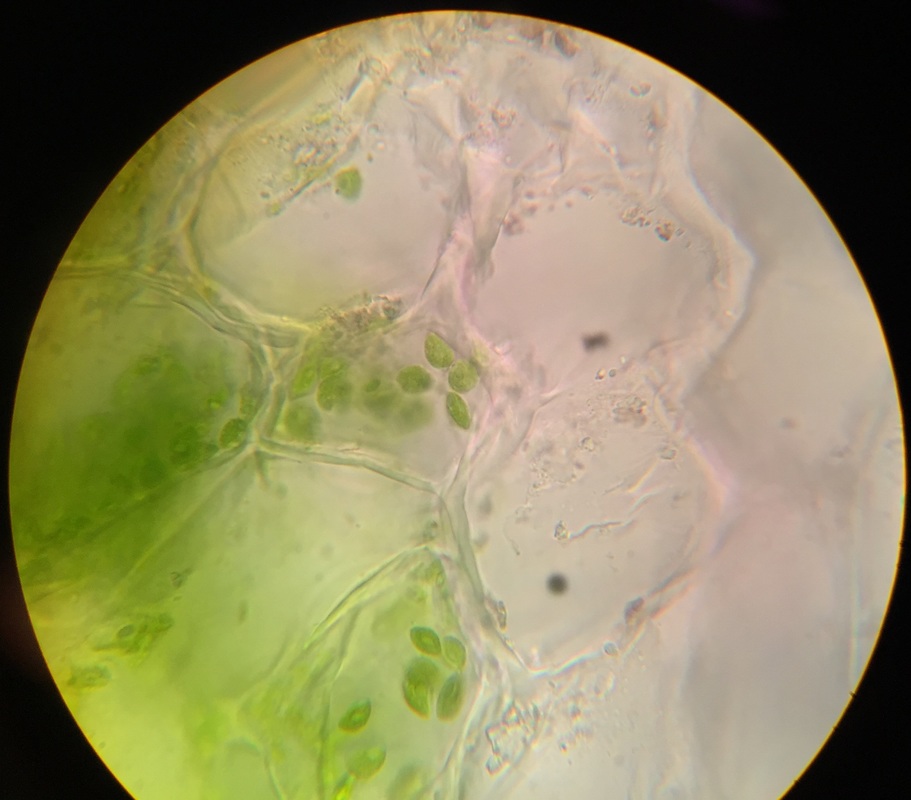
Image shows the chloroplasts (green) of Tradescantia cells, which are slightly different in shape compared to the chloroplasts of Elodea canadensis . Photo taken at 400x total magnification, compound microscope. Sample was prepared by doing an unstained wet mount of a cross section of Tradescantia. - Christine
|
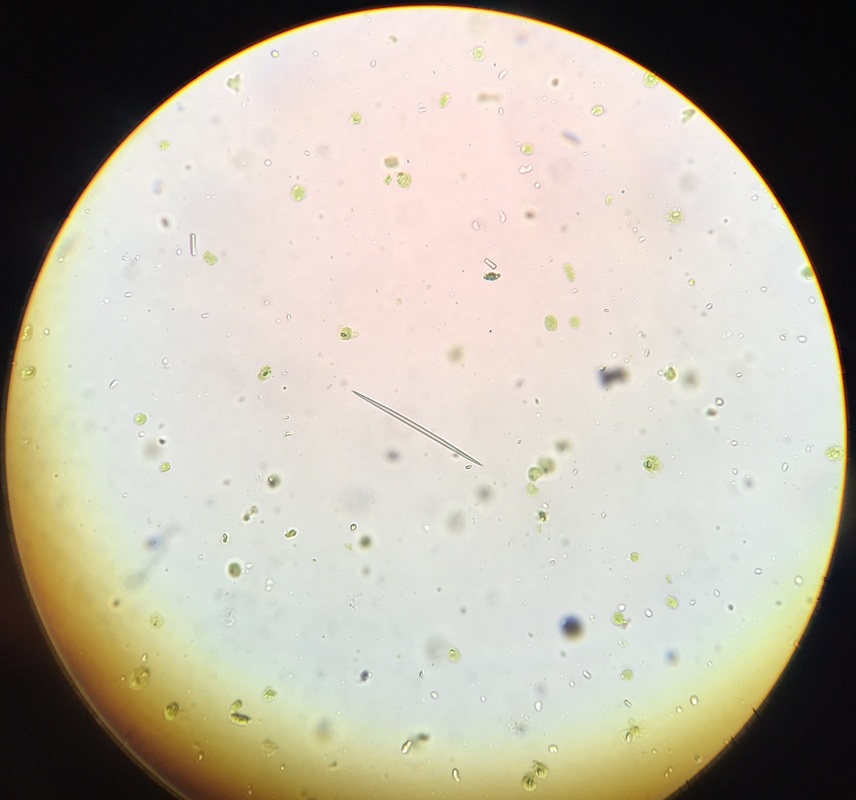
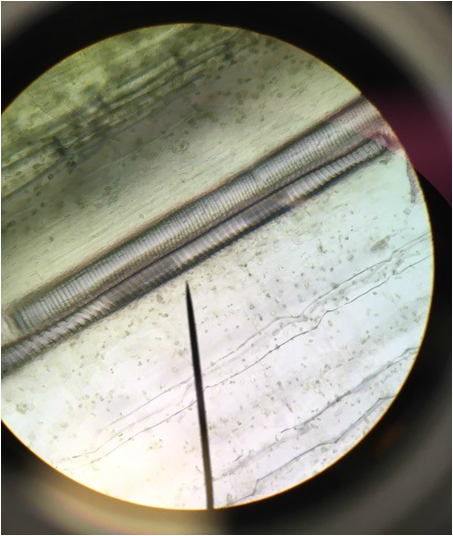
Image shows a calcium oxalate raphide (needle-shaped crystal) of Tradescantia. Photo taken at 400x total magnification, compound microscope. Sample was prepared by doing an unstained wet mount of a cross section of Tradescantia. - Christine
|
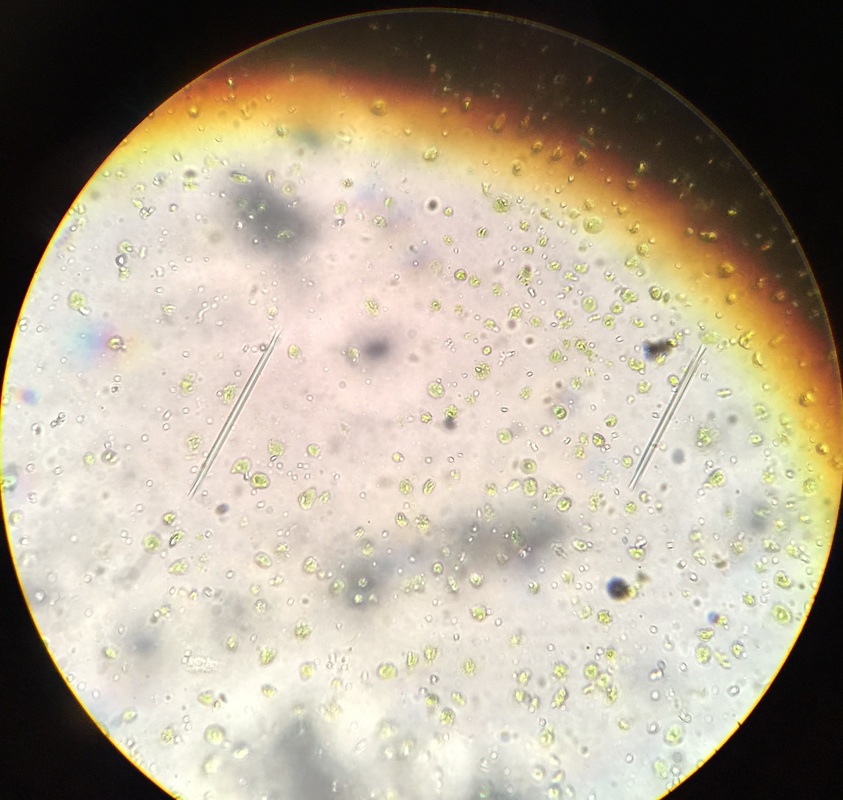
Image shows two calcium oxalate raphides (needle-shaped crystals) of Tradescantia. Photo taken at 400x total magnification, compound microscope. Sample was prepared by doing an unstained wet mount of a cross section of Tradescantia. - Christine
|
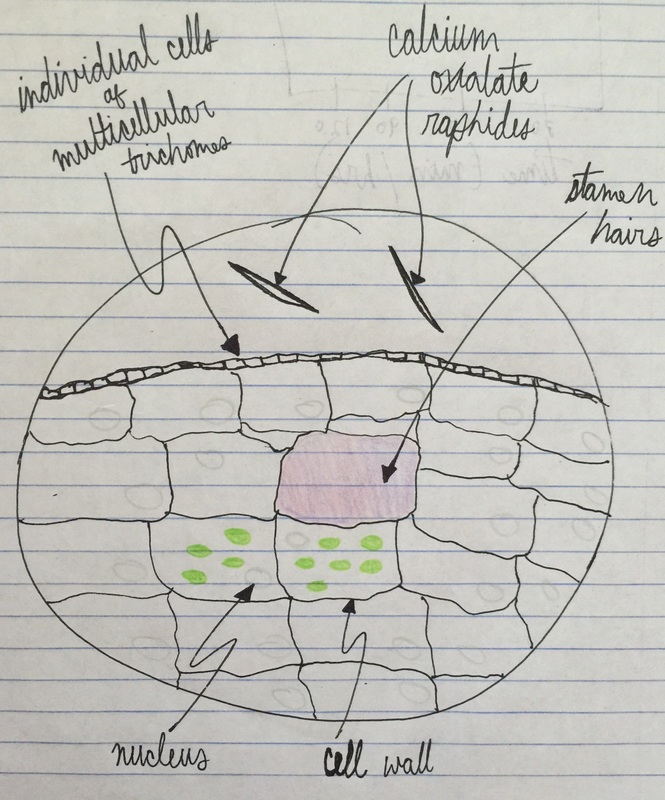
Image shows drawing of Tradescantia cells. The lavender color comes from anthocyanin pigments contained within the vacuoles. The needle-like structures are calcium oxalate raphides. The nucleus is shown in gray, the chloroplasts in green, and the cell wall is represented by the black outlining that defines the cells' limitations. Drawing made from 400x total magnification viewing of wet mounted cross section of Tradescantia, compound microscope. - Christine
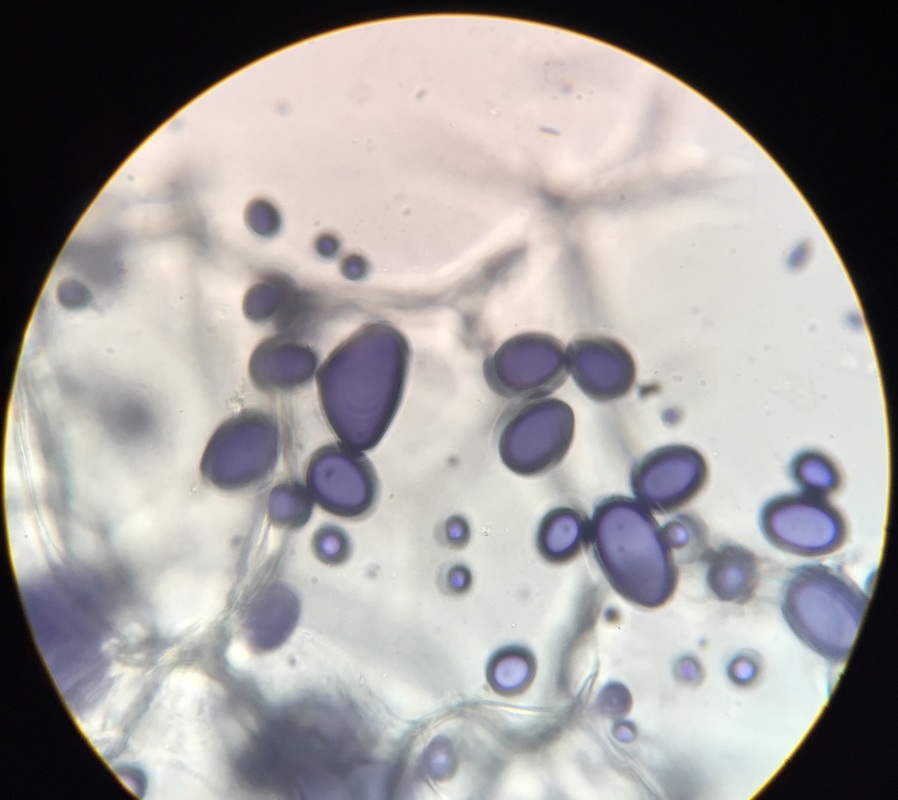
Image shows the cell walls and amyloplasts of Solanum tuberosum (potato). Iodine staining was used. The cell walls appear as dark outlines defining the boundaries of the cell. The amyloplasts (stained dark purple) can be seen inside the cells. Photo taken at 400x total magnification, compound microscope. Sample was prepared by first radial longitudinal sectioning and then cross sectioning of that piece. Section was then wet mounted. - Christine
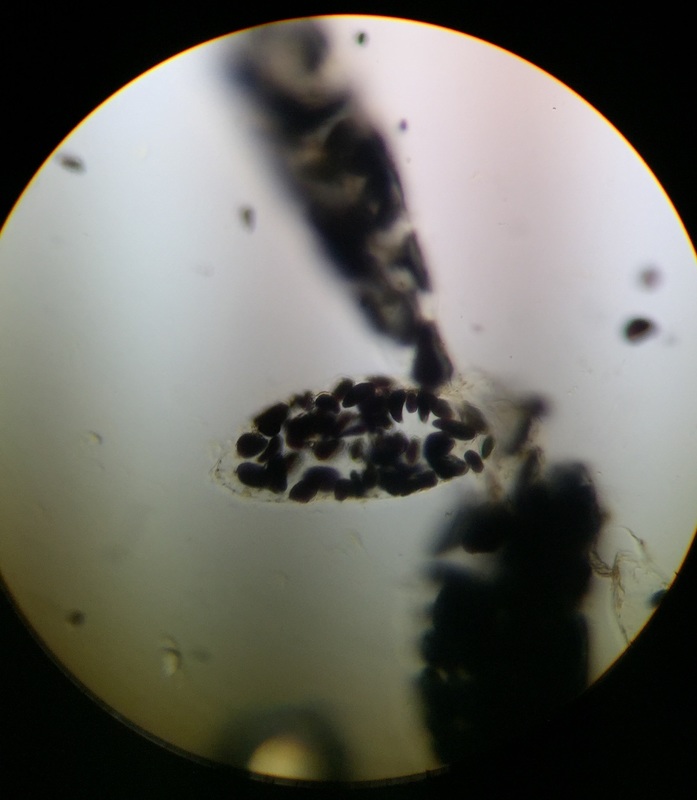
Image shows the amyloplasts of Musa sp. (banana), particularly, an unripe banana. Iodine staining revealed that unripe banana cells are rich with amyloplasts (stained dark purple). Photo taken at 400x total magnification, compound microscope. Sample was prepared by smudging the unripe banana onto the glass slide and then preparing a wet mount. - Christine
|
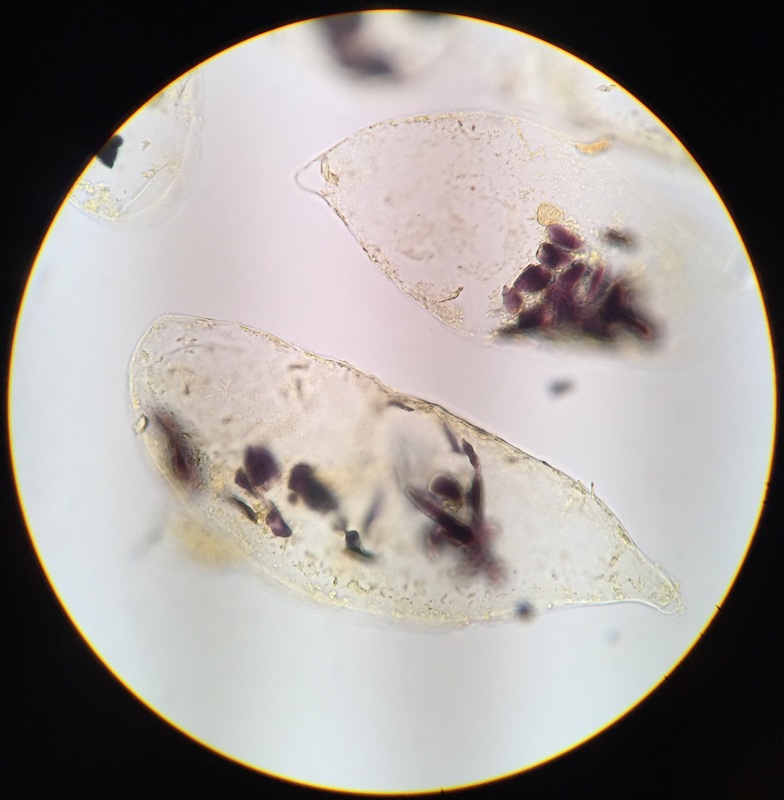
Image shows the amyloplasts of Musa sp. (banana), particularly, a ripe banana. Iodine staining revealed that ripe banana cells contain significantly fewer amyloplasts (stained dark purple). Photo taken at 400x total magnification, compound microscope. Sample was prepared by smudging the ripe banana onto the glass slide and then preparing a wet mount.
This specimen was my favorite because I have never associated bananas with starch before. I learned something new. - Christine
|
Photosynthesis, Week 3, 2/1/16
Objectives:
- use chromatography to separate and identify various pigments found in photosynthetic plant tissues.
- explain why it would enhance a plant’s success to have more than one type of photosynthetic pigment.
- demonstrate that carbon fixation during the “synthesis” (light-independent) reactions of photosynthesis is dependent on products of the light-dependent reactions (that is, no carbon will be synthesized into carbohydrates unless the light-dependent reactions are taking place simultaneously).
- use a starch test to examine the effects that carbon-starvation and light-deprivation have on the synthesis reactions of photosynthesis.
|
Exercise 1A: Extraction of Plant Pigments
Chromatography paper in the chromatography set up as pigment separation is occurring (beginning stages). Petroleum ether : methylene chloride (2:1) was used as the solvent. A Magnolia leaf was used for the extraction. We first removed some of the fuzz from the undersurface of the leaf. Then we placed the leaf, underside/fuzzy-side down, about an inch from the bottom of the chromatography paper. To apply the pigment to the paper, we used a glass stirring rod to press down on the top surface of the
leaf and “draw” a line across the leaf and piece of chromatography paper. This crushed the leaf cells, releasing the pigment onto the paper. - Christine
Exercise 2: Carbon Dioxide Consumption in Photosynthesis
|
Chromatography paper in the chromatography set up as pigment separation is just about complete. Pigments were extracted from a Magnolia leaf. In order from the bottom up, we see chlorophyll b (the yellow-green band), chlorophyll a (the blue-green band), xanthophyll (the yellow-brown band), and carotene (the yellow band). - Christine
|

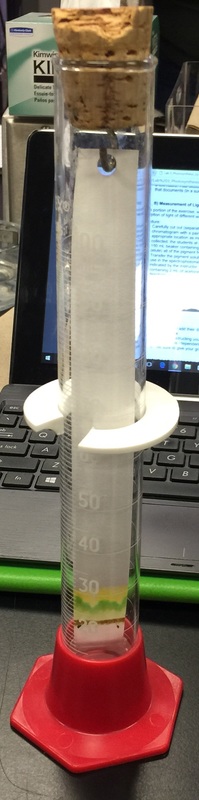
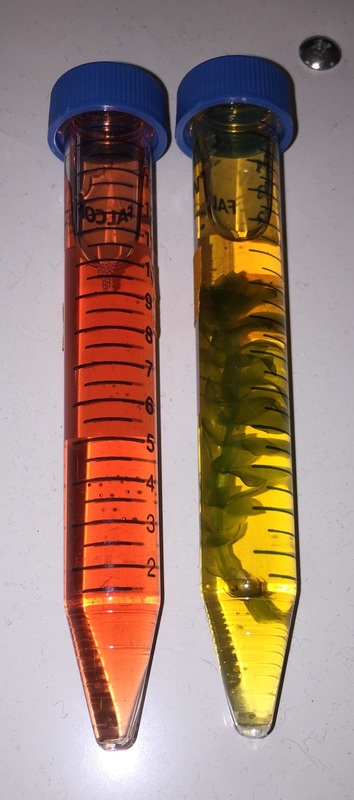
Test tubes were filled with a solution of phenol red and tap water to test whether elodea plants were undergoing photosynthesis. Carbon dioxide was added to the tubes orally via a drinking straw to lower the pH of the phenol red solution. changing the color to orange. Sprigs of elodea canandensis were added to one tube while the second was kept empty as a control. These test tubes were prepared to test for the uptake of carbon dioxide by the elodea. If the elodea took in carbon dioxide, the assumption that photosynthesis is occurring would be valid . This photo was taken at the beginning of the test and the tubes were kept under bright lights.-Michelle
|
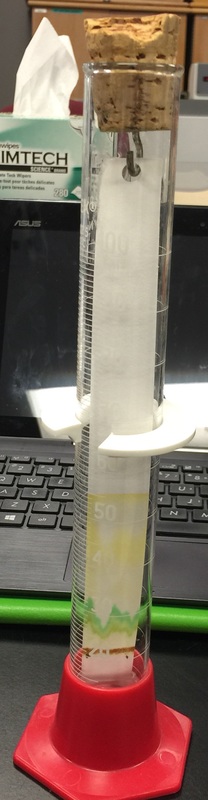
The elodea and control test tubes containing phenol red solution after an hour under the lights. The test tube containing the elodea exhibits a color change of the solution from orang to red indicating the pH rose. This color change occurred due to the uptake of carbon dioxide by the elodea thus supporting the assumption that photosynthesis is occurring in the elodea's chloroplasts. The control test tube exhibits no color change as the carbon dioxide introduced into the solution remained in solution. -Michelle
|
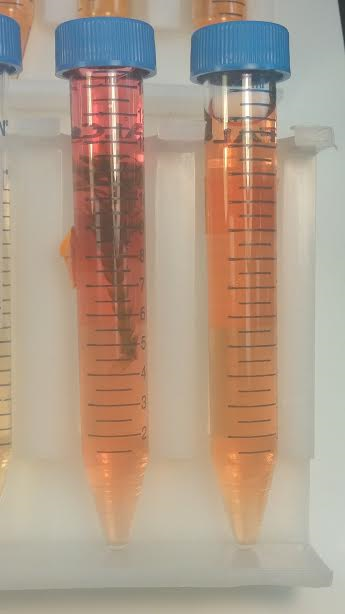
Tubes kept in the dark for the CO2 consumption in the photosynthesis experiment using Elodea (before one hour). One tube is the control and just contains the pH indicator (3 drops of 1% phenol red in ~ 150 mL water) and one contains the pH indicator and Elodea.
The pH indicator changed from a red color when mixed with tap water of a neutral pH to an orange color when CO2 was added into the solution (because of the formation of the carbonic acid). To add CO2, using a straw, Michelle gently blew into the beaker for
~ 8-10 seconds until the solution became an orange color. Had she blown for a lengthier time, too much CO2 would have been added and the solution would have turned yellow indicating high acidity. - Christine
|
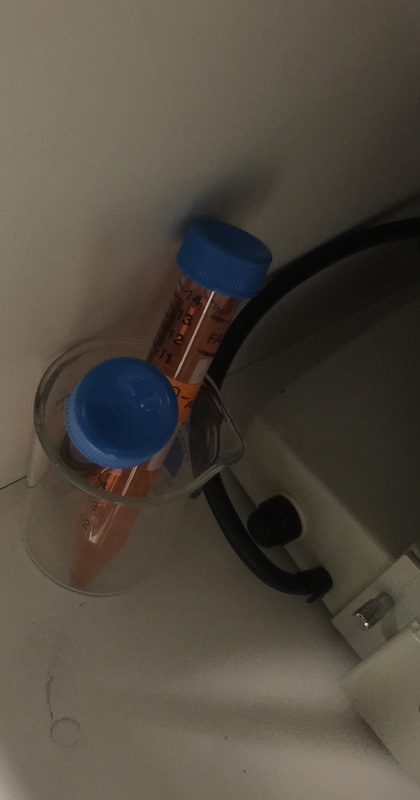
Tubes kept in the dark for the CO2 consumption in the photosynthesis experiment using Elodea. This photo was taken after the tubes were kept in the dark for three days. This was done to obtain clear results since there was not significant color change after one hour of being in the dark. No changes occurred in the control tube; it stayed an orange color. However, the pH indicator in the tube with Elodea clearly changed to a dark yellow, indicating that respiration had occurred. Photosynthesis could not occur due to the lack of light. As a result of respiration, CO2 was being emitted, increasing the acidity of the solution. This is my favorite experiment of the lab. It's one thing to learn about photosynthesis and respiration in plants on paper/in the classroom, but to actually see proof that it's happening is not only really cool, but solidifies the material taught in class. So now when I think about these processes occurring in the plant, I can also visualize the effects. - Christine
|
|
Exercise 1B: Measurement of Light Absorption
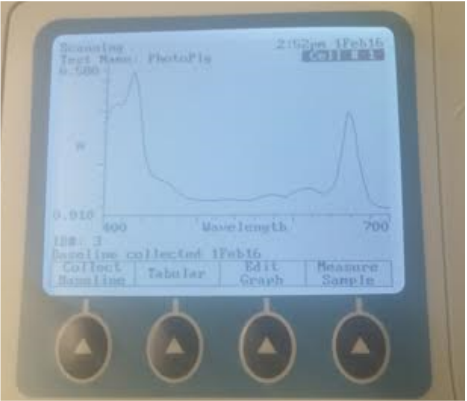
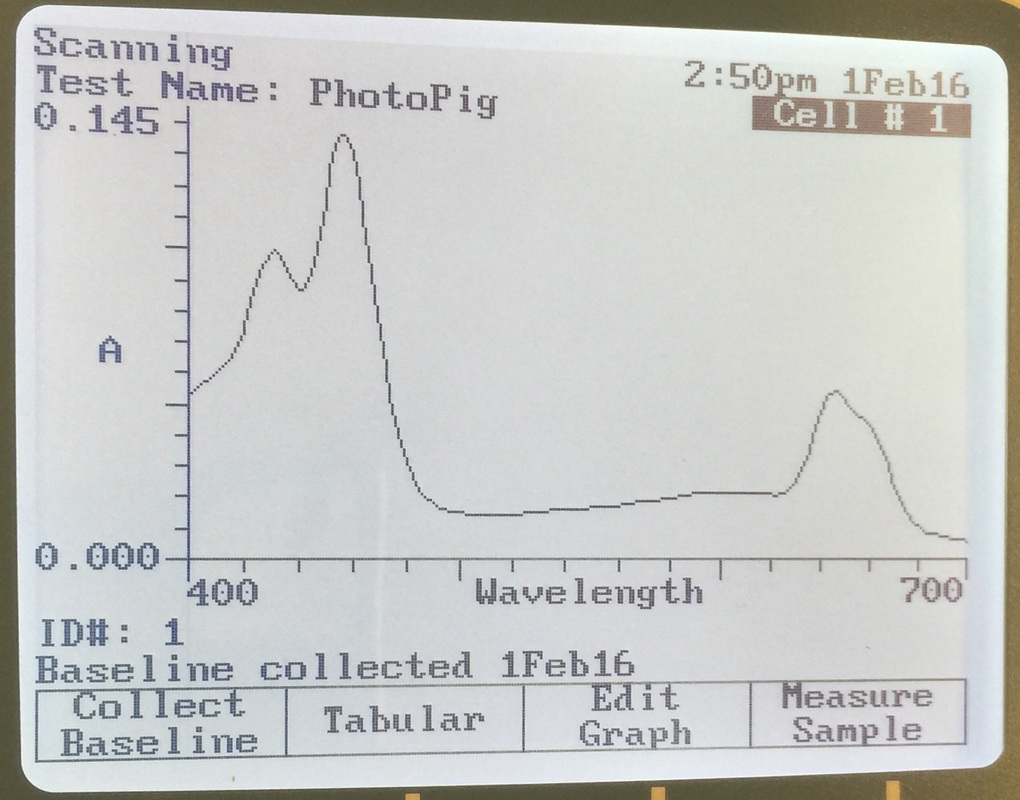
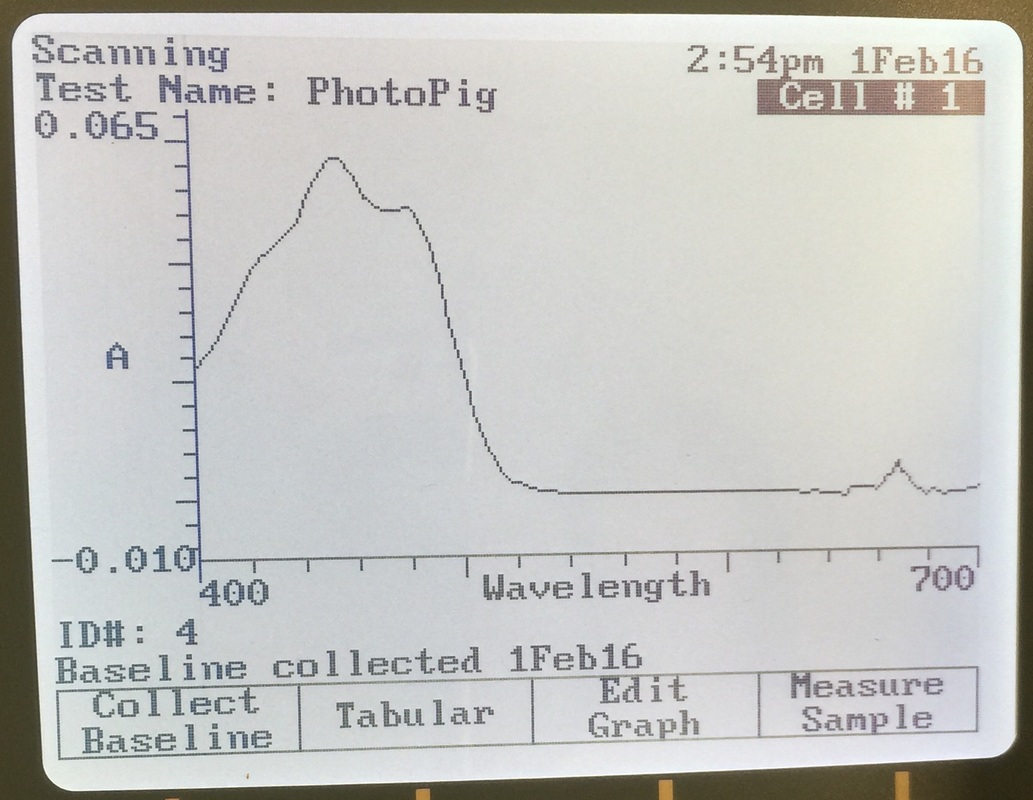
Absorptive wavelength of chlorophyll a as read by the spectrophotometer. The chromotography paper containing chlorophyll a was placed in a beaker containing acetone to remove the pigment. The solution was then placed in a test tube to be analyzed by the spectrophotometer. A blank of acetone containing no pigment was also analyzed as a control. The peaks of the wave length represent the spectrum of light chlorophyll a absorbs at. - Michelle
|
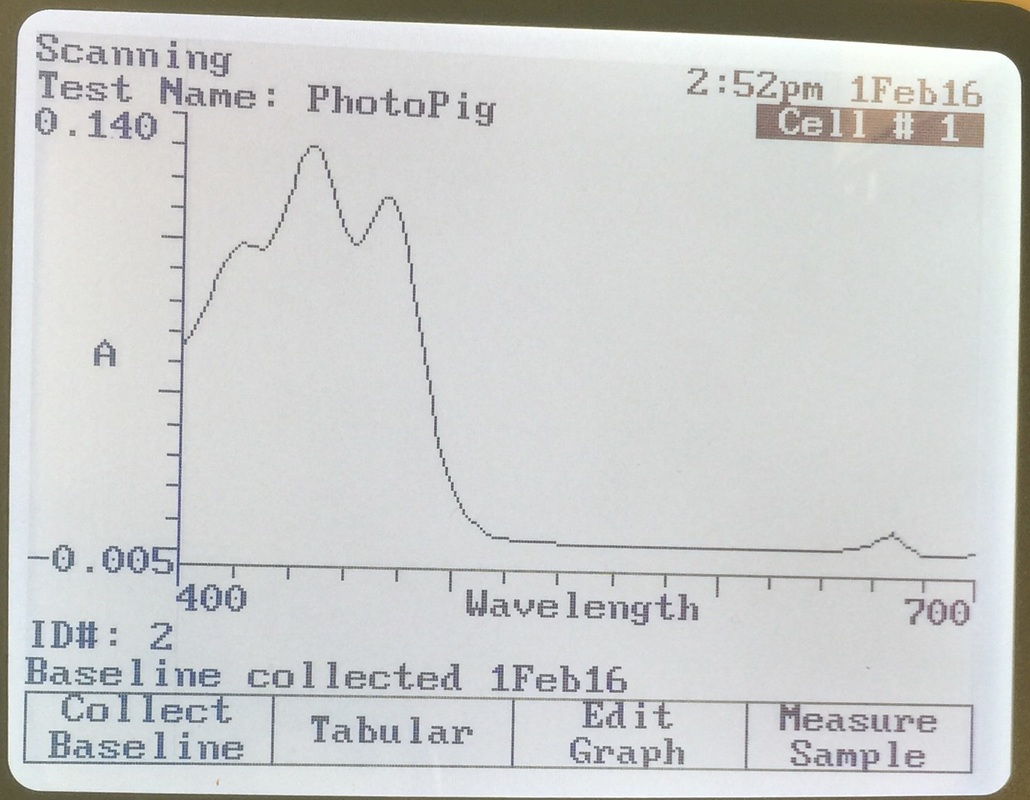
Absorptive wavelength of chlorophyll b as read by the spectrophotometer. A solution containing acetone and chlorophyll b was creating by dissolving the chlorophyll b pigment from chromotography paper. The solution was then put into a test tube. The test tube was placed in the spectrophotometer and analyzed. The peaks represent the peak wavelengths of light that chlorophyll b absorbs at. - Michelle (photograph by Christine)
|
Spectrophotometer measurement of light absorption for the pigment xanthophyll obtained from a Magnolia leaf. The pigment was separated via chromatography and then carefully cut out from the chromatogram. Our band of xanthophyll was combined with another groups’ band of xanthophyll in a 150 mL beaker containing 5 mL of acetone. After gently mixing, to remove all of the pigment from the paper, we then transferred the xanthophyll to a cuvette. The control, or blank, of only acetone was analyzed for comparison. We placed the cuvette of xanthophyll and acetone in the spectrophotometer and measured the light absorption. Peaks represent wavelengths that xanthophyll absorbs at. - Christine
Exercise 3: Test for Starch
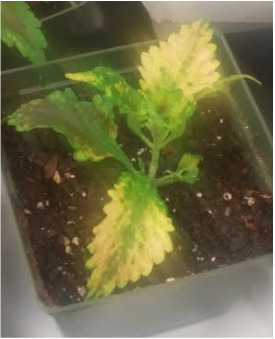
Variegated coleus plant used to determine the amount of starch in the leaves. The leaf prepared is located on the left hand side of the plant. It is the leaf that contains the most anthocyanin (purple pigment) on the plant. - Michelle
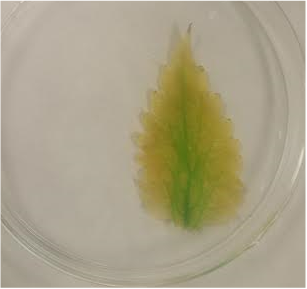
Once all the anthocyanin was removed, the coleus leaf was then placed in a beaker of boiling ethanol to remove chlorophyll from the cell, thus stripping the leaf of it's green pigment. Some green pigment remains in the vascular tissue of the leaf as time contraints would not allow full removal all pigments. - Michelle
|
Spectrophotometer measurement of light absorption for the pigment carotene obtained from a Magnolia leaf. The pigment was separated via chromatography and then carefully cut out from the chromatogram. Our band of carotene was combined with another groups’ band of carotene in a 150 mL beaker containing 5 mL of acetone. After gently mixing, to remove all of the pigment from the paper, we then transferred the carotene to a cuvette. The control, or blank, of only acetone was analyzed for comparison. We placed the cuvette of carotene and acetone in the spectrophotometer and measured the light absorption. Peaks represent wavelengths that carotene absorbs at. - Christine
Coleus leaf after submerged in a beaker of boiling water. The boiling water bath was done to remove all the anthocyanin (purple pigment) from the vacuoles in the plant cells. - Michelle
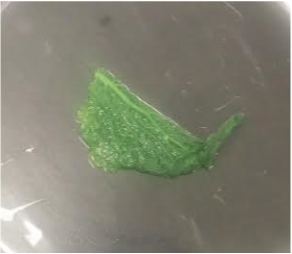
Coleus leaf after being treated with iodine to test for the presence of starch. This was executed after the anthocyanin and chlorophyll was removed from the leaf. Three drops of iodine were added which the leaf readily absorbed thus proving the presence of starch stored in the leaf. - Michelle
|
Simple and Complex Tissues, Week 4, 2/8/16
In today's lab, using different sectioning techniques, we stained various cells and viewed them under the microscope.
Objectives:
Objectives:
- compare and contrast parenchyma, collenchyma, and sclerenchyma cells and tissues (ground tissue system).
- recognize the three tissue systems of the plant body.
- identify water-conducting cells of the vascular tissue system and relate their structural features with their functions.
- describe the characteristics of the epidermis.
Cross-section of celery, Apium graveolens, petiole using toluidine blue (TBO). Image shows the collenchyma (bluish-purple stained bundle of cells shaped like a crescent moon) surrounding the vein of the plant. The vein of the plant consists of xylem and phloem. Xylem, the water conducting tissue of the plant, appear as larger, more globular, bluish-black stained cells, while phloem, the food conducting tissue of the plant tissue, appear as smaller bluish-black stained cells that are located in between the collenchyma cells and the xylem. Image taken at 100x total magnification under the compound microscope. – Christine
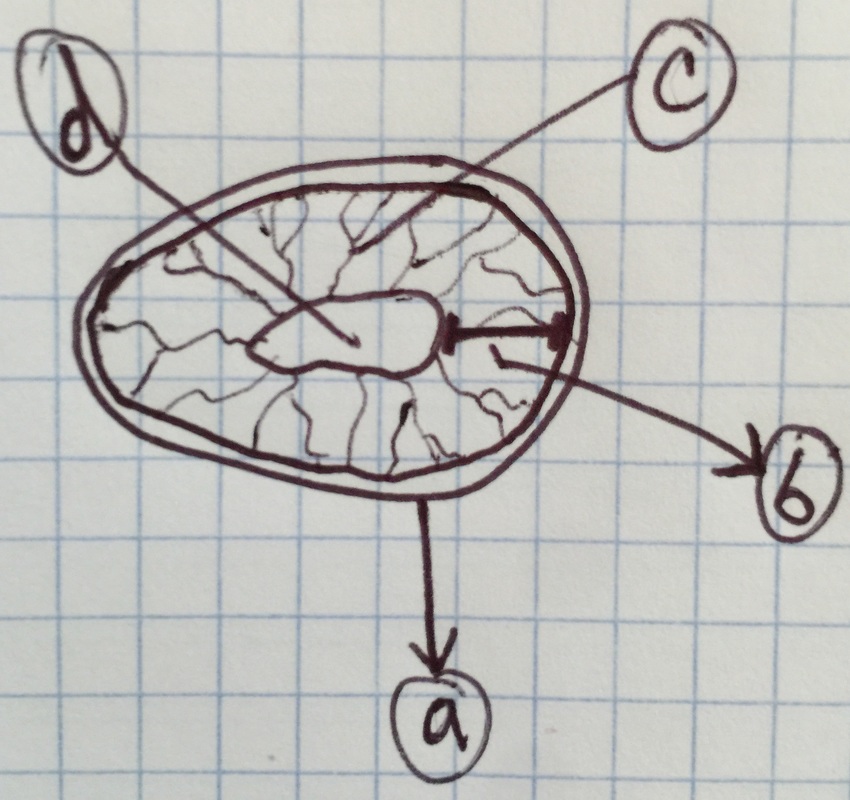
Drawing of sclereid from pear fruit, Pyrus communis. a) primary cell wall, b) thick, lignified secondary cell wall, c) branched pit canals, d) lumen (considerably smaller than typical lumen). Drawing of image taken at 400x total magnification under the compound microscope (left). – Christine
|
Cross-section of celery, Apium graveolens, petiole using toluidine blue (TBO). Collenchyma bundles stained bluish-purple and are seen towards the edge of the specimen. These bundles of cells are distinct because they are smaller and have thicker cell walls. TBO stains the cellulose in cell walls, therefore, the thicker the cell wall, the more cellulose and the more cellulose, the more of a bluish-purple color they stain. Parenchyma cells (seen next to collenchyma cells) are larger, more globular, and have thinner cell walls. Because parenchyma cell walls are considerably thinner, staining appears as a thin bluish-purple perimeter around the globular, unstained inside of the cell. Both cell types are considered to be simple tissue because they are comprised of only one type of cell; either collenchyma cells or parenchyma cells. Image taken at 40x total magnification under the compound microscope. – Christine
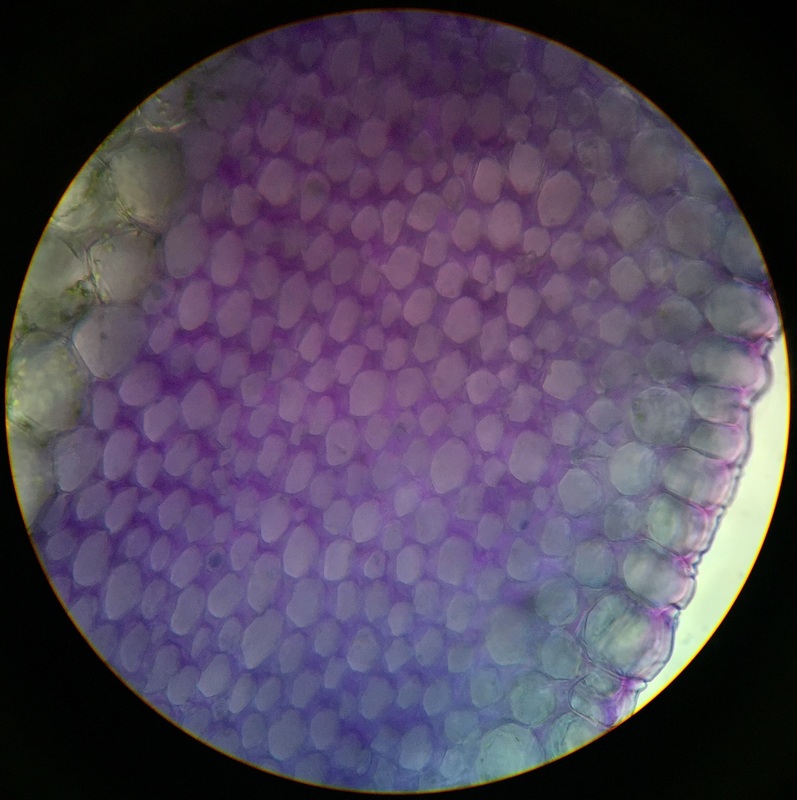
Cross-section of celery, Apium graveolens, petiole using toluidine blue (TBO). Image shows a close up of collenchyma (bluish-purple stained bundle of cells). Parenchyma cells, containing chloroplasts, are shown on the very edge of the image. Image taken at 400x total magnification under the compound microscope. – Christine
|
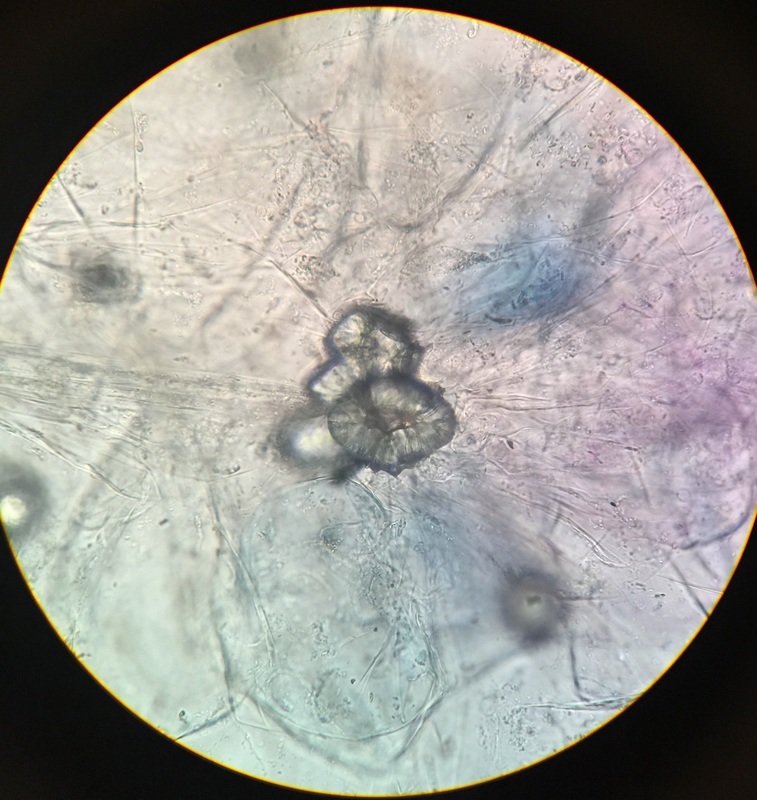
Sclerenchyma of pear fruit, Pyrus communis, stained with TBO. Specimen was obtained by gently scraping some of the pear flesh and smearing it onto the slide. Sclerenchyma cells have thick, lignified cell walls. Brachysclereids, or stone cells, are responsible for the gritty texture of pears. Sclerids are found as single cells or in small groups in the parenchyma tissues. Image taken at 400x total magnification under the compound microscope. – Christine
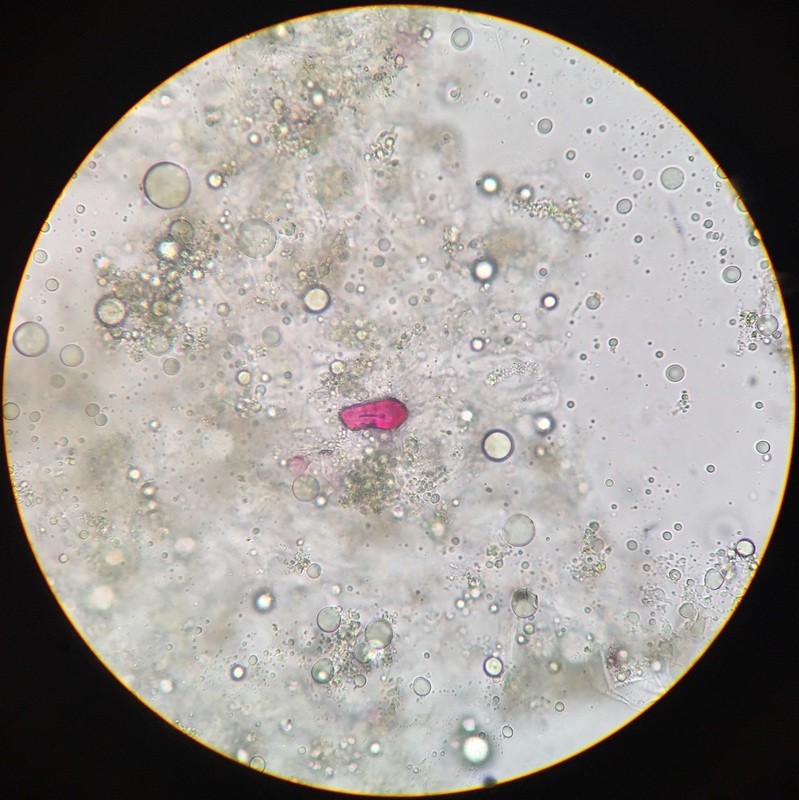
A single sclerid of an avocado fruit, Persea americana, stained with phloroglucinol- HCl. Specimen was obtained by gently scraping some of the avocado flesh directly from the peel and smearing it onto the slide. Sclerenchyma cells have thick, lignified cell walls. Brachysclereids, or stone cells, are responsible for the gritty texture of the avocado flesh near the skin. Sclerids are found as single cells as in this case, or in small groups in the parenchyma tissues. Image taken at 100x total magnification under the compound microscope. – Christine
|
Sclerenchyma of an avocado fruit, Persea americana, stained with phloroglucinol- HCl. Specimen was obtained by gently scraping some of the avocado flesh directly from the skin and smearing it onto the slide. Sclerenchyma cells have thick, lignified cell walls. Brachysclereids, or stone cells, are responsible for the gritty texture of the avocado flesh near the peel. Sclerids are found as single cells or in small groups, as in this case, in the parenchyma tissues. Image taken at 400x total magnification under the compound microscope. – Christine
|
Sclerenchyma fibers of snake plant, Sansevieria trifasciata, obtained by doing a cross-section and stained with TBO. Sclerenchyma fibers provide support to the elongated leaves of the plant. They appear very small (thin) and are stained bright blue because of the lignin in their thick secondary cell walls. Surrounding cells are those of the mesophyll; their cell walls have stained purple due to the presence of cellulose. The vacuoles are clearly visible in these cells and chloroplast are seen around the vacuole indicating that cytoplasmic streaming is occurring. Image taken at 400x total magnification under the compound microscope. – Christine
Drawn image of the epidermis peel that is in 40x magnification.
-Bryana Rounds
Longitudinal sectioning of the snake leaf plant, Sansevieria trifasciata which was stained with Toluidine Blue O. In the image you can see the narrow elongated fibers which are all bunched together. Viewed under 40x magnification.
-Bryana Rounds
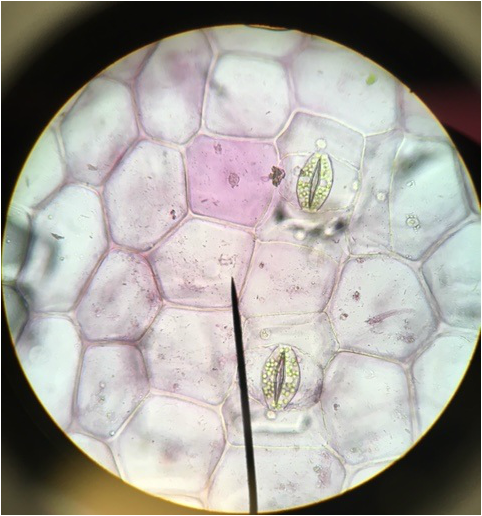
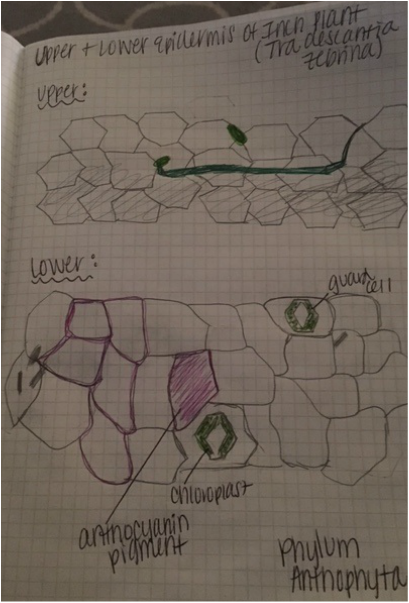
Lower epidermis of the inch plant, Tradescantia zebrina. In order to get the peel, a three way cut was made with a razor, then pulled backwards and pulled off with forceps. In the image, you can see the guard cells with the chloroplast bundles within the walls. Also there is some anthocyanin pigments by the purplish color. Viewed under 400x magnification.
-Bryana Rounds
|
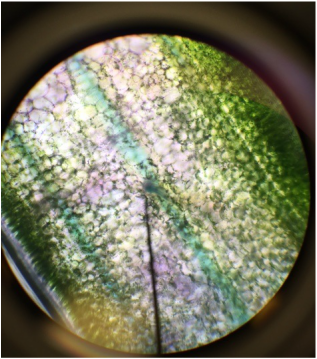
Upper epidermis of the inch plant,Tradescantia zebrina. There is m=not much to be seen in this portion of the leaf. Viewed in 40x magnification.
-Bryana Rounds
|
Longitudinal sectioning of the coleus leaf, Plectranthus scutellarioides. In the image, you can see the lignified tracheary
elements which were stained with Phloroglucinol-HCL. I would have to say that this image was my favorite. Although it took multiple times for me to get a good view, it was worth it to see the unique spring looking structures in this leaf.
-Bryana Rounds
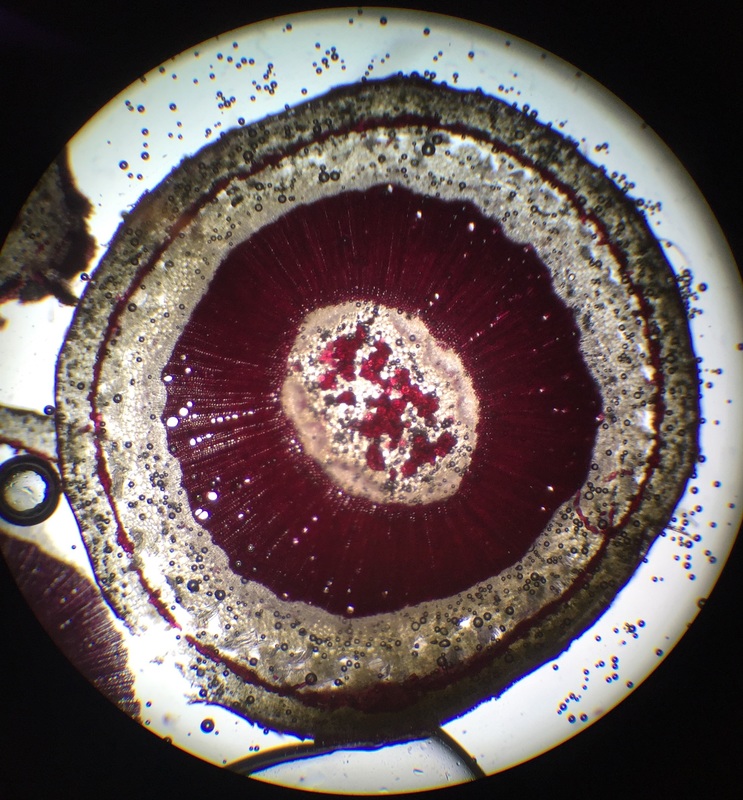
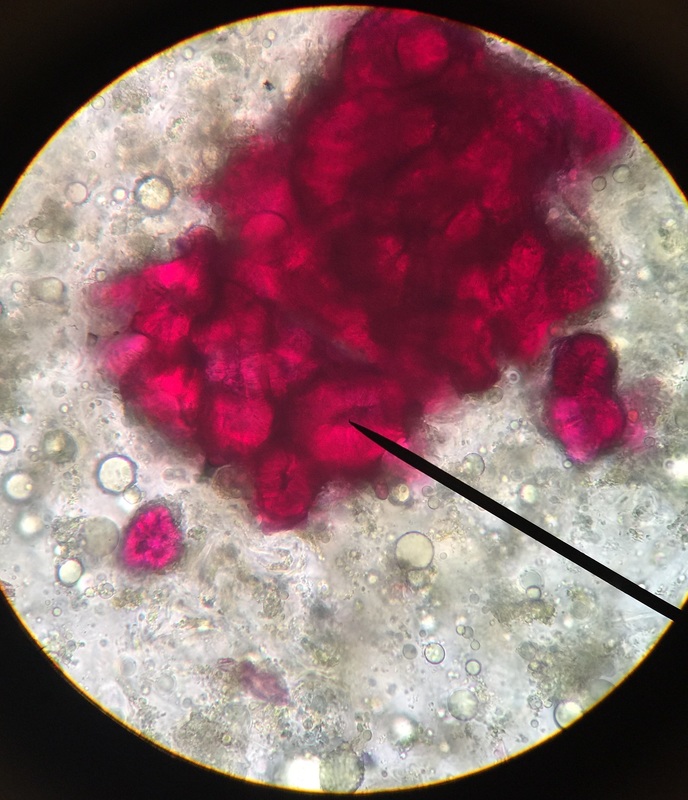
Cross-section of wax plant, Hoya carnosa, stem stained with phloroglucinol- HCl for lignin detection. Lignin is found in the secondary cell wall and turns a red-scarlet red color when stained with phloroglucinol- HCl. From innermost area of the cell - outward, we see brachysclerids in the pith, tracheary elements, and brachysclerids in the cortex. Image taken at 40x total magnification under the compound microscope. This was my favorite specimen to prepare simply because it's beautifully stained. – Christine
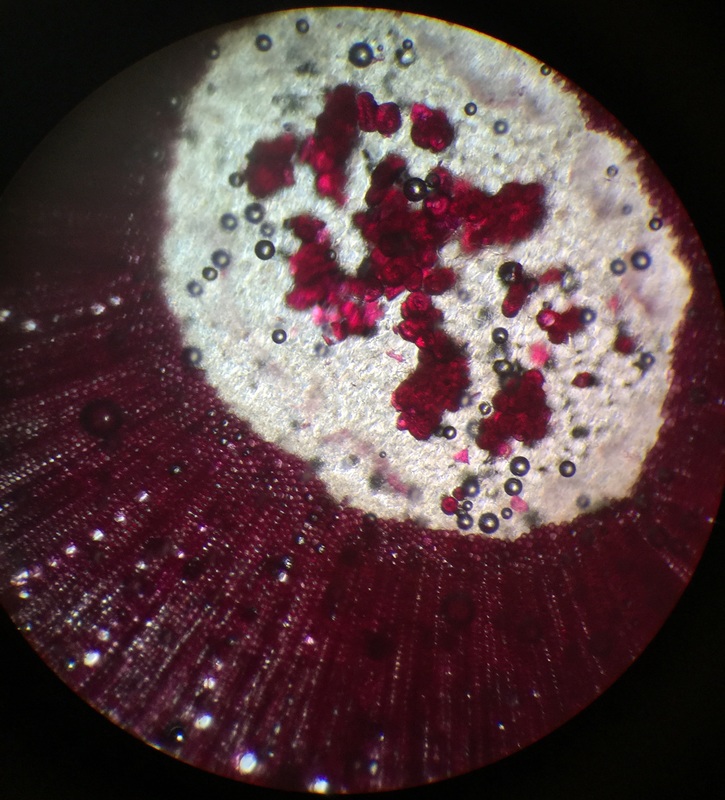
Cross-section of wax plant, Hoya carnosa, stem stained with phloroglucinol- HCl for lignin detection. Image shows a close up of the brachysclerids in the pith and tracheary elements, both containing lignin. Lignin is found in the secondary cell wall and turns a red-scarlet red color when stained with phloroglucinol- HCl. Image taken at 100x total magnification under the compound microscope. – Christine
|
Cross-section of wax plant, Hoya carnosa, stem stained with phloroglucinol- HCl for lignin detection. Image shows a close up of the brachysclerids in the pith. Lignin is found in the secondary cell wall and turns a red-scarlet red color when stained with phloroglucinol- HCl. Sclerids have thick, lignified cell walls. Image taken at 400x total magnification under the compound microscope. – Christine
|
Cross sectioning of the wax plant, Hoya carnosa stained with Toluidine Blue O.The sclerids were stained blue. You can easily see the cortex, pith, and brachyschlereids. Viewed in 40x magnification.
-Bryana Rounds
|

Closer look at the brachyscleroids of the wax plant.
-Bryana Rounds
|
GMO Investigations, Part One, Week 5, 2/22/2016
Objectives:
- explain what a genetically modified organism is.
- describe the process of extracting DNA from store-bought food products.
- describe how polymerase chain reaction amplifies target DNA sequences.
- discuss some of the implications for genetic engineering of agricultural crops, both positive and negative, in regards to plant biodiversity, ecosystems, co-evolution of plants and their pests, human health, and economics.

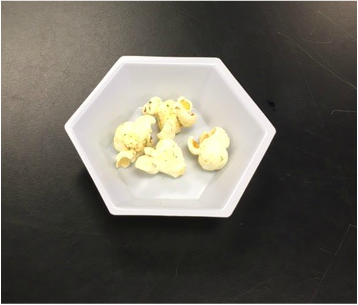
GMO negative oats prior to processing. These oats are used as our control against the popcorn we tested - Michelle

Christine pipetting 20 microliters of Green Plant Master Mix (vials 1,3,5) and Red Master mix (vials 2,4,6) into vials to be combined with our control and test samples of Non-GMO oats and our Unknown Popcorn- Michelle
|

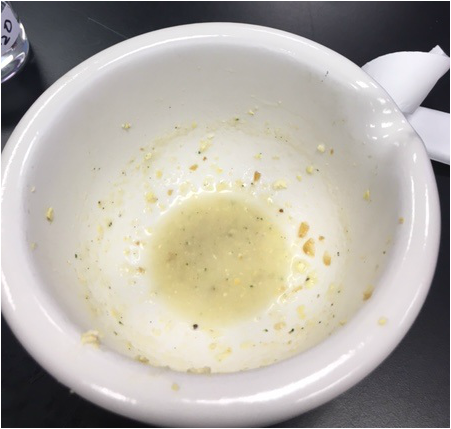
Christine pipetting samples of the Non - GMO oat sample and the processed popcorn sample to be tested into the vials containing the Plant Master Mix - Michelle
|

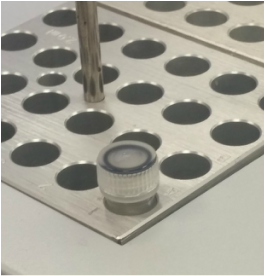
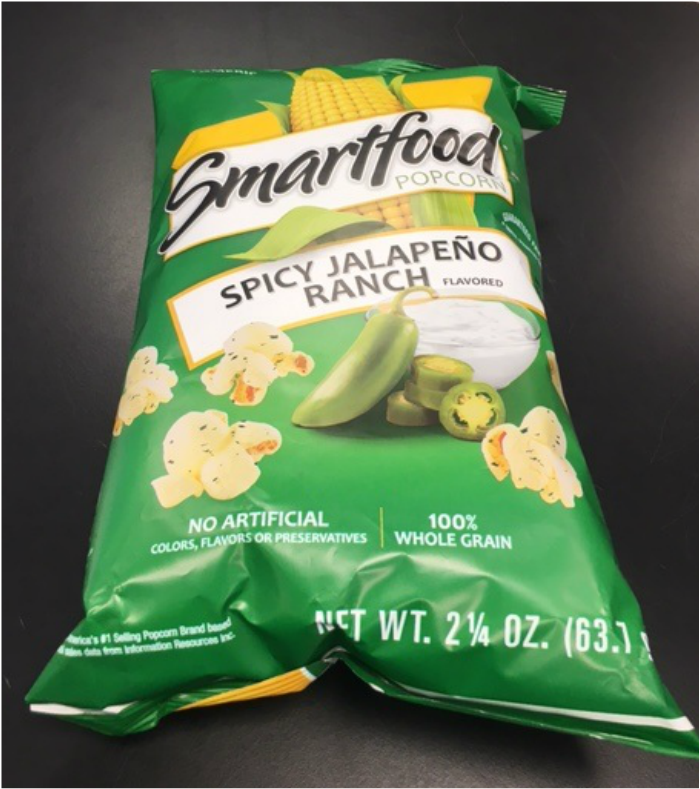
Image of the package containing the test food, popcorn. On the ingredients label, it shows there is indeed corn oil used.
-Bryana Rounds
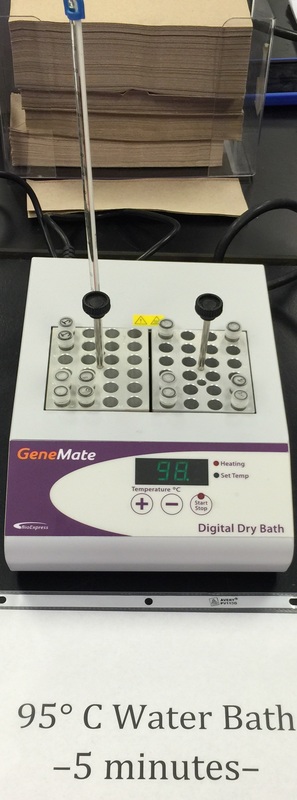
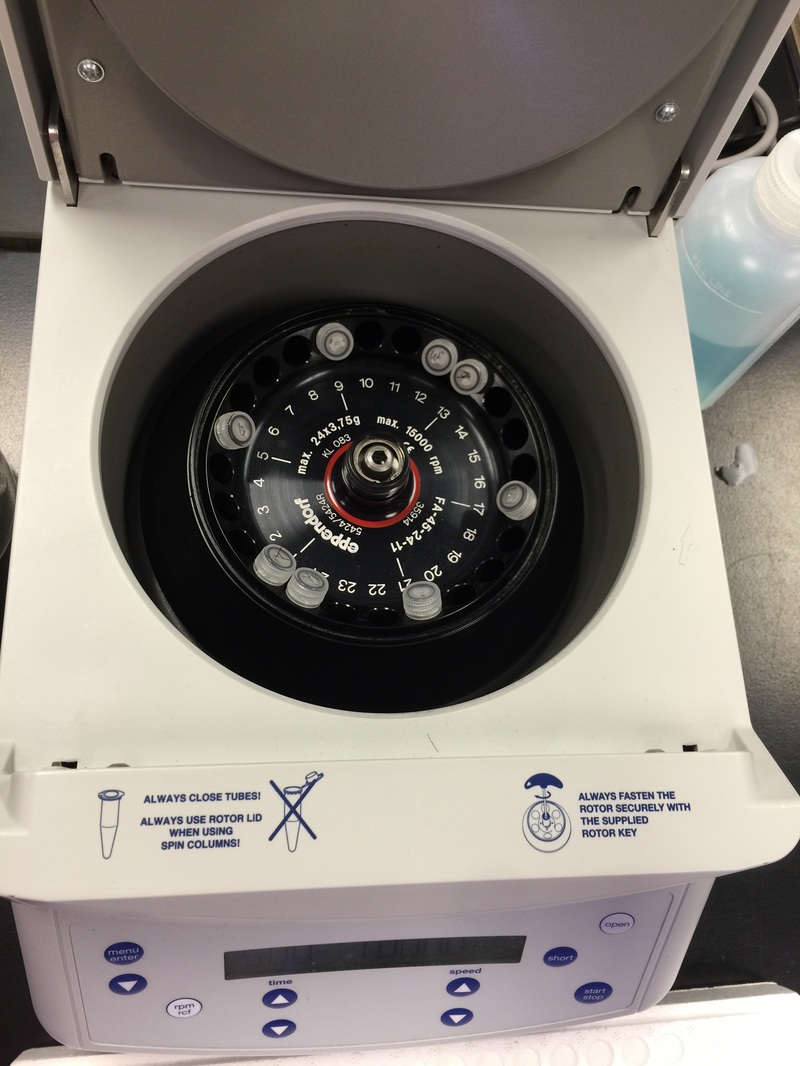
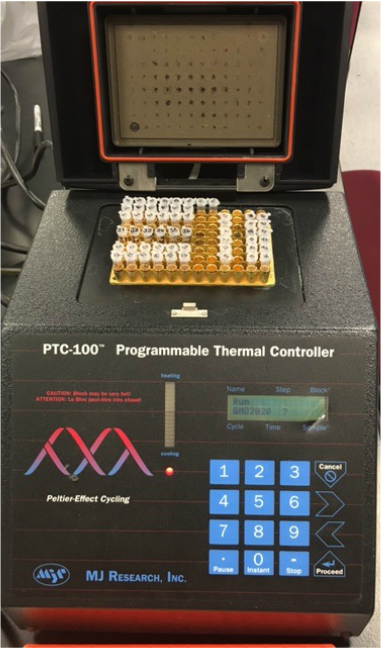
This image shows our (along with other students') non-GMO oat and unknown popcorn sample InstaGene tubes in the dry heat bath (98 degrees Celcius). We let them heat for a total of five minutes before taking them out and centrifuging them. Heating the samples was done to prevent the DNase enzymes from degrading the DNA we are trying to extract. - Christine
|
|
The results of the experiment will be obtained next week when we visualize the products of the PCR using gel electrophoresis.
GMO Investigation II, Week 6, 2/29/16
Objectives:
- explain the process of electrophoresis.
- interpret the results of gel electrophoresis of your PCR samples from last week.
- describe how both positive and negative controls were necessary in order to assess the validity of our results for this investigation.
- discuss some of the implications for genetic engineering of agricultural crops, both positive and negative, in regards to plant biodiversity, ecosystems, co-evolution of plants and their pests, human health, and economics.

Christine pipetting 20 microliters of the non-gmo oat sample with plant master mix and SafeView into the first slot of the gel to be processed by gel electrophoresis-Michelle
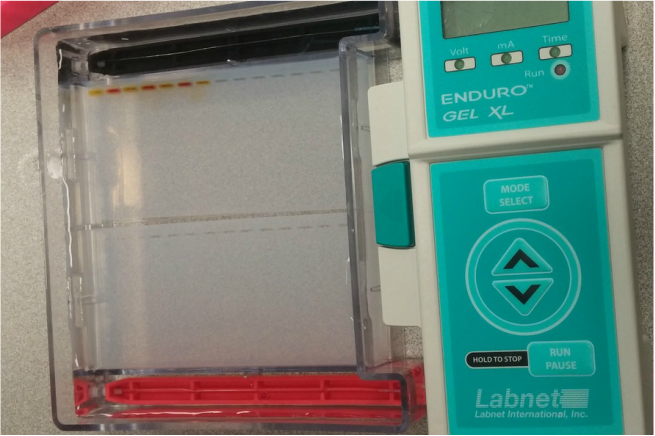
The gel ready to be processed using electrophoresis. Electrophoresis works by running a charge through the gel, helping drive the negatively charged DNA sample towards the positive end of the gel. If DNA is present, bands will appear under UV light adter the gel has finished being processed. - Michelle
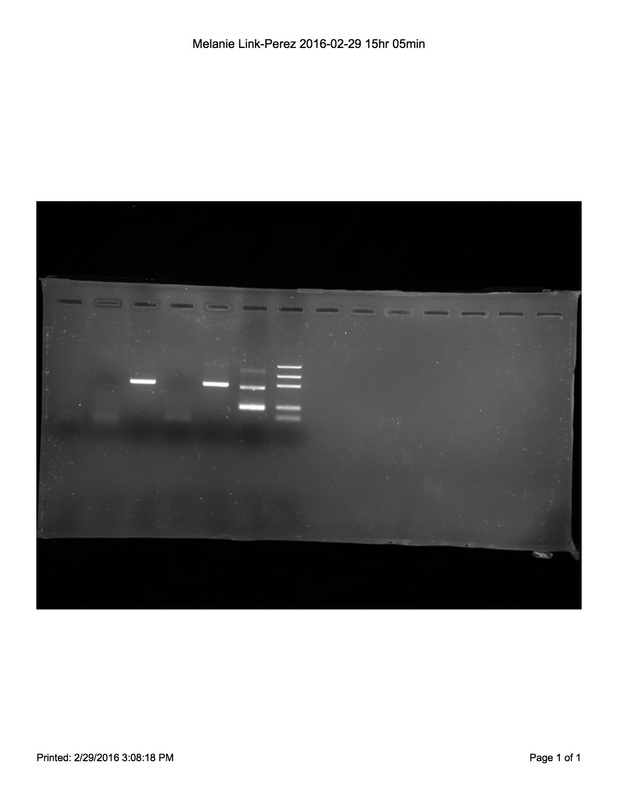
Electrophoresis of PCR products yielded results shown. There is no band in lane 1 (Non-GMO food control with plant primers) or 2 (Non-GMO food control with GMO primers), indicating that we failed to successfully extract DNA from our Non-GMO food control (Certified Non-GMO Oat sample) and our data for that particular sample are inconclusive. Our test food (Smartfood Popcorn) sample revealed a 455 bp long band in lane 3 (test food with plant primers), but no 200 bp band in lane 4 (test food with GMO primers), indicating that our test Smartfood Popcorn sample is Non-GMO. Lane 5 (GMO positive control DNA with plant primers) confirms our results because it too has a 455 bp long band indicating that the sample is from a plant, but does not contain GMOs. Likewise, lane 6 (GMO positive control DNA with GMO primers) contains a 200 bp band that is not shown in lane 4, which further confirms our results. Another group in the lab used the same Smartfood Popcorn as their test food and obtained the same results confirming that Smartfood Popcorn is non-GMO. If we were to repeat the procedure, we would thoroughly grind the Certified Non-GMO oat sample to ensure that DNA may be obtained. - Christine
Bryophytes and Ferns, Week 8, 3/21/16
Objectives:
- recognize representatives of the Phylum Bryophyta and the Phylum Hepaticophyta (non-vascular plants).
- recognize representatives of the seed-free vascular plants- Monilophytes (also known as ferns) at both the microscopic and macroscopic level.
- use the nomenclature, both scientific and common, associated with each non-vascular taxon observed.
- describe the sequence of events that occur during the life cycles of each taxon observed and recognize the gametophyte and sporophyte generations.
- describe the general characteristics of the non-vascular taxa observed and how those characters are used in their classification.
Observation of spores of Polytrichum sp. , a type of moss viewed under 400x total magnification. Spores form into the protonema, a branching filamentous structure that sprouts either male or female gametophytes. - Michelle
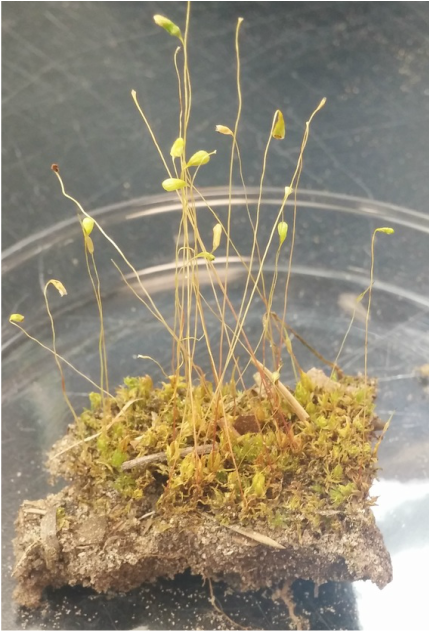
Moss gametophyte and sporophyte. The gametophyte is the leafy region at the bottom of the plant which helps anchor the sporophyte. The sporophyte includes the filaments, known as a seta, connected to the capsule where spores are formed. The capsule is protected by operculum, which falls off to release spores at maturity. The calyptera, a membranous part of the capsule also gives way at maturity, allowing for spore dispersal - Michelle
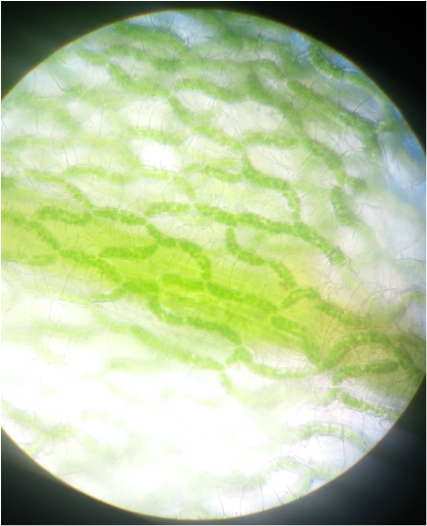
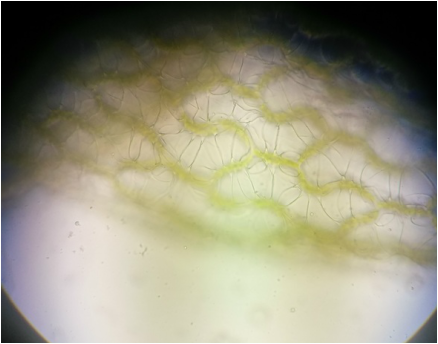
Sphagnum gametophyte. The chlorophyll's cells are indicated by the green chloroplasts found in the branching segments forming a net like structure. This netlike structure surrounds the colorless hyaline cells of the gametophyte. The gametophyte, while appearing leaflike,is undifferentiated tissue unlike true leaves, which are differentiated into dermal, ground and vascular tissue. This is my favorite slide due to the pattern the chlorophylous cells create, as the filaments of cells snake around the hyaline cells- Michelle

This image is of the Liverwort thallus, which is a non- vascular plant. This plant is apart of the Phylum Hepaticophyta. In the image, you can see the gemma cups which contains little pores that are helpful in gas exchange.
-Bryana
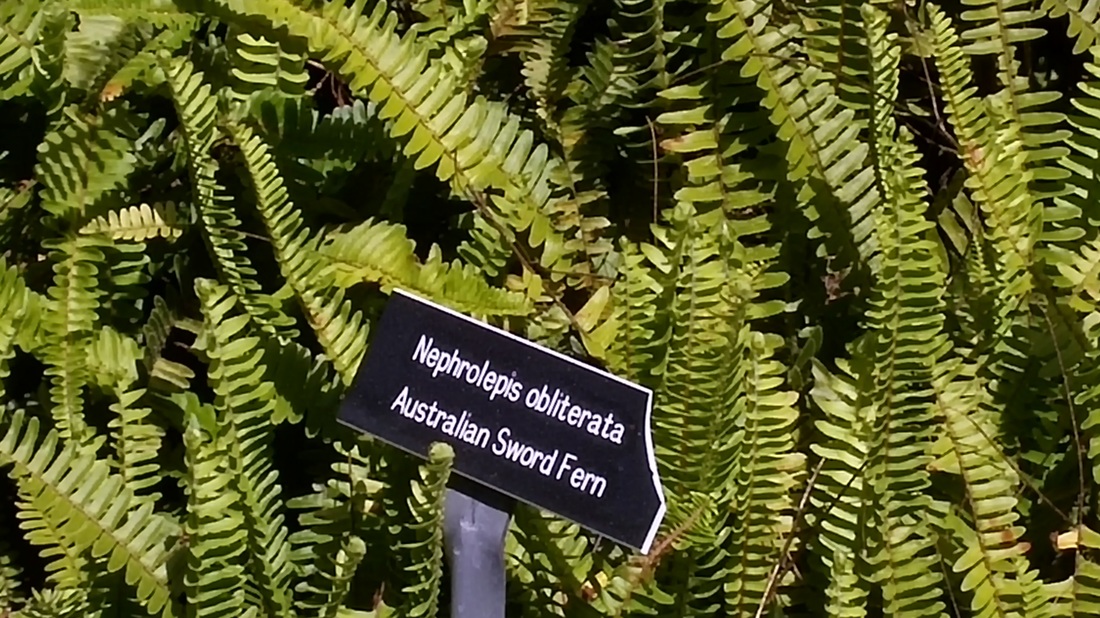
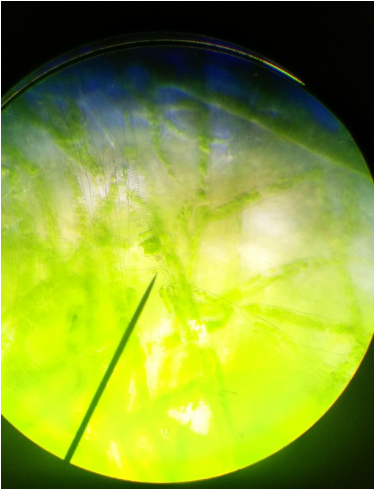
Nephrolepsis obliterata, the Australian Sword fern, was used to study sori on the underside of ferns. This fern garden is located outside Jenkins Hall of Armstrong State University - Michelle
|
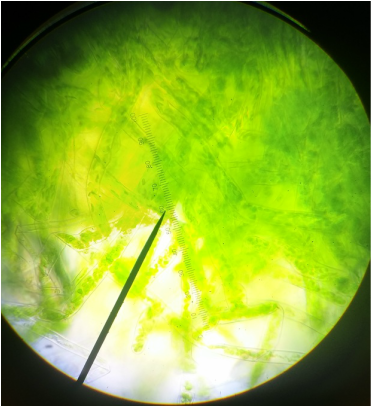
Whole mount (400x magnification) of a moss protonema. The protonema occurs when a spore germinates and branches across the ground. The protonema then develops into male or female gametophytes thus completing the life cycle of the moss - Michelle
Moss protonema with an apparent bud, indicated by the globular green cells above the pointer of the microscope. Taken at 400x magnification - Michelle
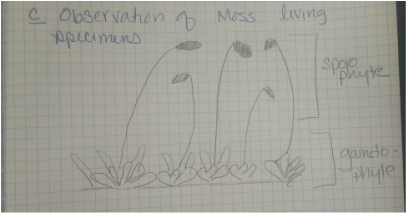
Sketch of the moss gametophyte and sporophyte as seen in the image to the left. The gametophyte and sporophyte region of the moss plant are labeled to indicate location. - Michelle
Whole mount of Sphagnum after staining with phloroglucinol to indicate the presence of lignin. After staining, while the color hanged to an orange-green color, no lignin was indicated as it was not stained red. Moss gametophytes lack vascular tissue, and the lack of red pigment from the phloroglucinol HCL indicates this - Michelle
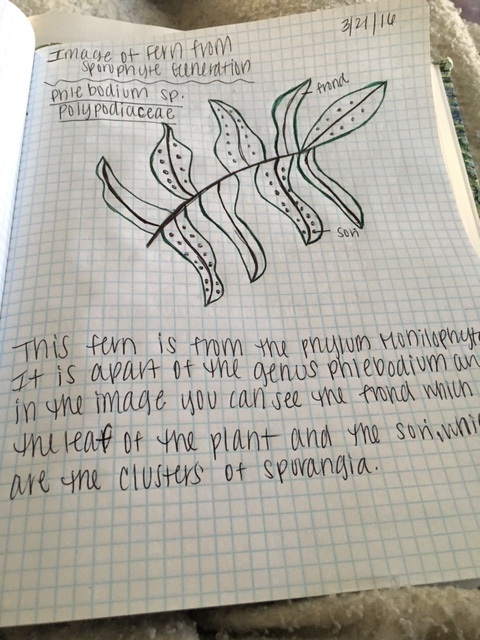
Image of Phlebodium sp. Polypodiaceae, which is a seed- free vascular plant that is apart of the Fern's sporophyte generation. In the drawing you can see the sori and fronds of the Fern.
-Bryana
|
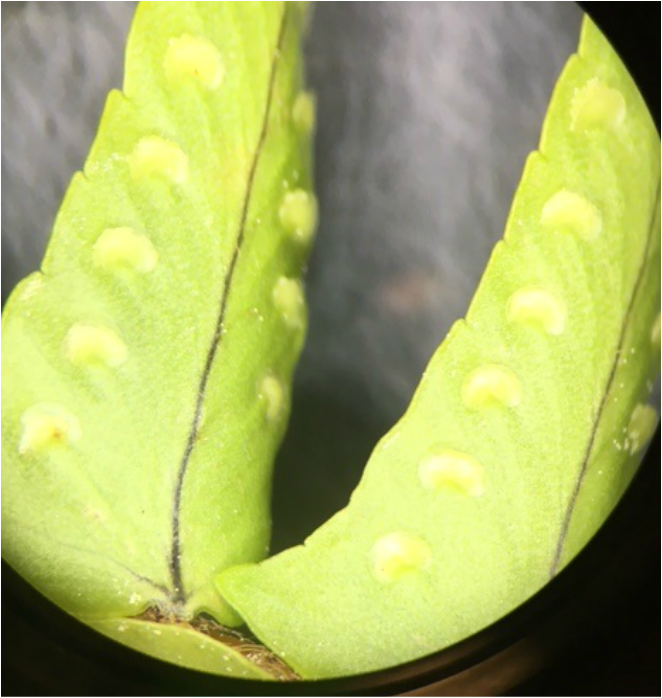
Image of a Nephorrolpsis obliterata, also known as the Australian sword fern which was found in the front of Jenkins Hall on Armstrong's campus. This image was photographed in 20x magnification under the dissecting microscope. The sori on the underside of this fern are in uniform along the backside and don't really compare that much to the sori in figure 17-32.
-Bryana
|
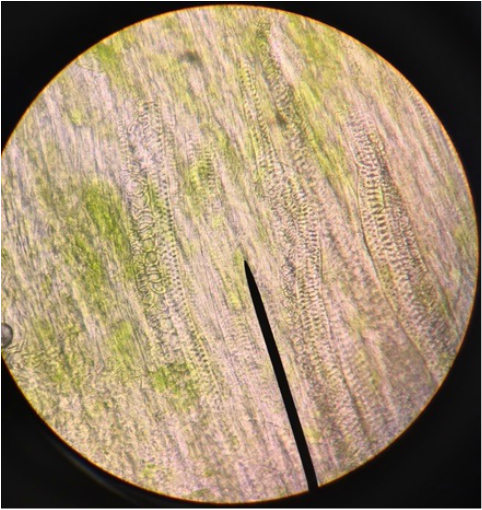
Image displaying a longitudinal- section of the stem Psilotum. This image was photographed at 40x magnification under a compound microscope. In this photo, you can see the lignin annular deposits which were stained with Toluidine blue dye.
-Bryana
|
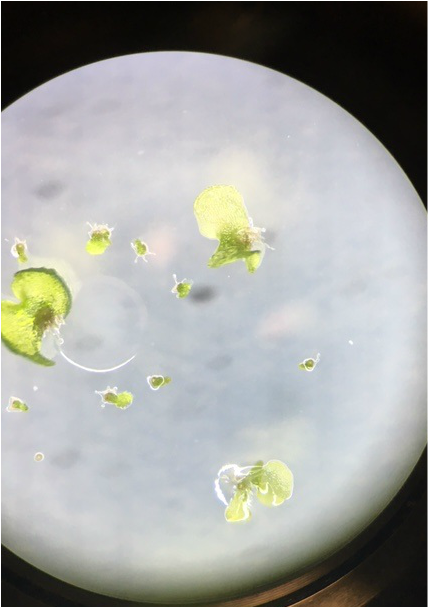
Image of C-fern gametophyte spores that have been growing for two weeks. This C-fern is part of the phylum Monilophyta. This image was taken in 20x magnification under the dissecting microscope.
-Bryana
|
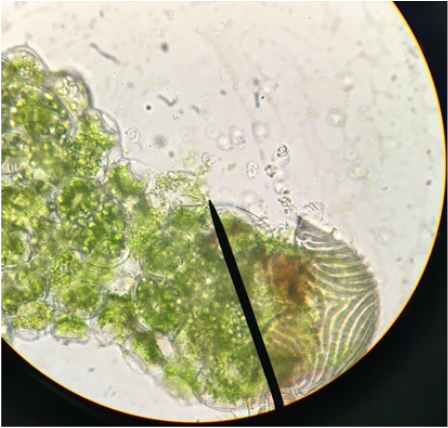
Image of C-fern sperm. This image was photographed in 40x magnification under the compound microscope. There wasn't much movement is my sperm collected, but there was some. The sperm resembles like a motor wheel just spinning around and around. The sperm seemed to only be moving in the same area near the rhizoids. I would have to say this was my favorite image of the day, just because it was interesting watching the release of sperm and the movement of it.
-Bryana
|
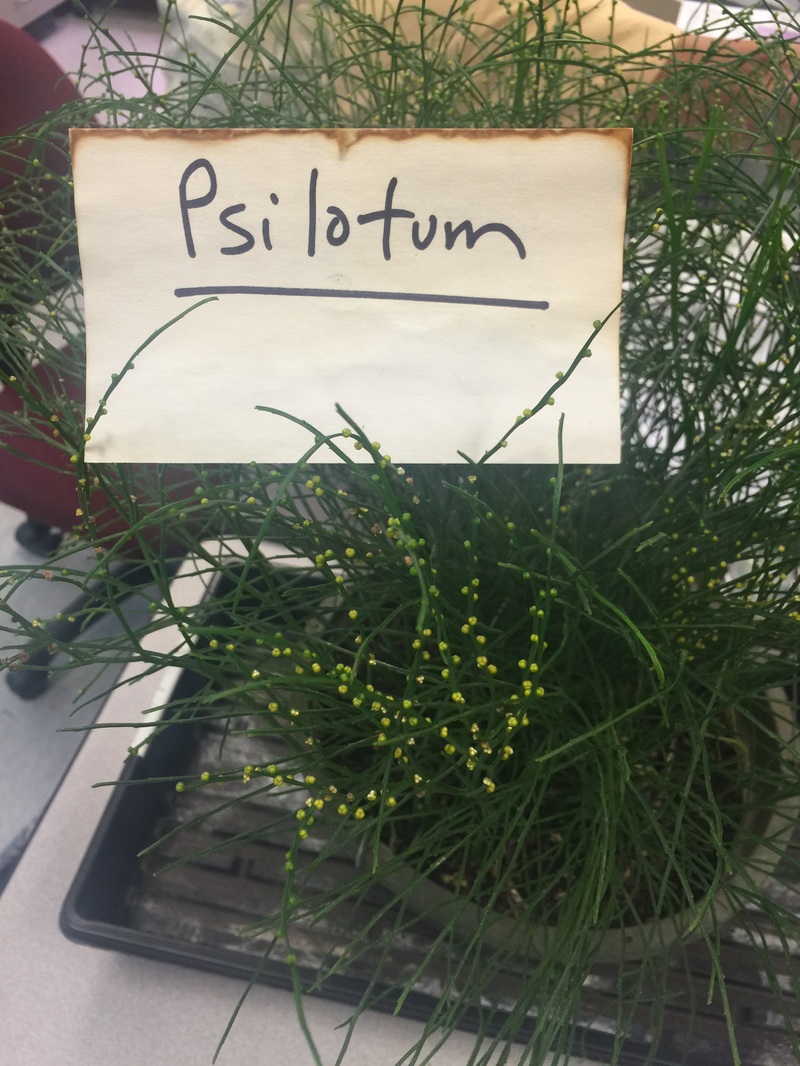
Psilotum nudum (whisk-fern) shown. They are members of the phylum Monilophyta. Many mature sporophytes (2n) are seen. These are the ones with yellow sporangia that consist of united groups of three. Scale-like outgrowths are also visible. - Christine
|
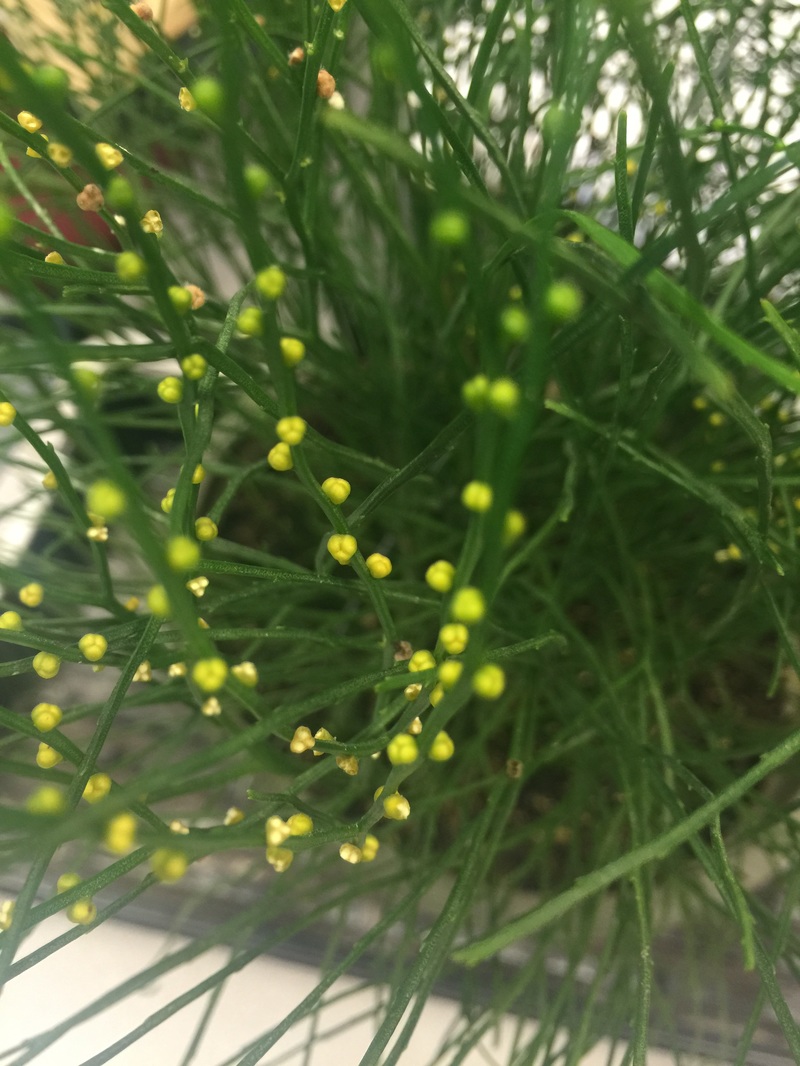
Closeup of Psilotum nudum (whisk-fern) showing the dichotomously branching aerial portion of the sporophyte with many yellow sporangia. This closeup makes it easier to see the groups of three. Scale-like outgrowths are more easily seen. - Christine
|
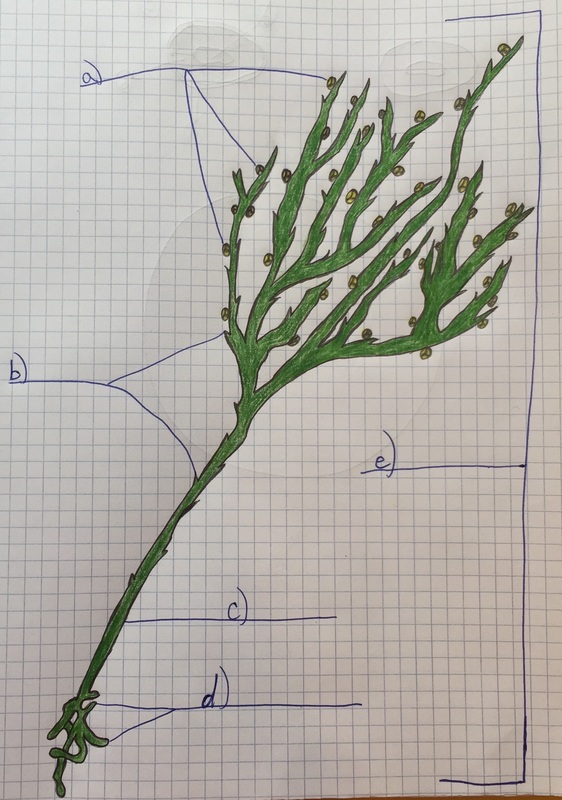
Drawing of Psilotum nudum sporophyte. a) sporangia; b) scale-like outgrowths; c) aerial stem; d) rhizome (not shown in actual photos above); e) mature sporophyte (2n) - Christine
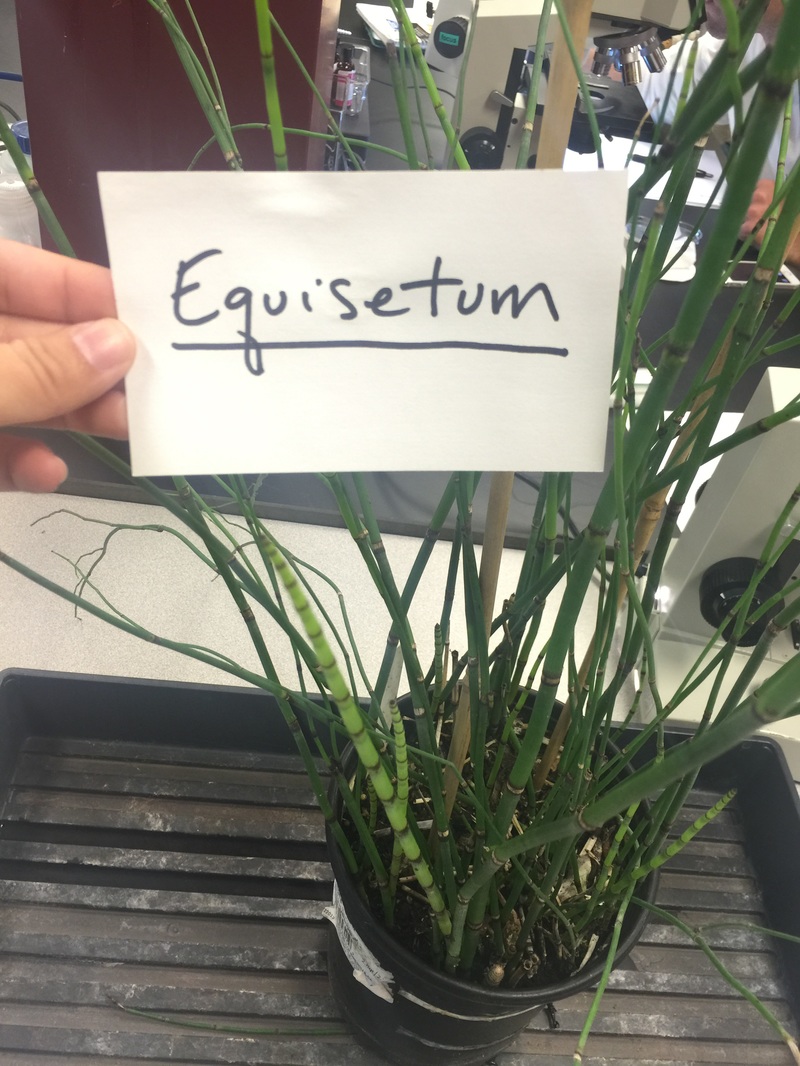
Equisetum sp. (horsetail) shown. They are also members of the phylum Monilophyta. Some branching is seen. Internodes and nodes are seen directly under the leaves (brown) of the fertile shoots. These whole structures are mature sporophytes and are diploid. However, no strobili are shown. Sporangia, in which meiosis occurs, would've been found along the margins of the umbrella-like structures called sporangiophores. These sporangiophores are grouped into strobili. - Christine
|
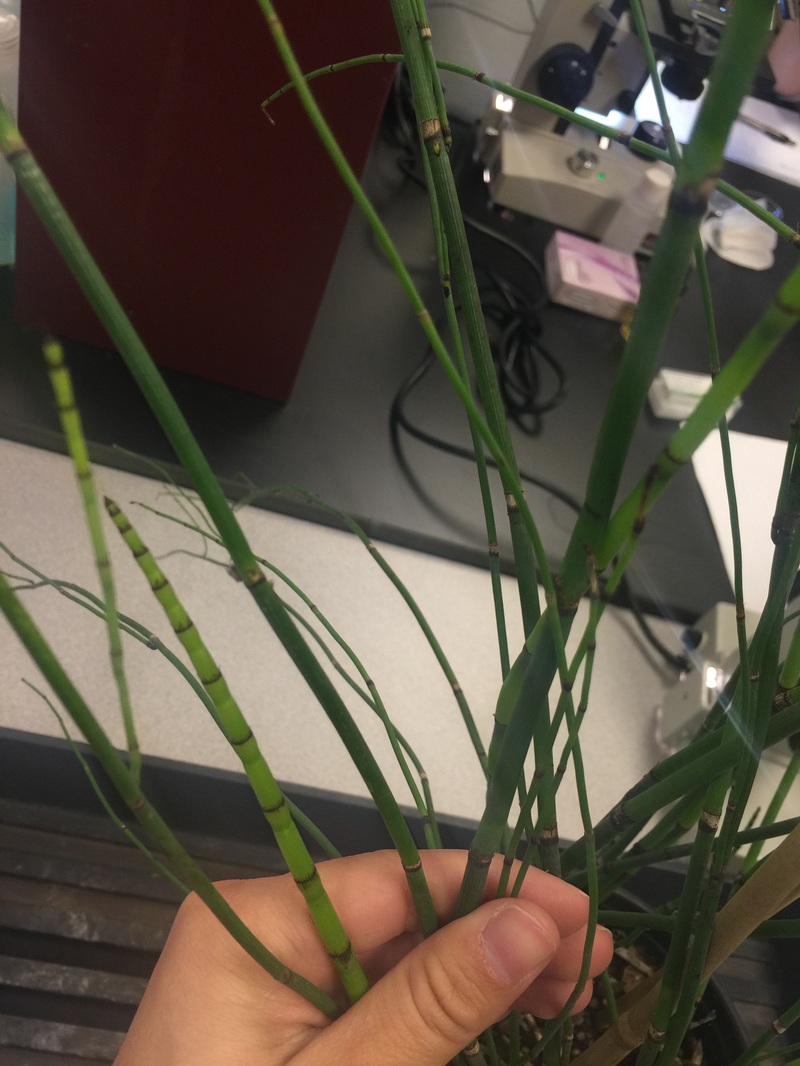
Closeup of Equisetum sp. (horsetail) shown. Branching is better seen. The separation and distinction between the internodes and nodes are more easily seen. The leaves of the fertile shoots are also seen in more detail. Younger leaves are brown. Older leaves appear to be a lighter brown to tannish color. - Christine
|
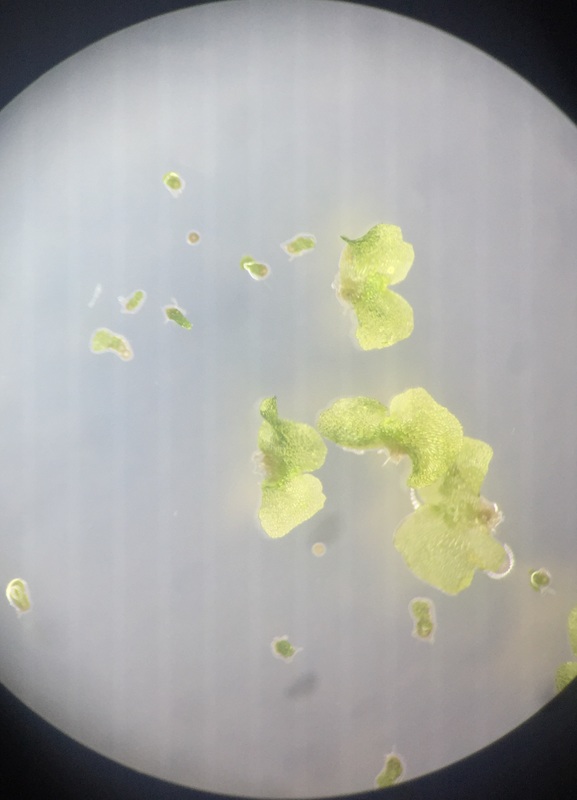
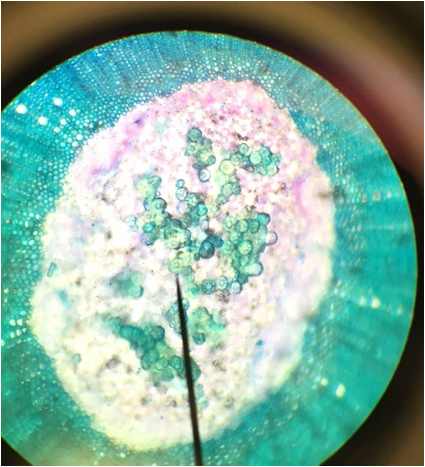
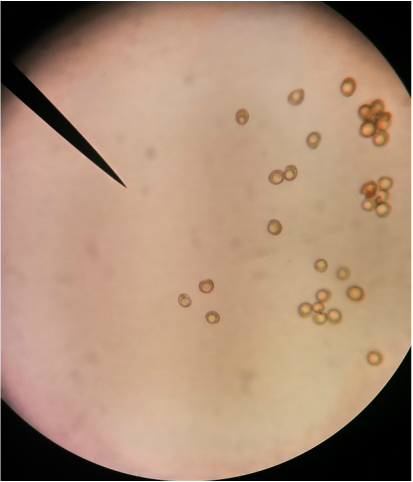
Image shows C-fern gametophytes two weeks after sowing spores on an agar plate viewed under the dissection scope at 30x total magnification. C-ferns are members of the phylum Monilophyta. In this view, we see two small circular brownish colored spores that are ungerminated. The smaller club-shaped gametophytes are male and you can see some of them growing out of the remnants of their spore case. The significantly larger heart-shaped gametophytes are hermaphrodites.
This was my favorite specimen of the day because I sowed these spores and this particular agar plate had everything: a couple of ungerminated spores, several male and hermaphrodite gametophytes, and some male gametophytes growing out of their spore case. - Christine
|
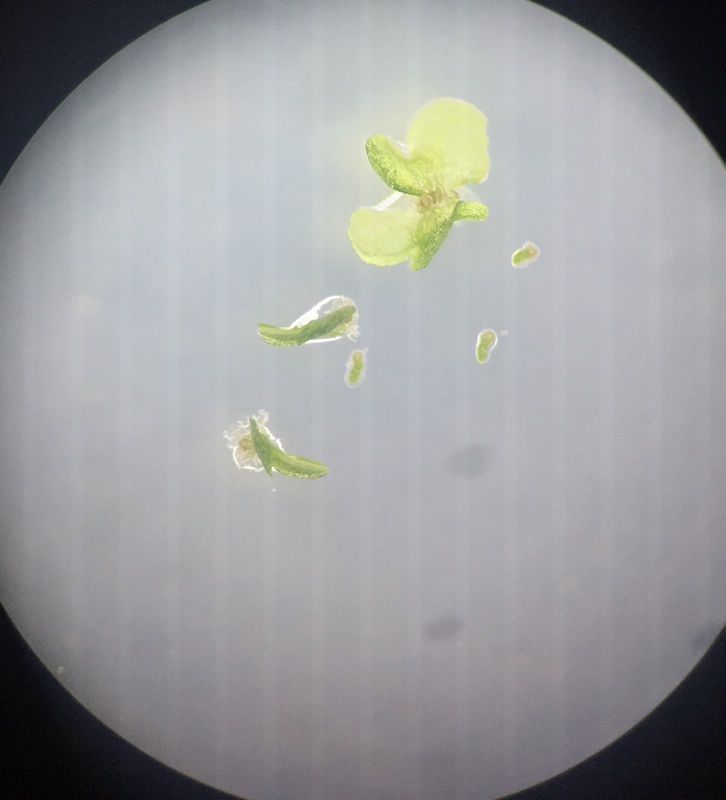
This image also shows C-fern gametophytes two weeks after sowing spores on an agar plate viewed under the dissection scope at 30x total magnification. Here we see three much smaller club-shaped male gametophytes all visibly growing out of the remnants of their spore case and three much larger heart-shaped hermaphrodite gametophytes, two of which are young and appear to be growing sideways. - Christine
|
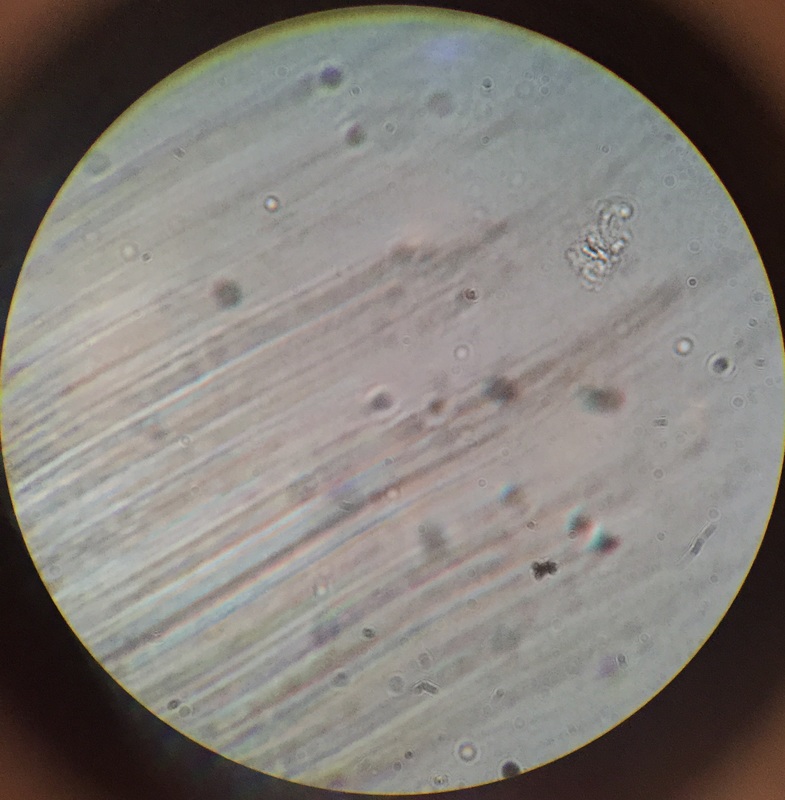
C-fern sperm shown at 1000x total magnification using oil immersion. It was extremely difficult to try to take a photo of a living sperm cell because they are constantly moving about. The sperm in this image is immobile because it is dead. C-fern sperm are corkscrew shaped and appear to twist (much like a corkscrew) when they move. This sperm sample was obtained by placing a few male gametophytes on a slide with a toothpick. I added a drop of water and a cover slip and watched as the antheridia (mature male sex organ) burst when exposed to the water, releasing their sperm cells. - Christine
Gymnosperms and Angiosperms (Seed Plants), Week 9, 3/28/16
Objectives:
- recognize representatives of the gymnosperms and angiosperms.
- describe the sequence of events that occur during the life cycles of each taxon observed and recognize the gametophyte and sporophyte generations.
- identify the parts of a flower and describe their functions.
- understand the terms related to ovary position, presence and absence of floral organs, and floral symmetry- and be able to use them to describe a specimen.
- prepare diagrams to record important features revealed during a floral dissection.
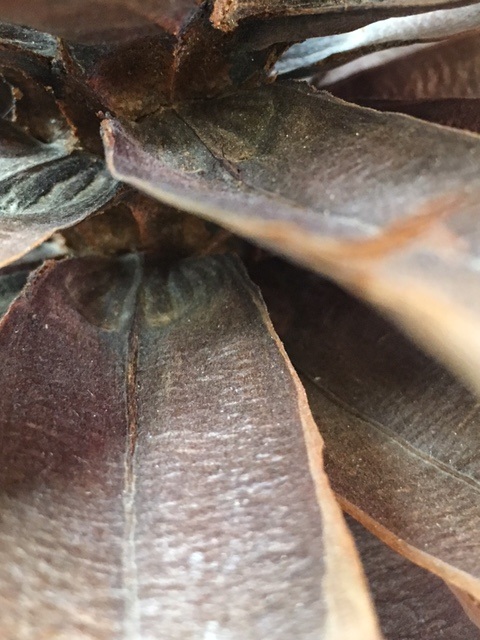
Image of a woody scale that comes from a female cone. In this photo, you can see the depressions which is where the seeds of the cone are formed.
-Bryana
|
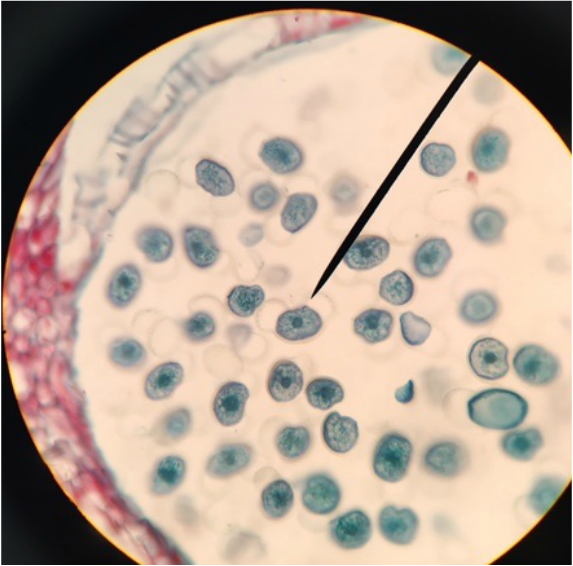
Image of a longitudinal sectioning of a Pinus mature embryo. In this photo, you can see a tight collection of cells.
-Bryana
|
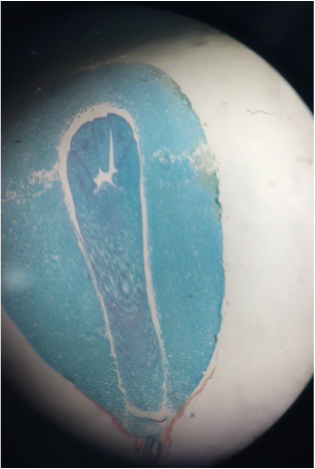
Image of a Pinus longitudinal sectioning of a mature male cone. This photo was taken in 40x magnification under a compound microscope.
-Bryana
|
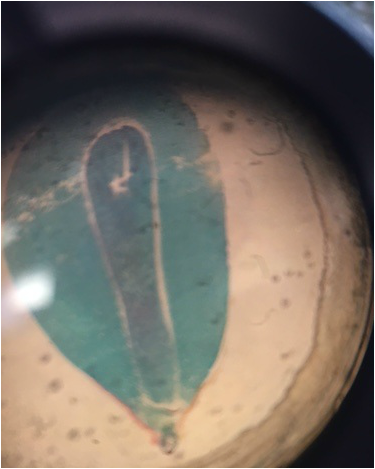
Image of longitudinal sectioning of Pinus , a mature embryo. This photo was taken in 400x magnification under the compound microscope.
-Bryana
|
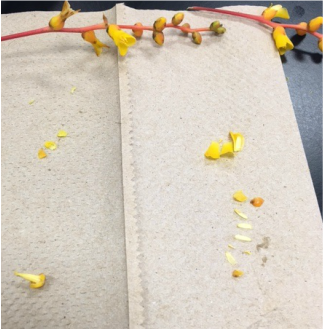
Image of the floral dissection of Dykia 'Burgundy Ice' Burgundy Ice Dykia. This flower is considered zygomorphic or bilateral and it is a complete flower, because it contains sepals, petals, stamens, and carpels. This plant is perfect because it contains both female and male parts. It is also considered a superior ovary, because each whorl is above the ovary. In the image you can see the petals, stamens, sepals, and carpal. This was my most favorite activity of the day, because it was interesting to pull each piece of the flower apart just to get to the inside in order to see the female ovaries.
-Bryana
|
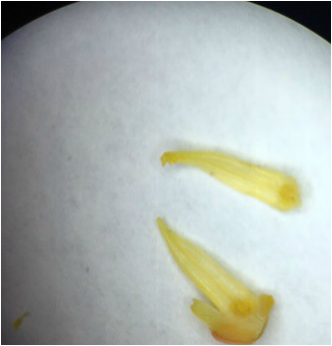
Image is showing the longitudinal sectioning of the ovary in the Dykia Burgundy Ice flower. In the photo, you can see the ovules in the ovary.
|
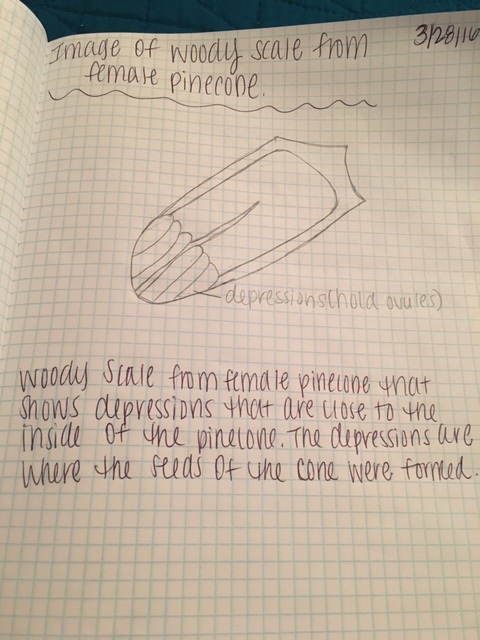
Drawn image of a woody scale from a female cone. This picture was not drawn from a magnification, but just taken as as a regular photo. In the drawing, you can see the depressions in the cone.
-Bryana
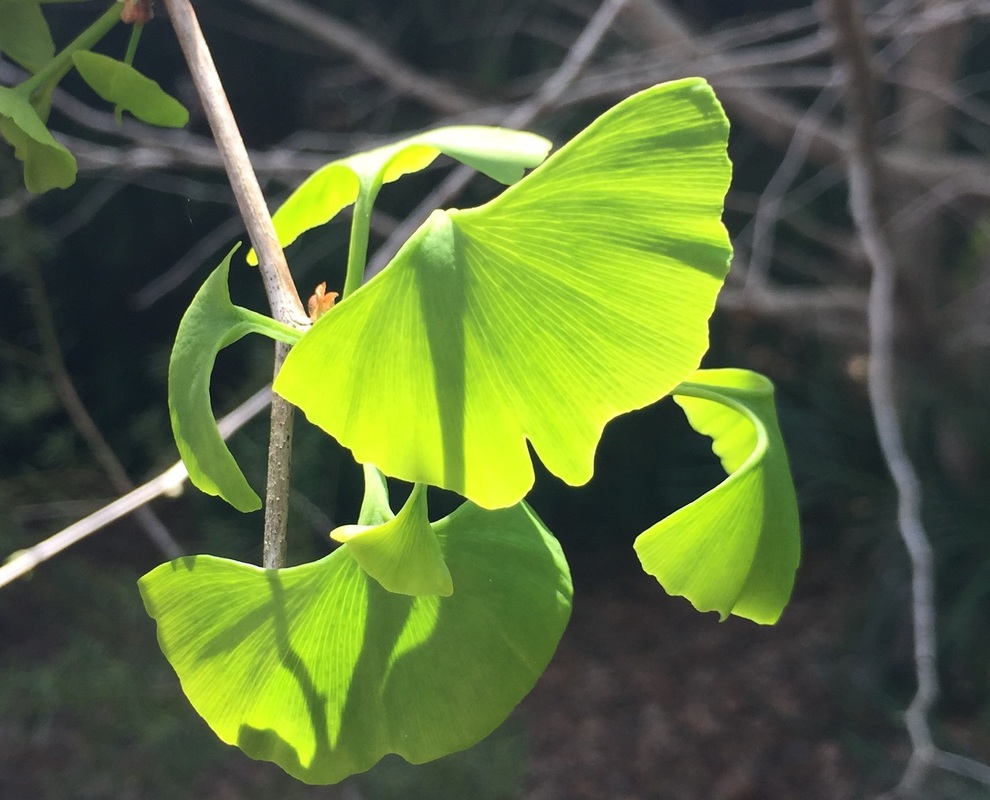
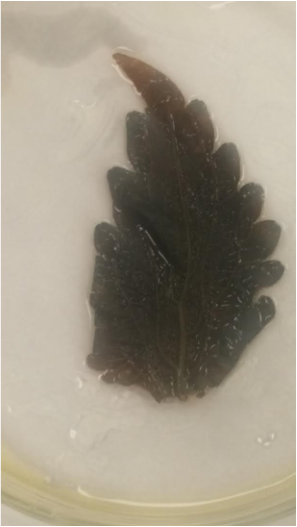
Ginkgo biloba, the only living member of the phylum Ginkgophyta. Also referred to as the maidenhair tree, easily recognized by its fan-shaped leaves with their openly branched, dichotomous pattern of veins, Ginkgo are unique to other gymnosperms because they are deciduous, meaning its leaves turn a beautiful golden color before falling in autumn. - Christine
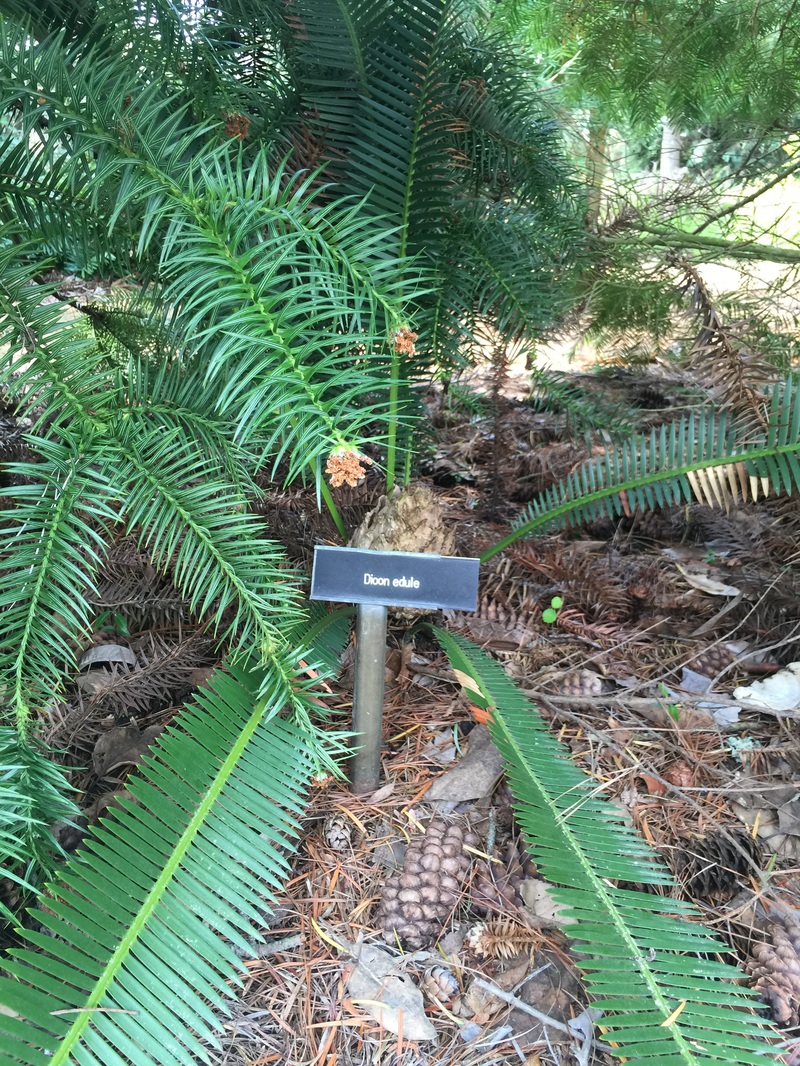
Dioon edule of Phylum Cycadophyta. Cycads are palm-like plants found mainly in tropical and subtropical regions. They are often very toxic containing neurotoxins and carcinogenic compounds. - Christine
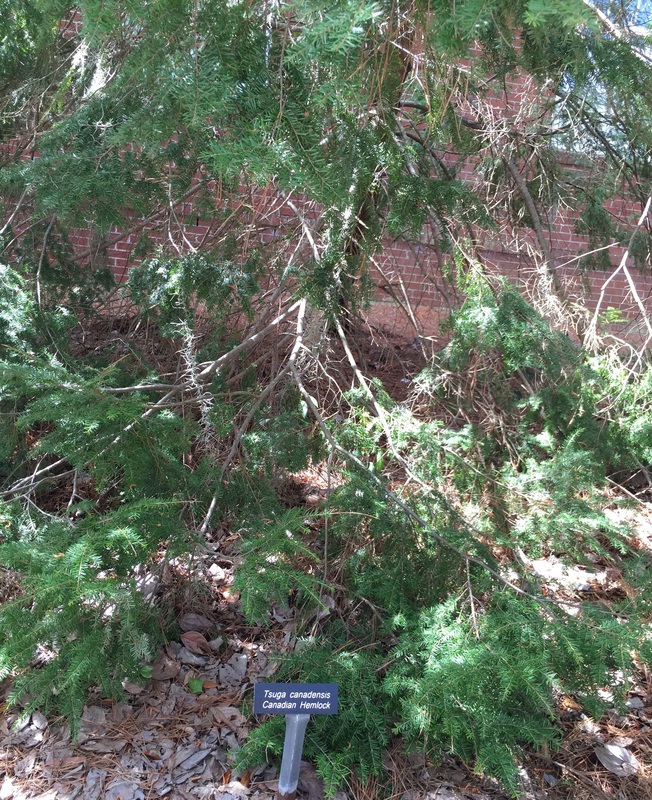
Tsuga canadensis (Canadian Hemlock) of Phylum Coniferophyta. Conifers are the most numerous and widespread of the gymnosperm phyla. - Christine
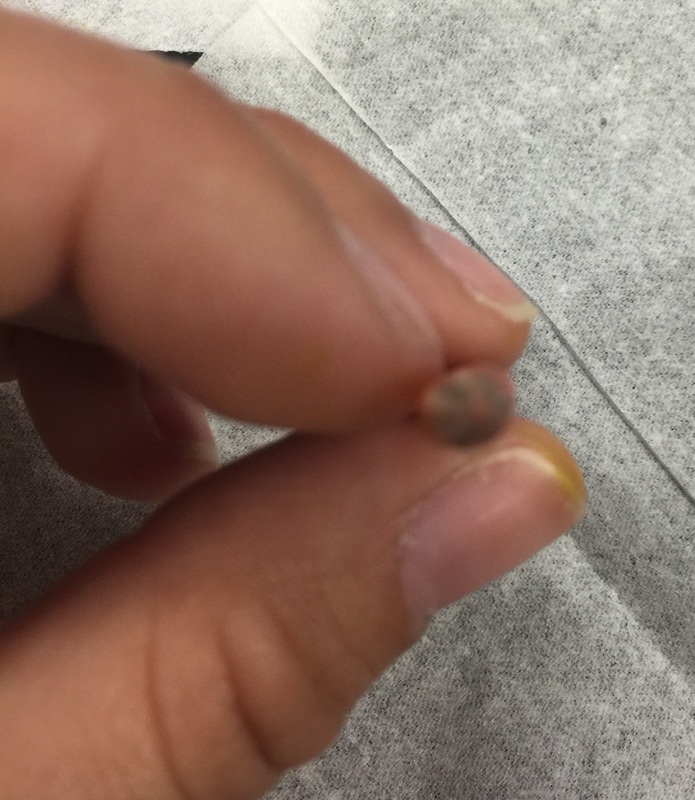
Image shows a top view of a closed Aloe maculata bud plucked from it's plant located near the Sports Center on campus. - Christine
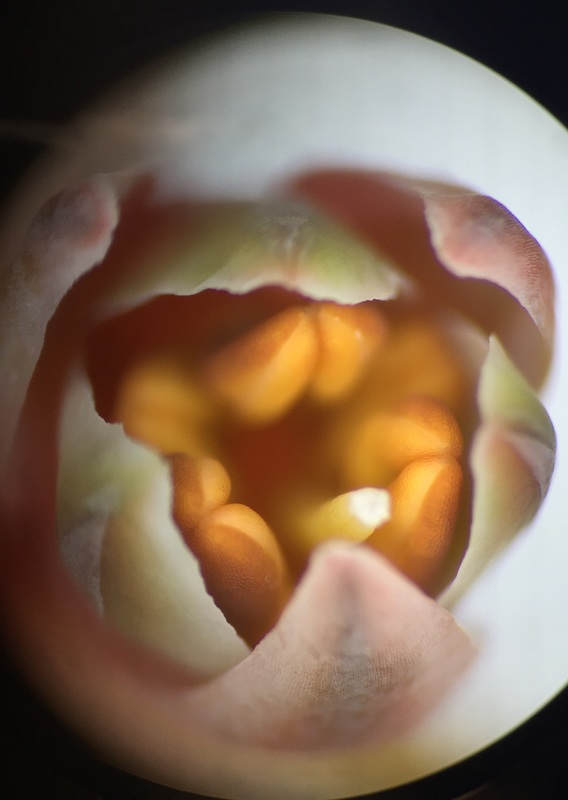
Image shows a top view of an open Aloe maculata bud viewed under 30x total magnification using the dissecting microscope. We see 3 outter sepals protecting the 3 inner petals. We see 6 anthers, the top part of stamens, surrounding the pistil. The stigma is the very top, sticky part of the pistil and the style is the neck region that leads down into the ovary of the flower. The flower is zygomorphic in that it has bilateral symmetry. It is considered incomplete because it does not have 4 whorls. It is perfect because it has both male and female parts and its ovary is inferior. - Christine
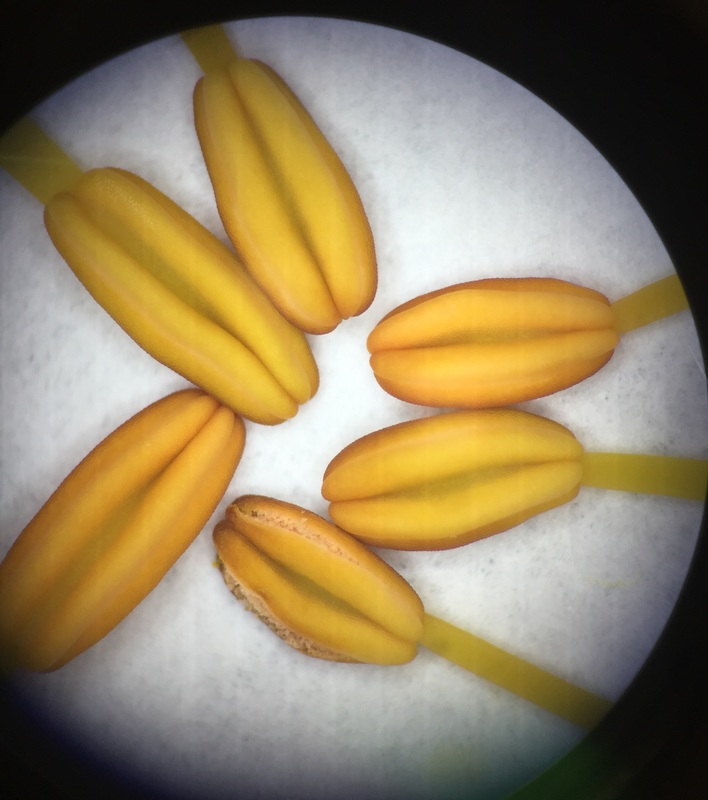
Image shows the 6 anthers plucked from an Aloe maculata flower. Note, that the anther on the bottom has ruptured and you can see all the pollen that just one anther releases. Viewed under 20x total magnification using the dissecting microscope. - Christine
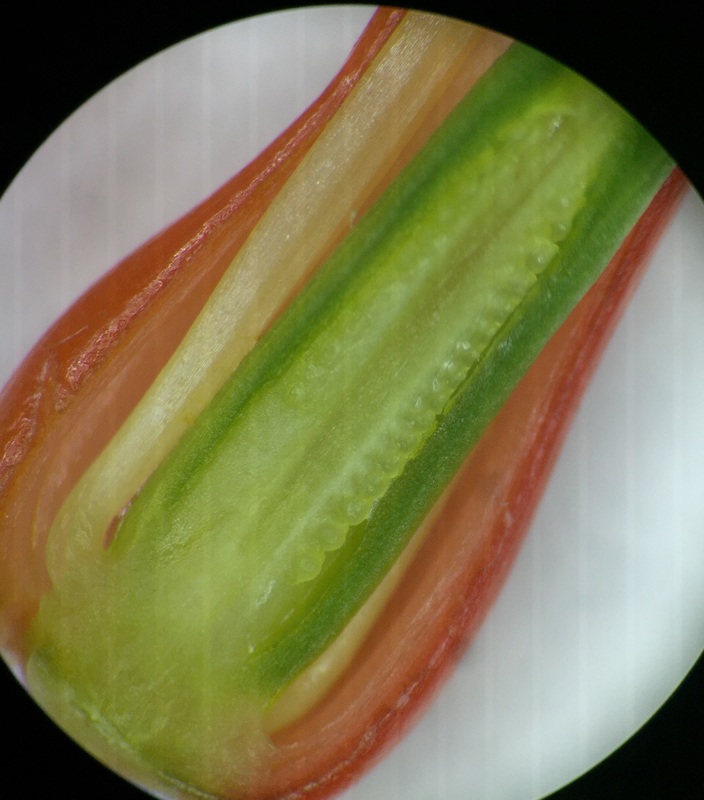
Image shows a longitudinal section of an Aloe maculata ovary viewed under 30x total magnification using the dissecting microscope. This image focuses on the many immature ovules encased in the ovary. We also see the receptacle, which is at the bottom of the ovary. - Christine
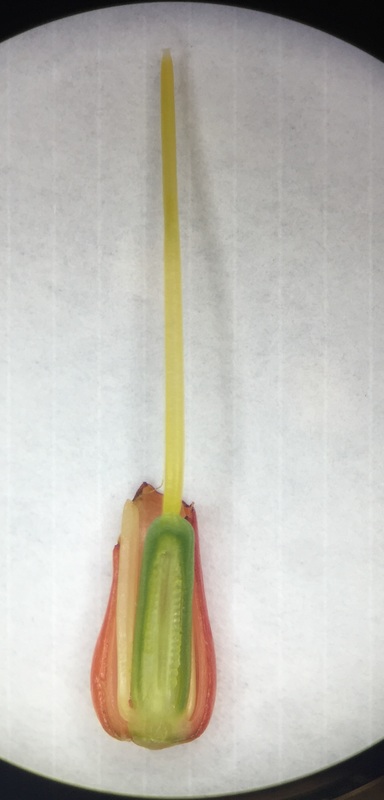
Image shows a longitudinal section of an Aloe maculata carpel viewed under 7.5x total magnification using the dissecting microscope. The very top, sticky part of the pistil is the stigma. The neck region that leads down into the ovary is the style. The whole structure at the bottom is called the ovary, which encases the many ovules we see in this view. The very bottom of the ovary is called the receptacle. This was my favorite specimen of the day, not only because it was fun going out and collecting it, but also because I'm proud of my longitudinal section. - Christine
|
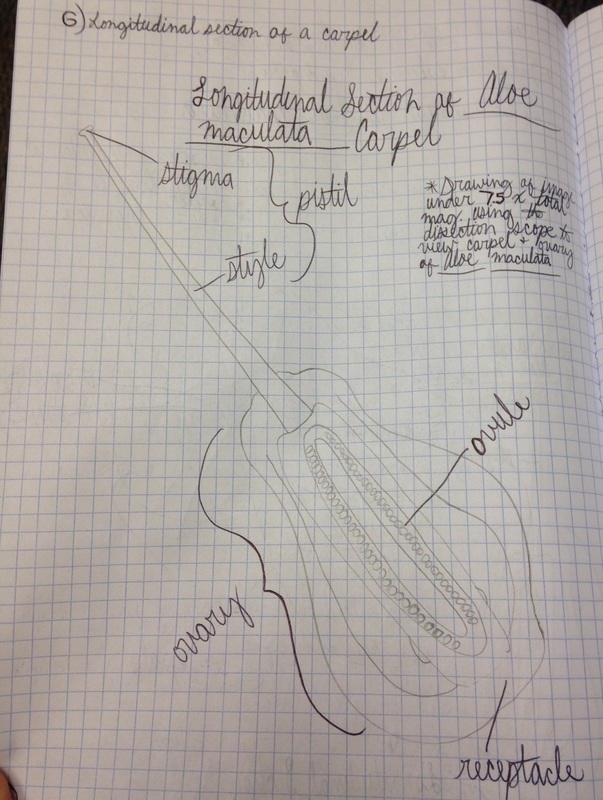
Drawing shows a longitudinal section of an Aloe maculata carpel viewed under 7.5x total magnification using the dissecting microscope. The very top, sticky part of the pistil is the stigma. The neck region that leads down into the ovary is the style. The whole structure at the bottom is called the ovary, which encases the many ovules we see in this view. The very bottom of the ovary is called the receptacle. - Christine
|
Roots and C-ferns Shoot Cuttings and Observations April 11,2016
Today's lab consisted mainly on the focus of roots.
Goal Objectives:
-Identify the external features of plant roots , including root hairs
-Identify the internal anatomy of plant roots
-Distinguish monocot roots from those of dicots, both from external morphology and from internal anatomy
-Describe the principle functions of roots
In today's lab, we worked hands on with identifying the different roots of a monocot (corn) and dicot (pea) seedling. We began a plant root shooting, a culture of cat grass, and transplanted our sporophyte cultures into soil. From today's lab, we have learned the two different types of rooting systems and the internal root anatomy of a monocot and dicot root. Also walked away with learning something, we never knew could happen which is that a plant can grow after cutting its stem.
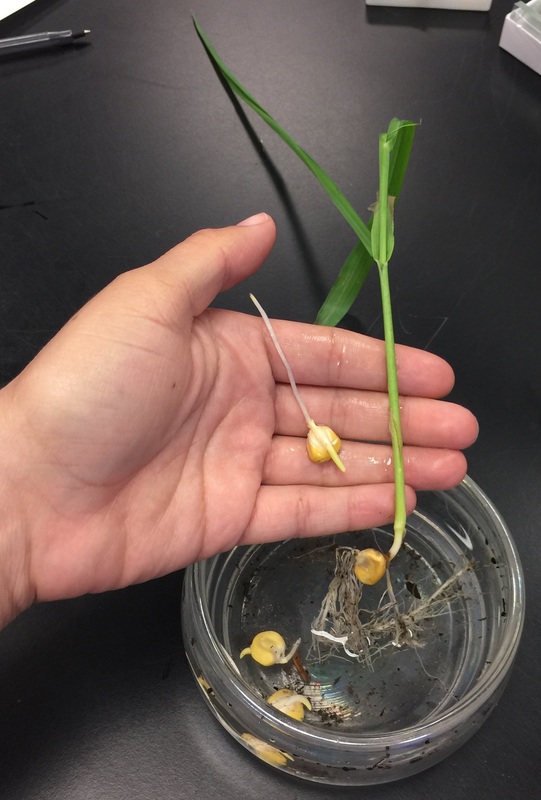
Monocot roots of corn plants at different stages of development. In the more mature plant, you can see the shoot-borne or "adventitious" roots growing downward out of the bottom of the shoot. The primary seminal root is growing downward from the corn, but is very difficult to see with the many secondary roots growing out of it. Secondary roots are very important in absorption. The secondary roots of monocots do not run as deep as the secondary roots of dicots. - Christine
|
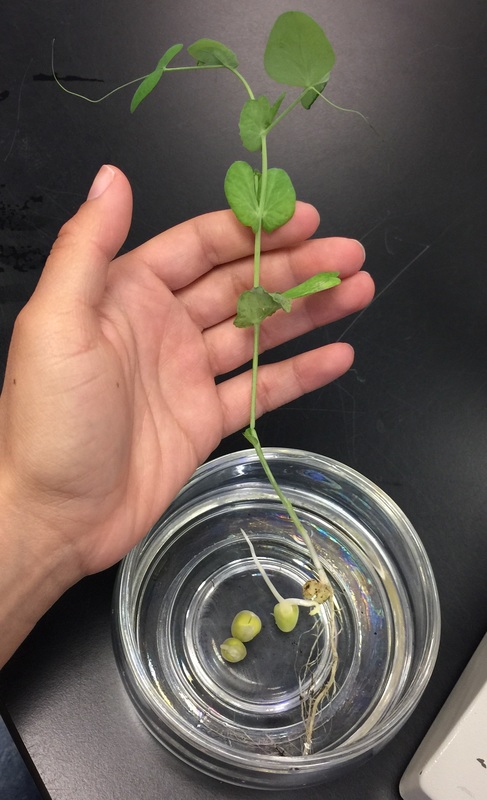
Dicot roots of pea plants at different stages of development. In the more mature plant, you can see the long taproot growing downward from the pea with secondary roots branching off of it. Secondary roots of dicots are less extensive than those is monocots. - Christine
|
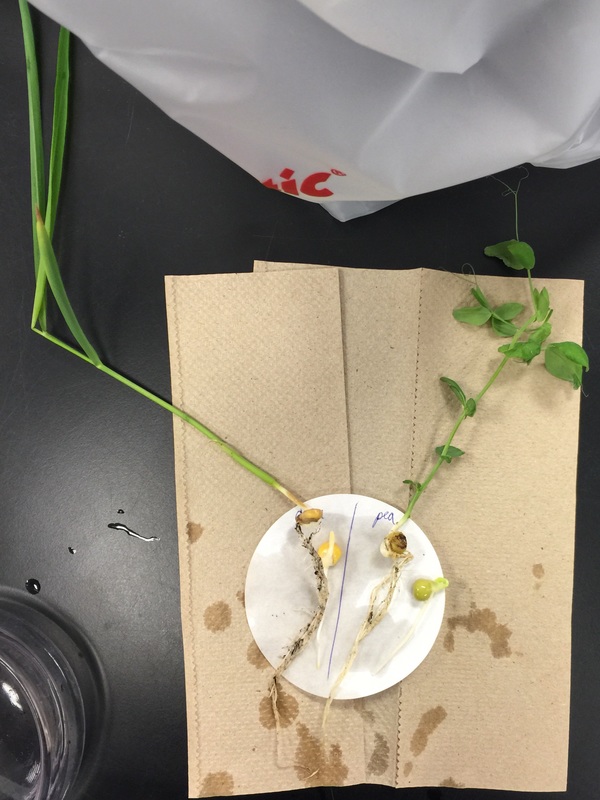
A comparison of the monocot roots of the corn plant and the dicot roots of the pea plant at two different stages of development- early on in development and about 3 weeks into development. In the monocot roots of the corn plant (left), we see many secondary roots growing out of a very difficult to see primary seminal root. We also see the shoot-borne or "adventitious" roots that arise from the stem and give rise to a fibrous root system. In the dicot roots of the pea plant (right), we see the taproot (or primary root), which grows directly downward giving rise to branch/lateral roots (secondary roots), which collectively form the taproot system. - Christine
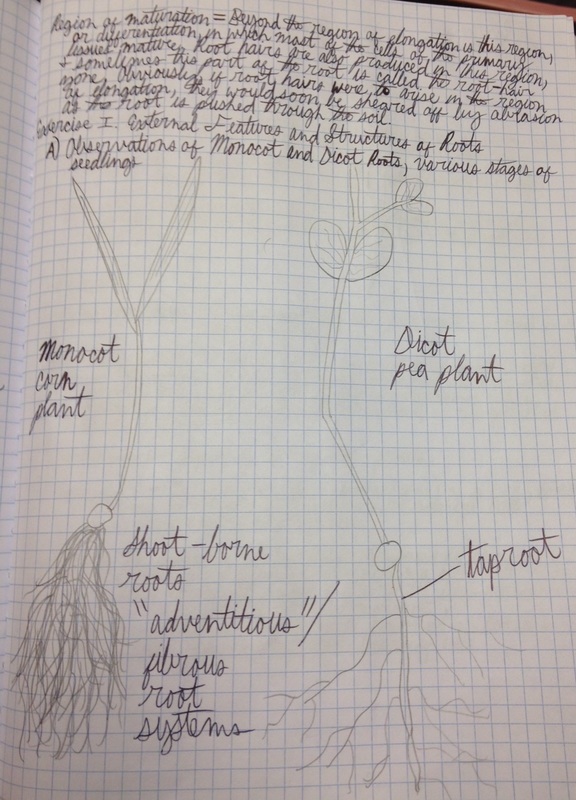
Drawing comparing the monocot roots of the corn plant and the dicot roots of the pea plant at about 3 weeks into development. In the monocot roots of the corn plant (left), we see many secondary roots growing out of a very difficult to see primary seminal root. We also see the shoot-borne or "adventitious" roots that arise from the stem and give rise to a fibrous root system. In the dicot roots of the pea plant (right), we see the taproot (or primary root), which grows directly downward giving rise to branch/lateral roots (secondary roots), which collectively form the taproot system. - Christine
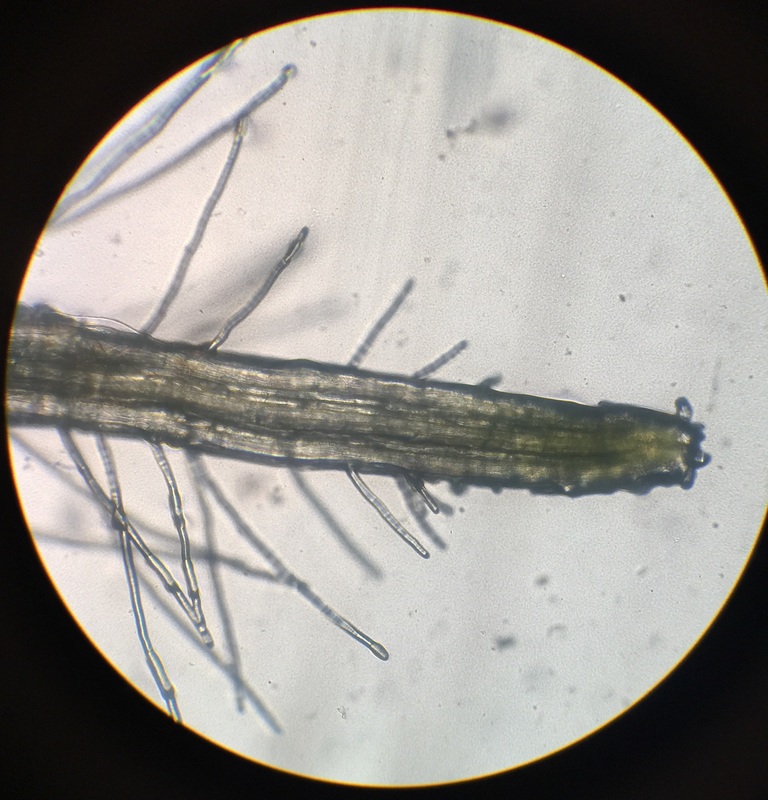
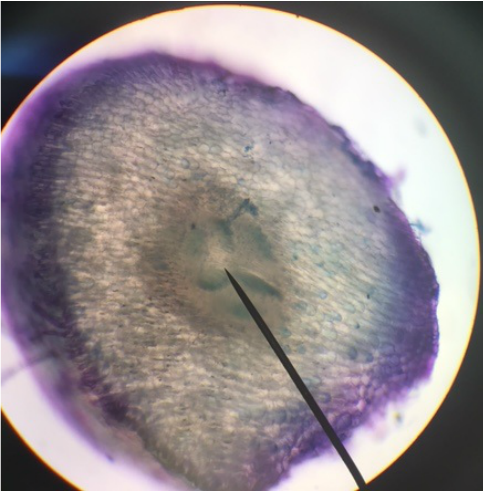
Roots of my C-fern culture at 400x total magnification. The rootcap refers to the yellowish tip of the root. The rootcap is a mass of living parenchyma cells that protects the the apical meristem behind it and helps the root penetrate the soil. As growth occurs, peripheral cells of the rootcap secrete large mounts of mucilage which lubricates the root as it passes through the soil. Eventually, the peripheral cells (border cells) shed from the rootcap and new cells are added to the rootcap. The root hairs are the tubular extensions of the epidermal cells. They greatly increase the absorptive surface of the root. Root hairs are short-lived and confined to the region of maturation. New root hairs are produced just behind the rootcap. - Christine
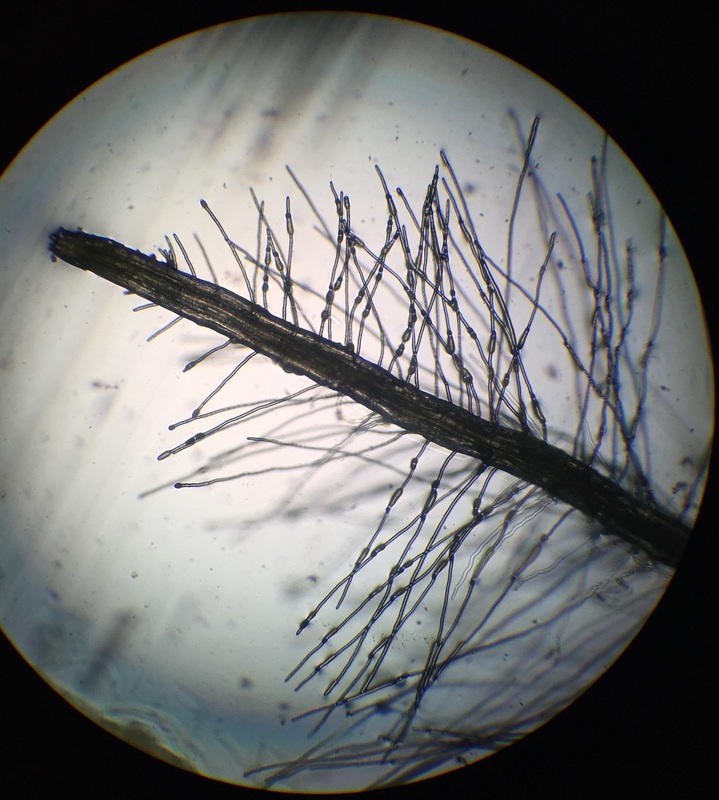
Photo of the roots of my C-fern culture at 100x to show the extent of the root hairs in more detail. - Christine
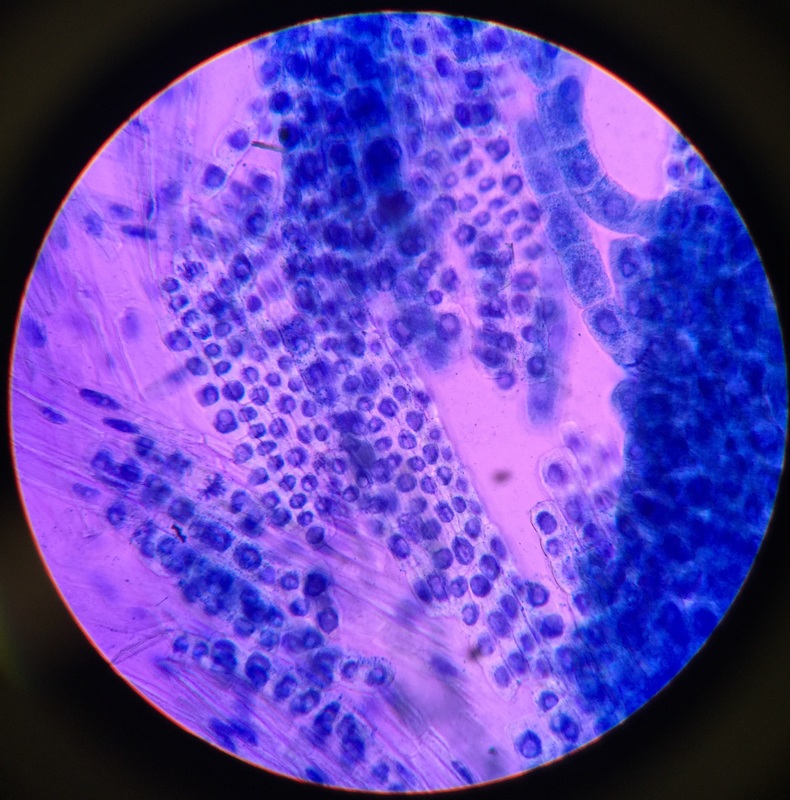
Photo shows mitotic squash of the mitotic cells of Allium cepa (onion) root. Specimen obtained by cutting the apical meristem region of the root, in which growth (elongation) of the root occurs. Speciemen was first put in a solution of Carnoy Fixative I, then in an 18% HCl solution for 4 min., and finally a solution of Carnoy Fixative II for another 4 min. Before staining the tip of the root with TBO to view the mitotic cells, we squashed the specimen onto a slide with a plastic pipette. The two mitotic cells of interest are undergoing metaphase (in quadrant III of the image) in which you begin to see the spindle in the area formerly occupied by the nucleus. During this phase, the chromosomes migrate to the equitorial plane of the spindle. There are two cells undergoing metaphase in quadrant III- one at full metaphase in which the chromosomes lie directly and compactly on the plane of the spindle and the other less compacted on the plane. 400x total magnification - Christine
|
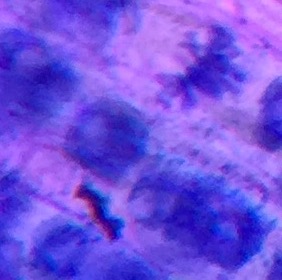
Photo of a mitotic squash of the mitotic cells of Allium cepa (onion) root undergoing metaphase, TBO stain was used. 400x total magnification and zoomed in to show clarity and detail. - Christine
|
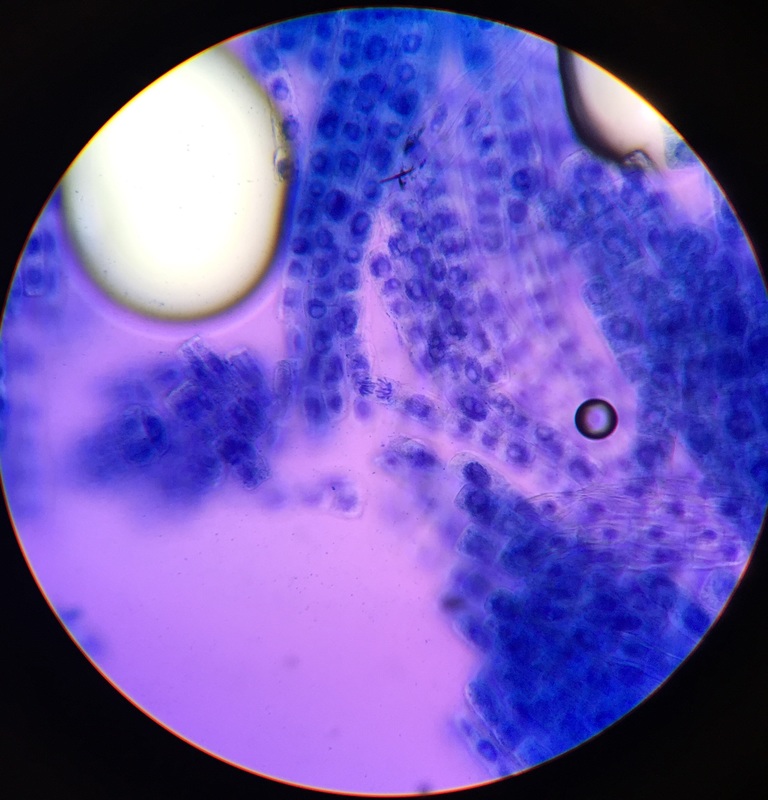
Photo shows mitotic squash of the mitotic cells of Allium cepa (onion) root. Specimen obtained by cutting the apical meristem region of the root, in which growth (elongation) of the root occurs. Speciemen was first put in a solution of Carnoy Fixative I, then in an 18% HCl solution for 4 min., and finally a solution of Carnoy Fixative II for another 4 min. Before staining the tip of the root with TBO to view the mitotic cells, we squashed the specimen onto a slide with a plastic pipette. The mitotic cells of interest are undergoing anaphase (in the very center of the image) in which the centromeres of the sister chromatids separate. The sister chromatids, now daughter chromasomes, then move to opposite poles of the spindle. 400x total magnification. This was my favorite specimen of the day because it was very interesting to capture the mitotic phases of these cells as they were happening in real time. - Christine
|
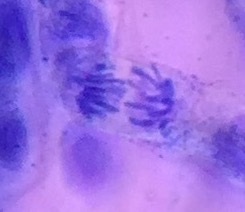
Photo of a mitotic squash of the mitotic cells of Allium cepa (onion) root undergoing anaphase, TBO stain was used. 400x total magnification and zoomed in to show clarity and detail. - Christine
|
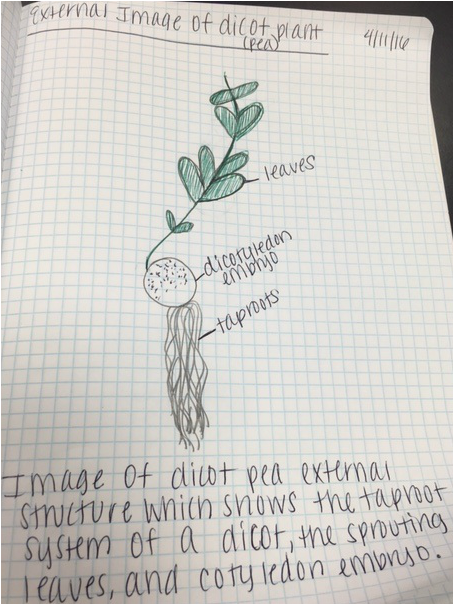
Hand drawn image of the external feature of a dicot (pea)roots. In the drawing, you can see the taproots, leaves, and outer coating of the embryo. There is no magnification for this picture.
-Bryana
Drawn image of the internal anatomy of the dicot seedling. The picture was drawn after being taken in 40x magnification.
-Bryana
|
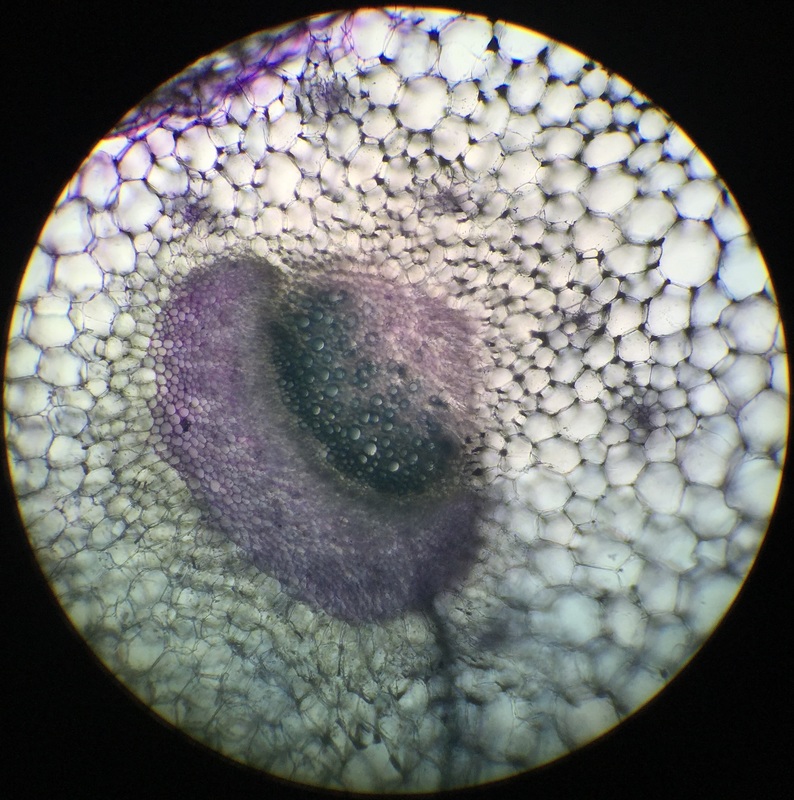
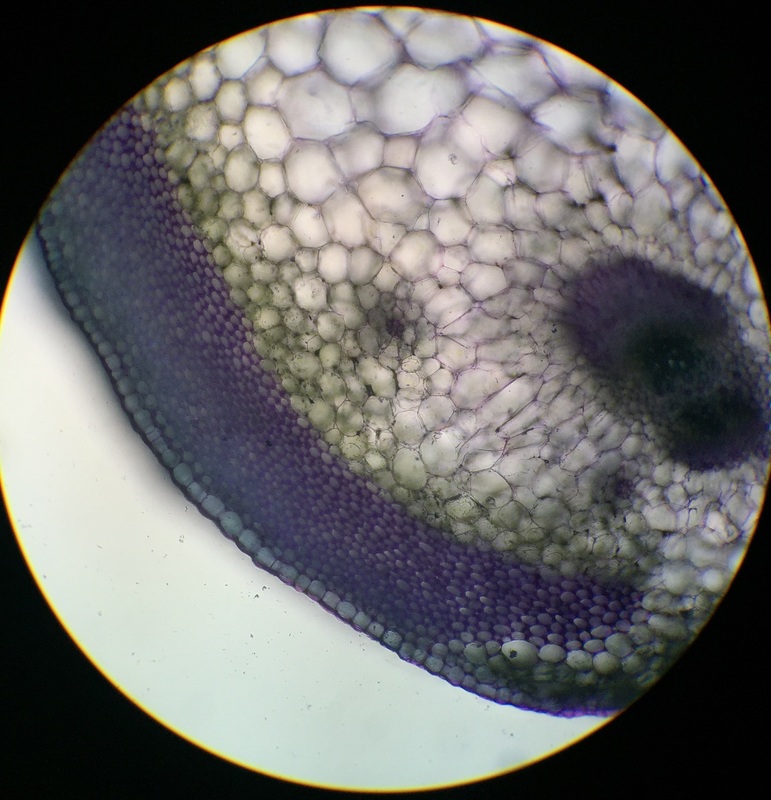
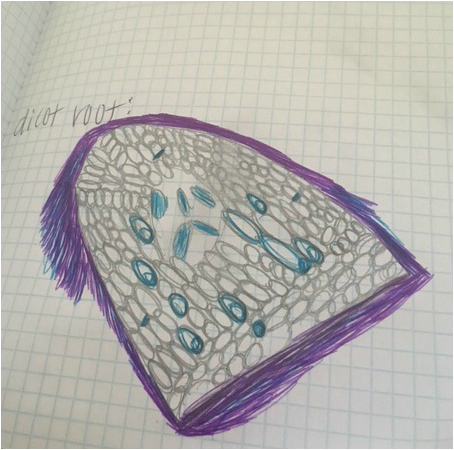
Cross sectioning of root for the dicot seedling. This image was taken in 40x magnification under the compound microscope.. This root was stained with Toluidine Blue O stain. The outer thick layer of purple is the pericarp , while the inner blue pieces are the xylem tissues.
-Bryana
|
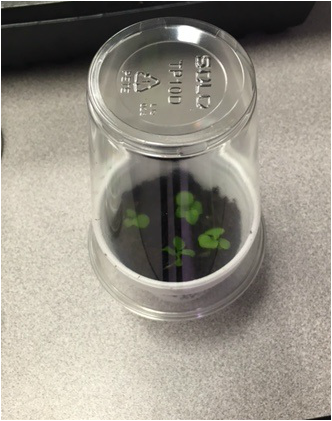
Image of the C-fern sporophytes after transplating them into the soil. During this process, the sporophytes from our media were removed and put into soil where we will monitor them over the next few weeks in order to track their growth. I would have to say this was my most exciting part of lab, because liked seeeing how much my C-ferns had grown. I cannot wait to see how much they grow over the next few weeks in the soil.
-Bryana
