Lab1: Botanical explorations with and without Dissecting Microscopes
Objectives: We established partners and familiarized ourselves with the a microscope.To obtain knowledge of a dissecting microscope we needed to gather specimens to observe.To do this, we gathered components of various plants throughout Armstrong's campus(next to Lane Library and the Science Center) and placed them under the microscope to see what lies beneath.

This flower belongs to the Dark Red Poony type. Bloom was taken from outside of the Science Center. Here, it is shown without magnification.
Photo credit: Chris Winarski
 Citrus fruit under the microscope at 10x magnification. Citrus fruit under the microscope at 10x magnification.
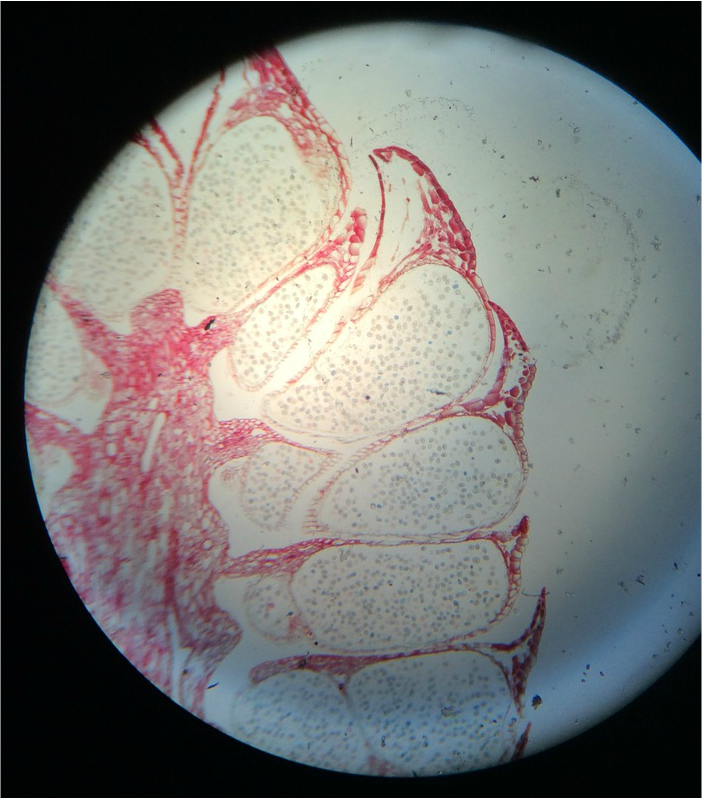
The waxy, reflective sheen of Citrus Sulcata, is a protective coating that helps seal the body from water absorption.
|

This citrus fruit belongs to the species Citrus sulcata and was taken from the corner of science drive and kitty corner to the police station on Armstrong's campus. This picture was taken with a dissecting microscope at the magnification 7.5x with no stain and whole mount.
Photo Credit: Jonathan Pope
|
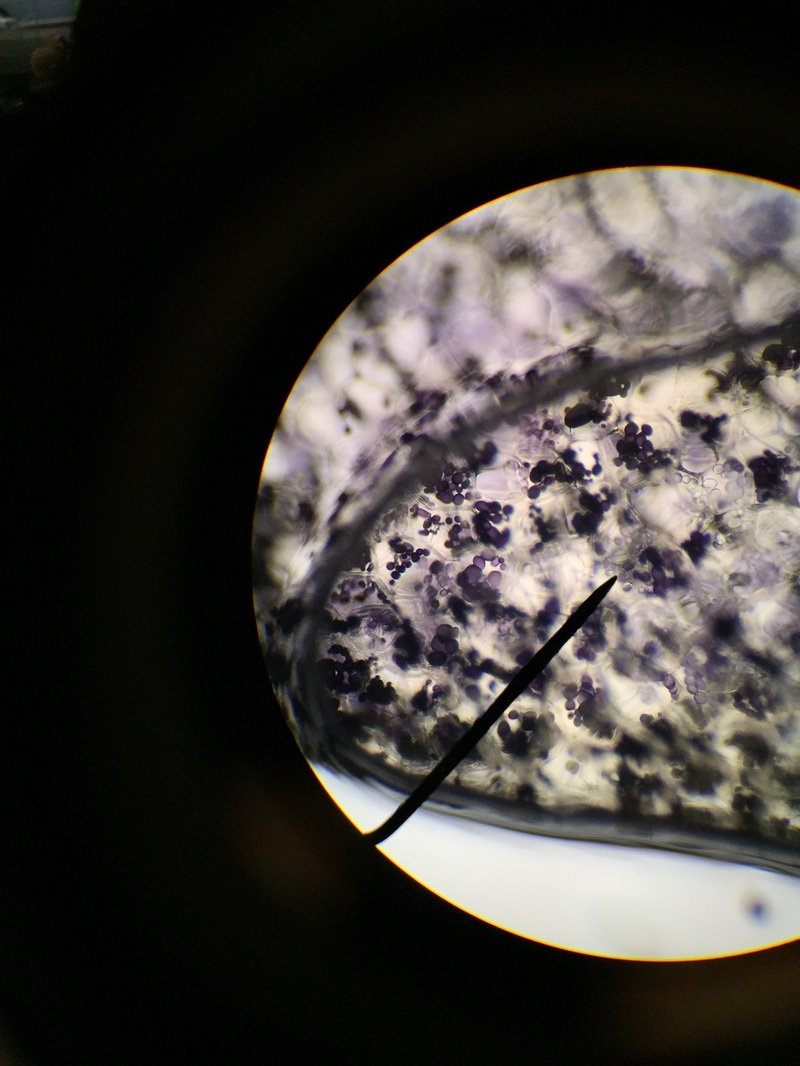
This picture is a magnified 23x of the stigma from the Camellia flower. It is also whole mounted with no dye added.
|

This specimen is a species of the Camellia species found near the fountain on campus at Armstrong State University. The picture depicts a whole mount preparation with no magnification and no dye added.
Photo Credit: Stephen Gumann
|
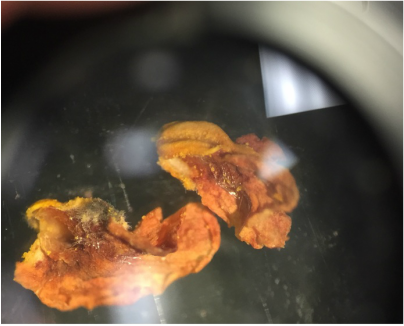
Our group was intrigued by two qualities. The first being the texture of our flowering plants and how that helps protect them from the environment and desiccation. Secondly, the stigma of our pink flower had a silver river of fungus or reproductive threads which was not visible with the naked eye.
Lab 2: Plant Cells & Scientific Drawings
Lab Objectives & Learned Objectives
1.) To be able to orchestrate the production of and observe a wet-mount slide under a microscope
2.)To obtain knowledge of different slide preparations
3.) To find and decipher features of a living plant cell
4.) To use biological stains to highlight and objectify plant cell features
5.) To produce a scientific diagram
Johnathan and Stephen prepared different slide mounts (smear, cross section) of 6 different organisms and observed them under a compound microscope. This lab gave us a closer look of the cells of the: Allium cepa (onion), Elodea canadensis (Canadian Pondweed), Capsicum annuum (Bell pepper), Tradescantia, Solanum tuberosum (potato), and the Musa sp. (banana). We observed and obtained knowledge of different functions and components of plant cells.
Plant Illustrations
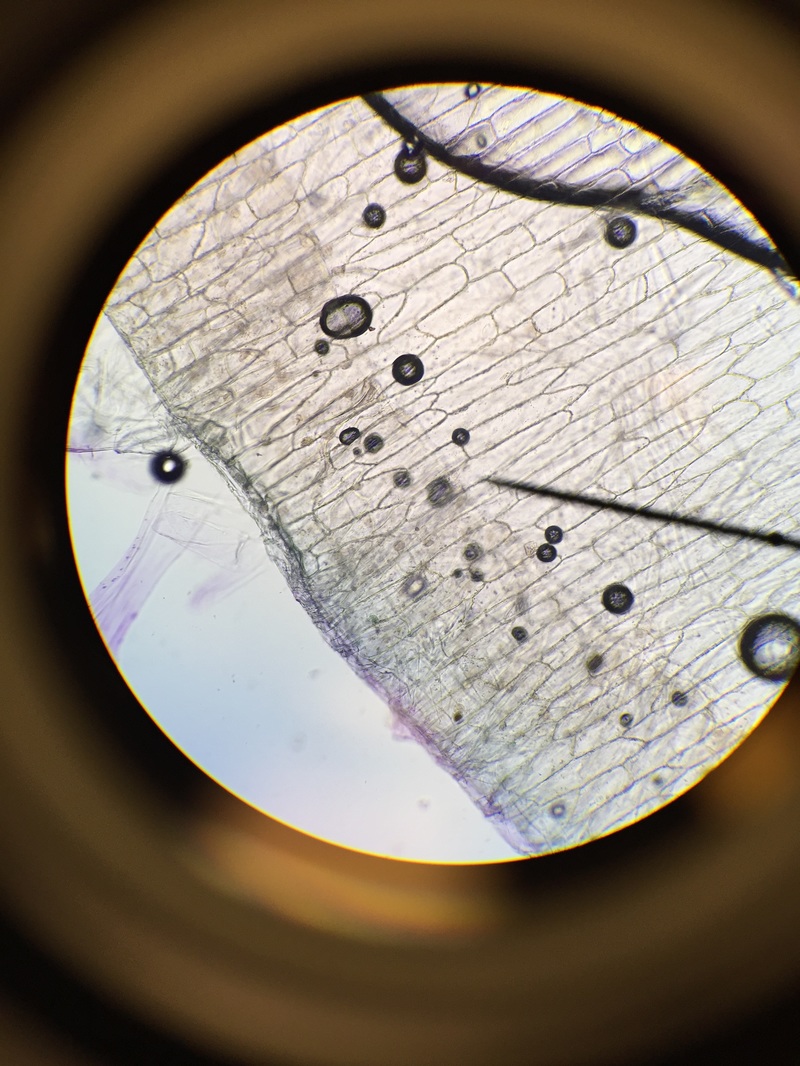
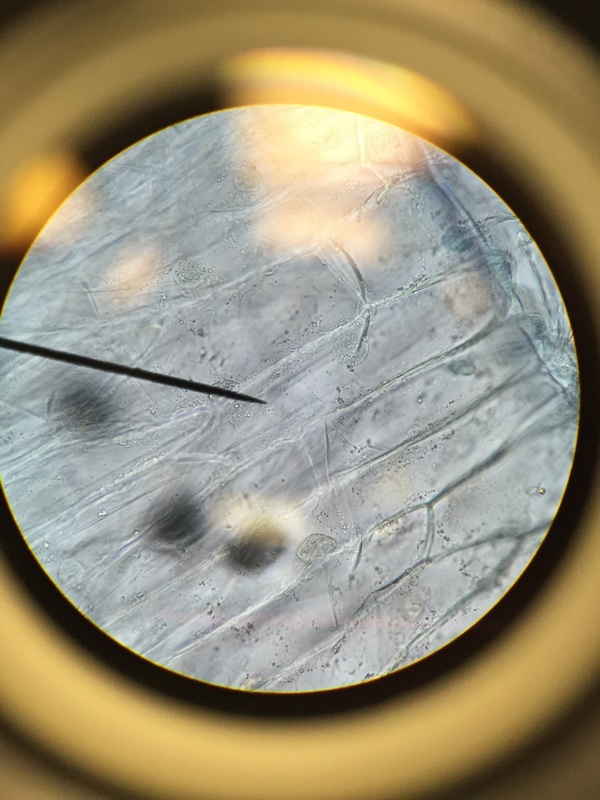
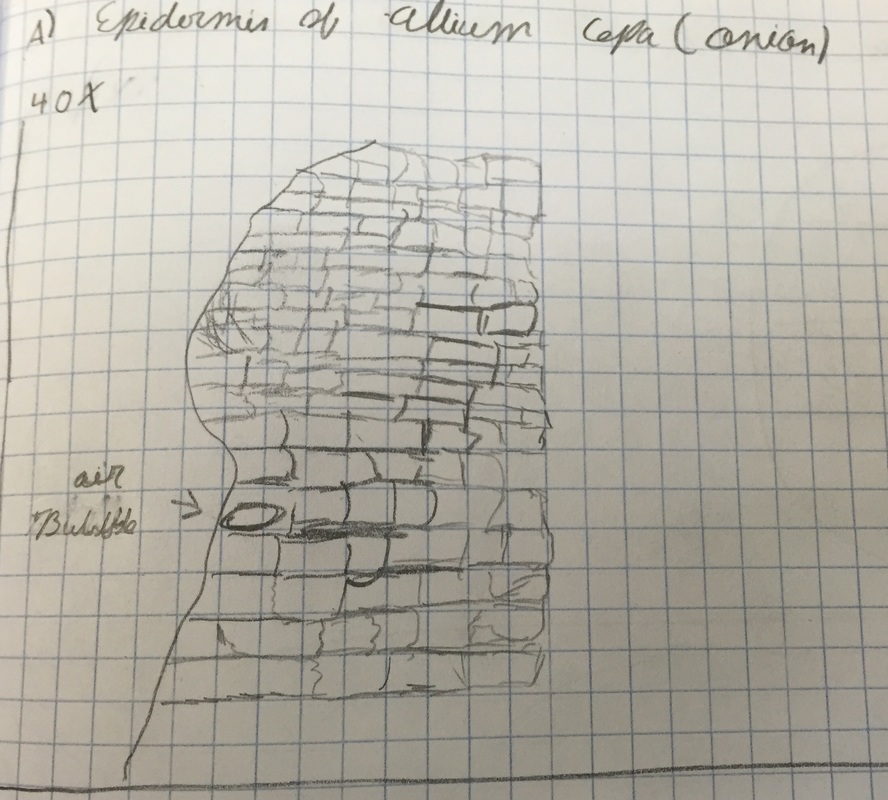
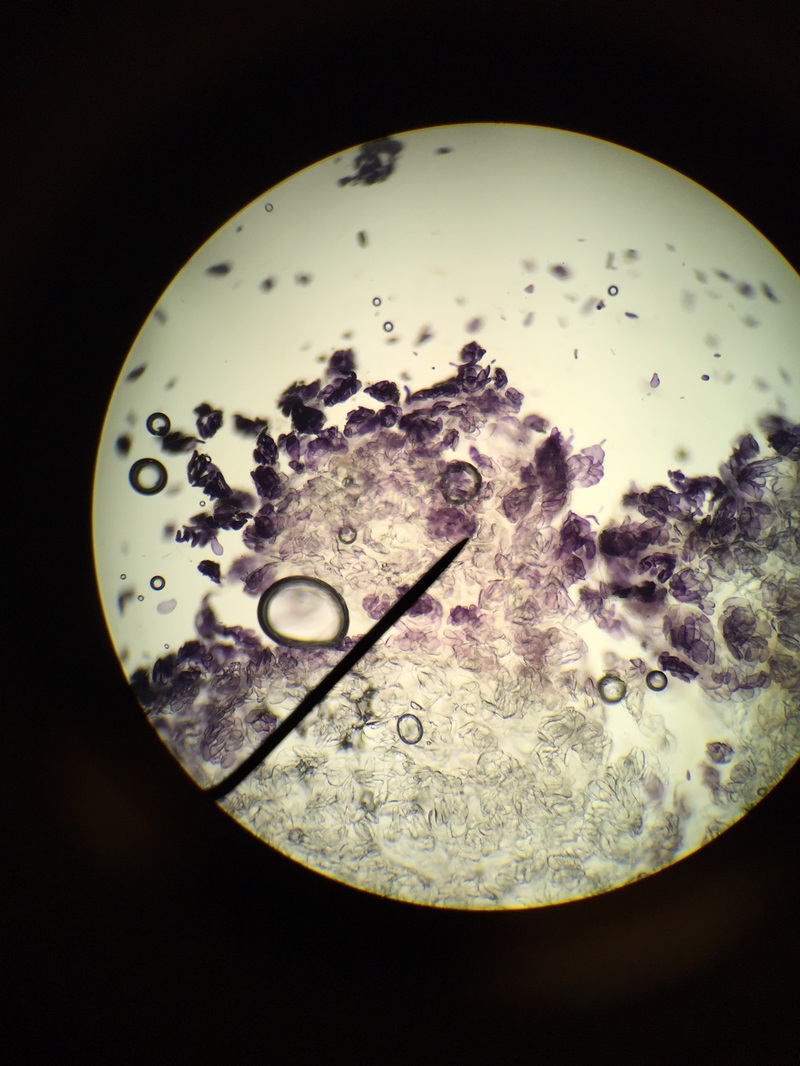
In the first picture, we observed at 100X magnification, a longitudinal section of the epidermis of an Allium Cepa. The addition of Toluidine Blue stain produced a contrast, which offered better perception of the transparent Allium Cepa cells.The second image of Allium Cepa was stained and captured at 400X magnification. The third image is an illustration of Allium Cepa at 40X magnification; the marcostructure of the cell is clearly defined, but none of the organelles can be perceived.
Here you find Elodea Canadensis being shown in 40X, 100X and 400X, the individual cells and cell wall are clearly defined in both macro and micro. The 400X image has the addition of a solute of 5% CaCl; in this magnification aggregation of the cells are observed as the cell endues atrophy. I (Jonathan) enjoyed this experiment the most, because I was able to see a cause and affect relationship within the plant.
These pictures are depicting a wet mount of the Capsicum annuum fruit or the bell pepper at 400x magnification with distilled water. The left picture is of the green bell pepper, the middle is the yellow and the right is the red bell pepper. The carotinoids reflect different colors the fruits different pigments and protects cells from photo damage.
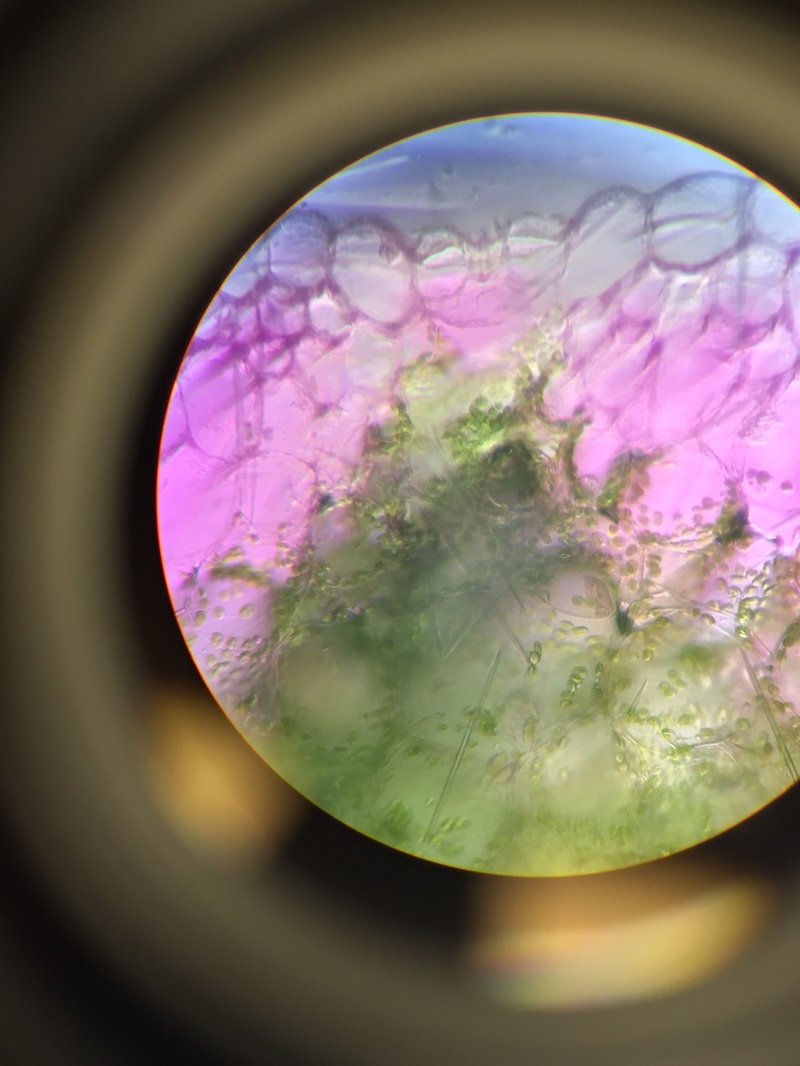
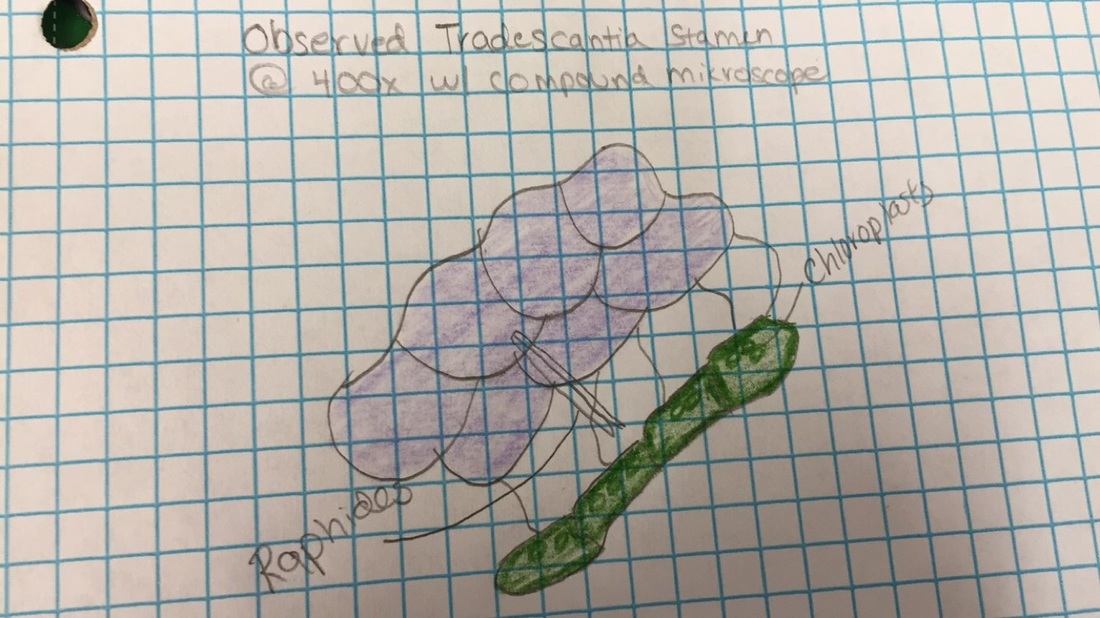
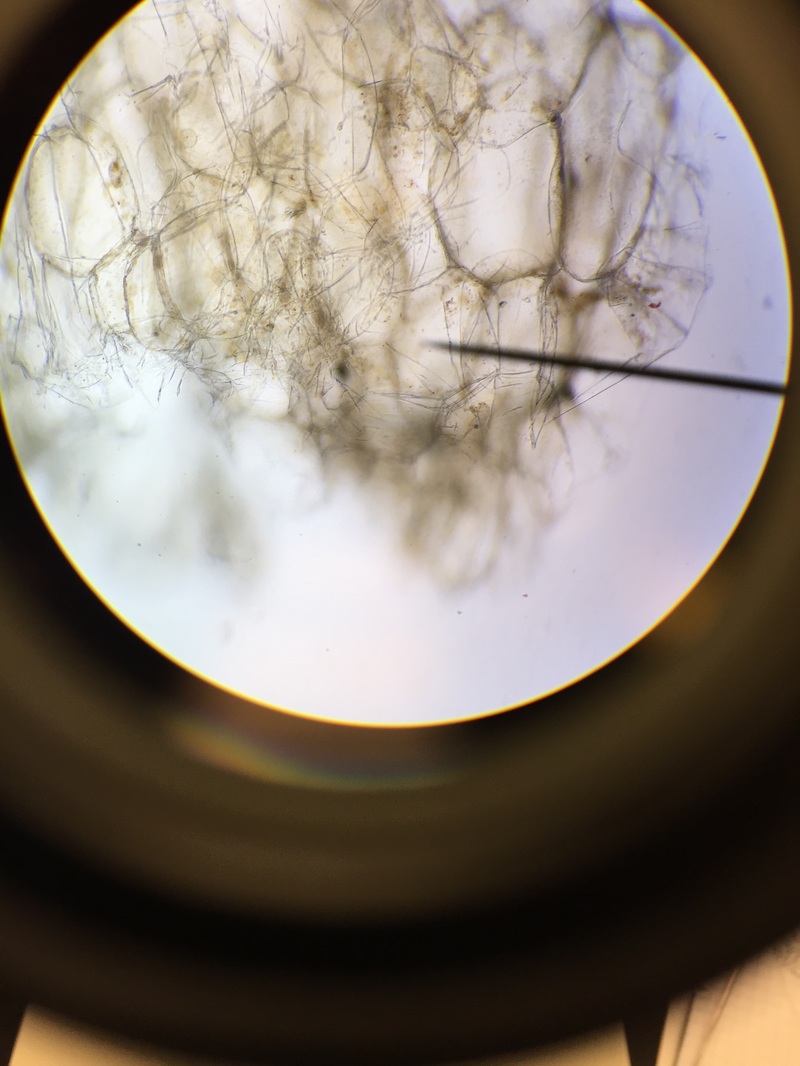
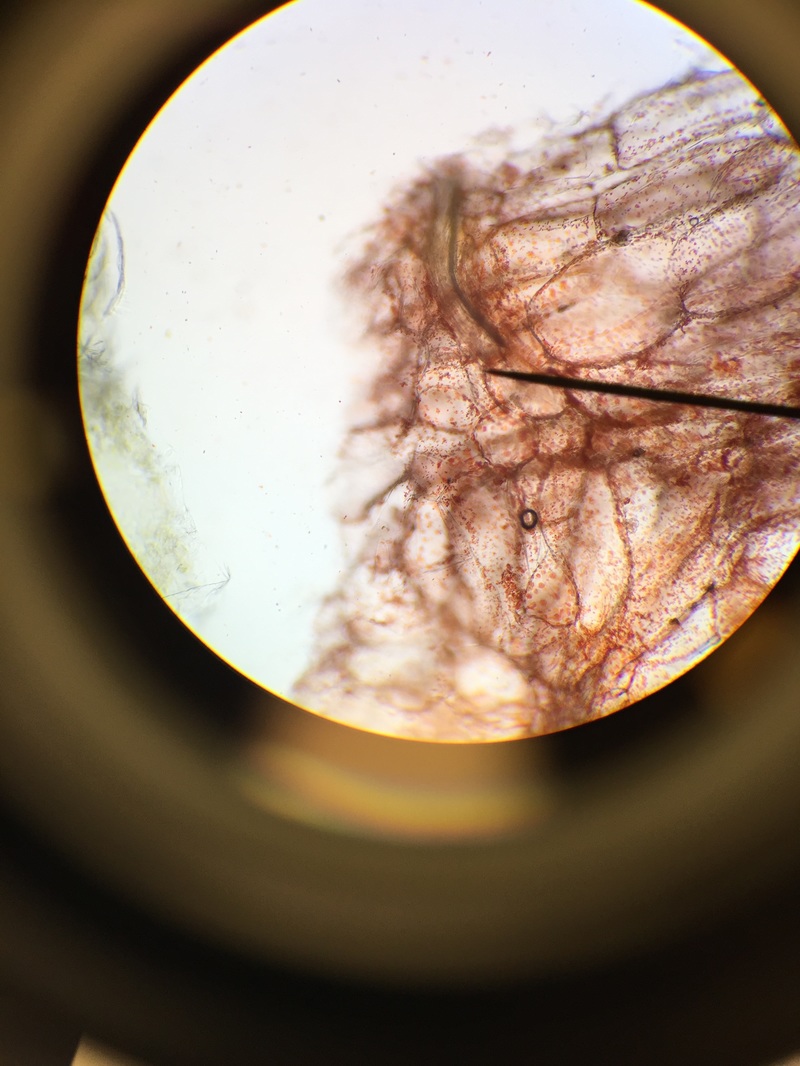
This picture depicts a cross section wet mount of Tradescantia stem under 400x magnification. This specimen was an interesting one to observe because you could see the cytoplasmic streaming and transportation of mitochondria. I (Stephen) didn't personally see them through my microscope but we did observe them from the microscope Dr. LP projected at the front of the room. The pink pigment illuminated from the vacuoles are easily seen along the top row of cells and the green chlorophyll embedded in the thylokoids are ever present in the lower deeper cells.
The above picture is a cross section wet mount of a potato (Solanum tuberosum) dyed with iodine and examined under 400x magnification of a compound microscope. The main highlight on the picture is the cell walls which look like alot of bubbles surrounding the starch molecules. The iodine highlights the starch molecules of the potato.
The above illustrations are comparing the quantity of starch between an unripe banana(left) and a ripe banana(right) or Musa sp.. Both slides were prepared using a smear mount and was dyed with iodine to highlight the starch molecules. Then observing them under 400x magnification under a compound microscope, it was revealed that the unripe banana possessed more starch than its latter more tasty companion.Stephen enjoyed this one the most out of all the mounts because it gave a clear comparison between fruits, its clinical application of why the fruit tastes different in maturation process, and it was an easy preparation.
Lab 3: Photosynthesis Lab - Chromatography, CO2 Consumption, and Starch Test
Goals/Ojectives:
1.) Use chromatography to separate and identify various pigments found in photosynthetic plant tissues.
2.) Explain why it would enhance a plant's success to have more than one type of photosynthetic pigment
3.) Demonstrate that carbon fixation during the "synthesis" reaction
4.) Use a starch test to examine the effects that carbon-starvation and light deprivation have on the synthesis reactions of photosynthesis
Learned Techniques:
We learned a great deal from this lab including: the absorption rate of different pigments, how it reflects, and that is what we perceive of plants.We also obtained a greater understanding of CO2 entering into a plant through its stomota at different times of the day and when it can use said CO2 because of the light entering the plant.
Chromatography
(The captions in this section will be encased in the pictures, please hoover over pictures for captions to appear)
(The captions in this section will be encased in the pictures, please hoover over pictures for captions to appear)
Part1:
Objective: the goal of this experiment is to achieve isolation and extraction of Beta carotene, Xanthrophyll, Chlorophyll A and B pigments.
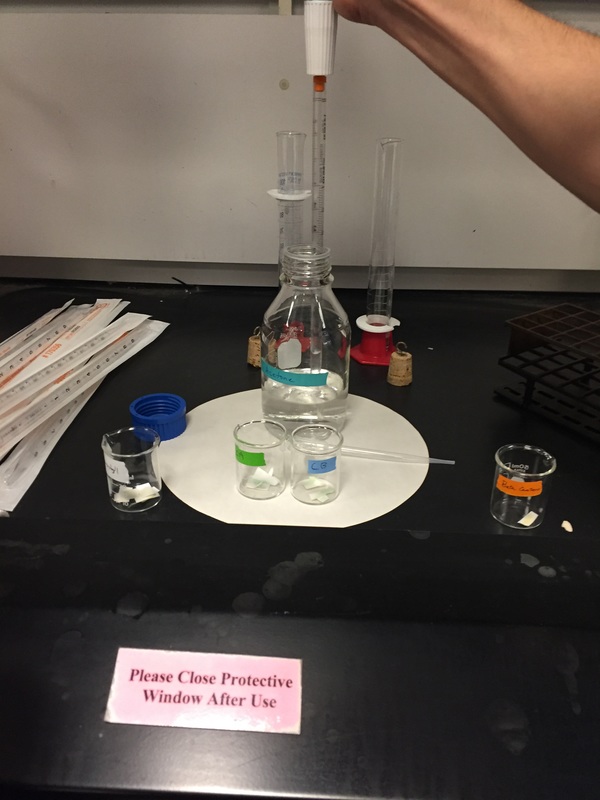
Input data on procedure of measuring Chromatography paper, gathering the leaf sample (Magnolia grandiflora), and extracting the sample.
The principle of chromatography allowed for the differentiation of of the four pigments, due to the variation rate passing through the paper; this occurs because of the difference of affinity of the pigments toward the chromatography paper.
Once separation occurs between the pigment on the paper, the paper is then divided into 4 portions of pigments. The portions are then placed into a acetone bath to extract the pigments from the paper; the solution is then run in an Spectrometer and compared.
Objective: the goal of this experiment is to achieve isolation and extraction of Beta carotene, Xanthrophyll, Chlorophyll A and B pigments.
Input data on procedure of measuring Chromatography paper, gathering the leaf sample (Magnolia grandiflora), and extracting the sample.
The principle of chromatography allowed for the differentiation of of the four pigments, due to the variation rate passing through the paper; this occurs because of the difference of affinity of the pigments toward the chromatography paper.
Once separation occurs between the pigment on the paper, the paper is then divided into 4 portions of pigments. The portions are then placed into a acetone bath to extract the pigments from the paper; the solution is then run in an Spectrometer and compared.

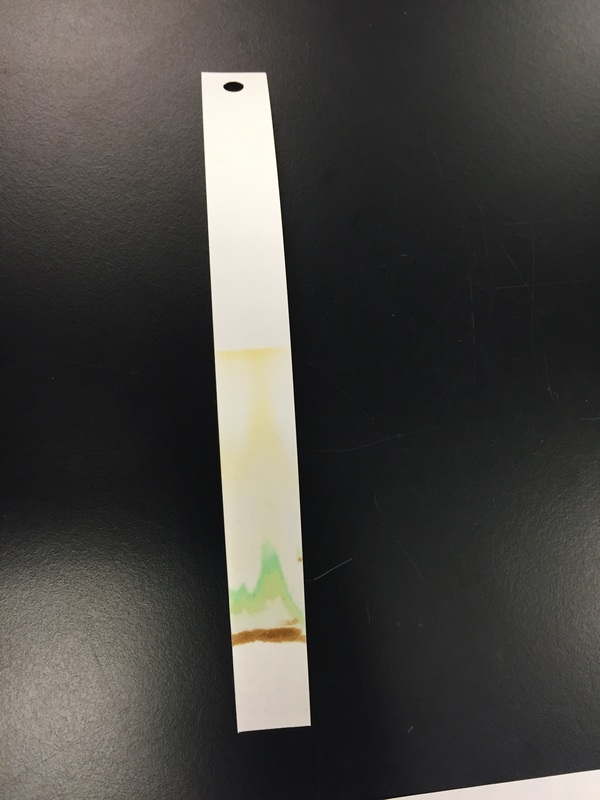
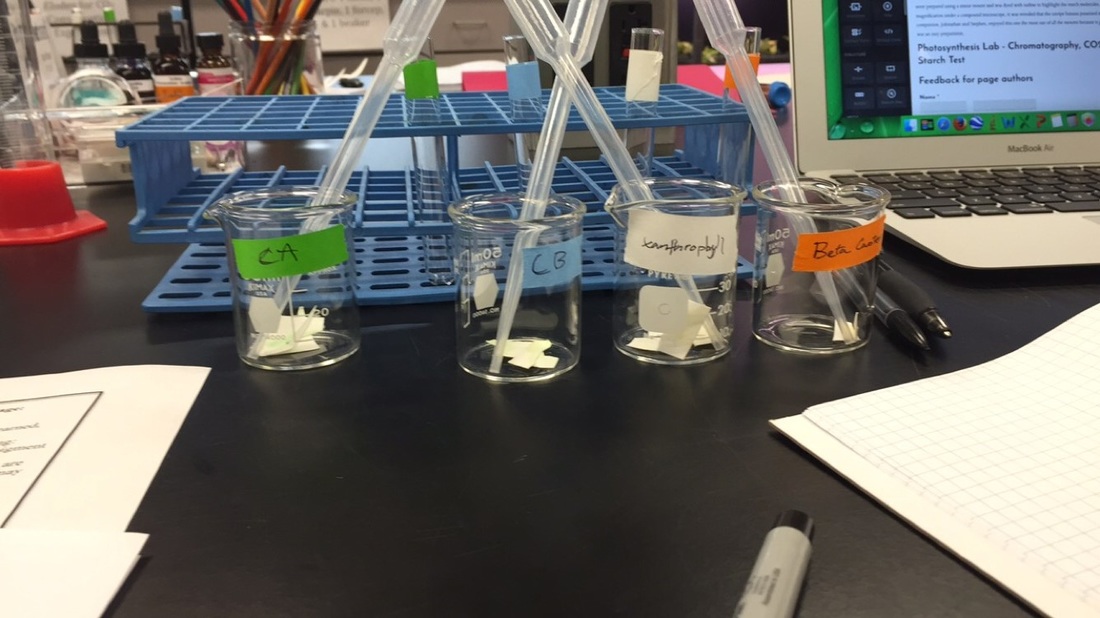
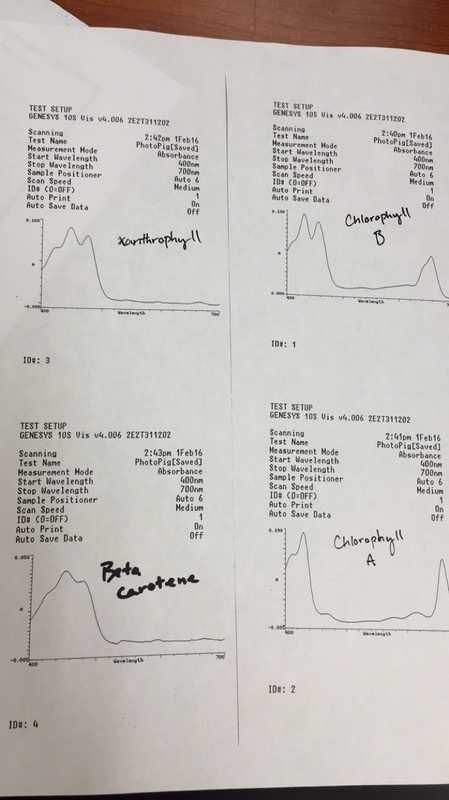
Chlorophyll A: Green pigment.
Chlorophyll B: Blue/Green pigment.
Xanthophyll: Yellow pigment.
Carotene: Orange pigment
CO2 Consumption
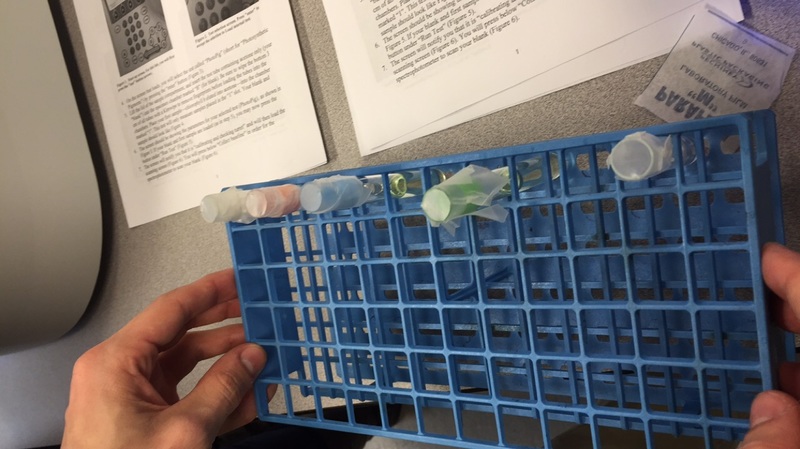
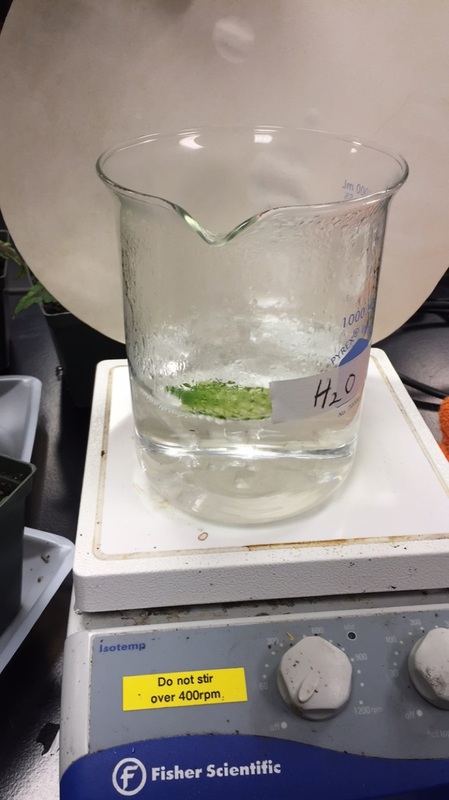
Hypothesis: If the solution turns pink then the Elodea does use CO2 for photosynthesis and does require light.
Procedure:
1.) Fill a beaker with 150 mL of H2O.
2) Add 3 drops of phenol red.
3.) Blow into the solution with a straw until it turns orange.
4.) Fill test tubes with solution then add Elodea leaf to 2 of the 4 tubes.
5.) Place 2 tubes in the light (one with Elodea and the other without) and the other 2 in the dark.
6.) Leave for one hour.
This was our favorite experiment of the day because of the visual effect being that we could see the different between a photosynthetic plant in the dark vs in the light and how effective the photosynthetic process was in each condition.
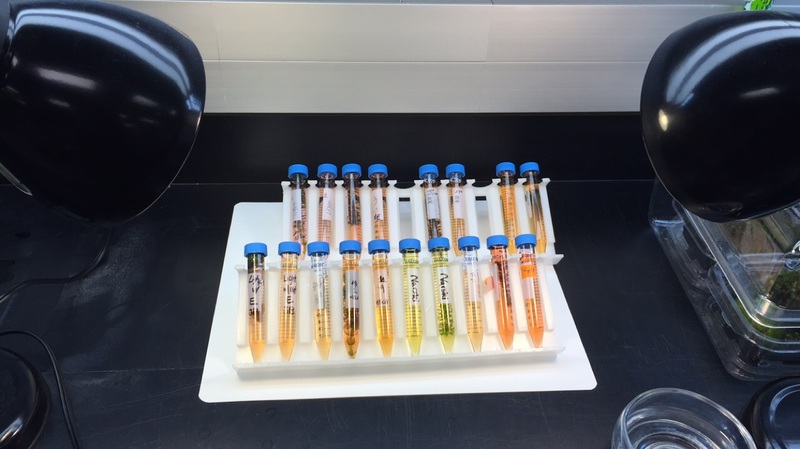


This Picture is after CO2 has been introduced to both vials evenly and placed in the dark for a 24 hour period in which the vial containing the plant is considerably lighter in color compared to the one without the plant meaning that the plant was performing aerobic respiration and releasing CO2. (the one on the right was the control)
|

This Picture is after CO2 has been introduced to both vials evenly and placed in the light for a 24 hour period in which the vial containing the plant has turned pink meaning that it continued to perform photosynthesis while in the light and used up all the CO2 in the vial. (the one on the left was the control)
|
Starch Absorption
(The captions in this section will be encased in the pictures, please hoover over pictures for captions to appear)
(The captions in this section will be encased in the pictures, please hoover over pictures for captions to appear)
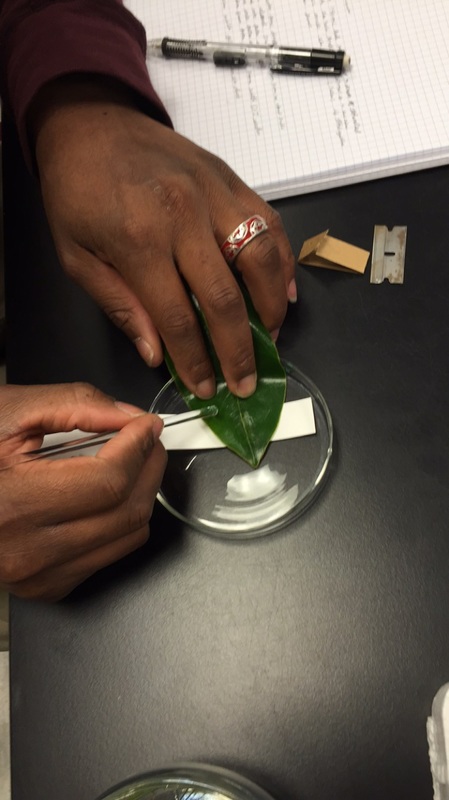
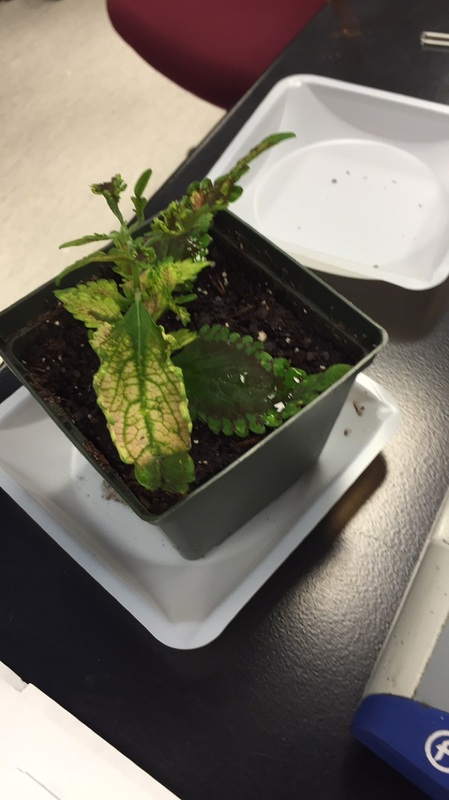
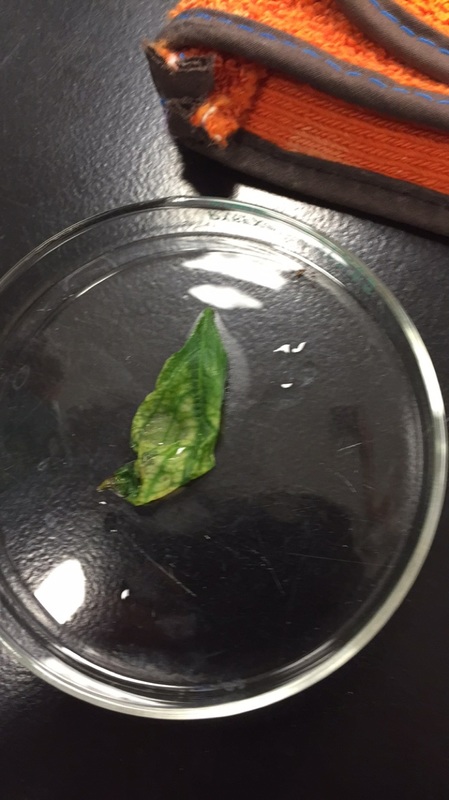
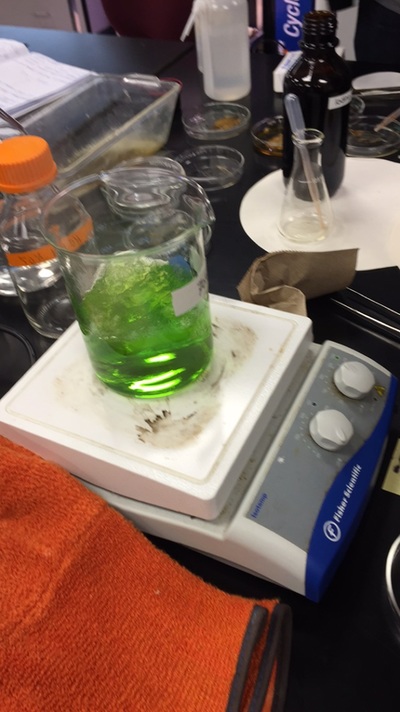
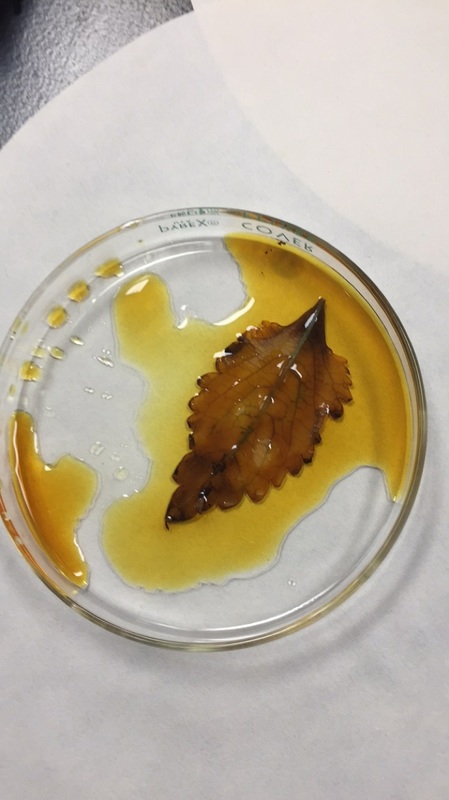
Our test for starch was a multi step process first starting with obtaining a leaf from a variegated coleus plant. To isolate the compound starch we boiled the leaf in water to remove the water-soluble purplish pigment of anthocyanin. Then we put the leaf into a beaker of boiling ethanol which to remove the chlorophyll. After we got rid of the dominant pigments coloring the leaf, we were left with two shaded pigments of off greenish white. We then added iodine to highlight the areas changing the leaf into two distinct colors: a golden yellow and a darker brown. The dark brown is where the starch is held in the leaf. -Stephen.
Lab 4: Simple and Complex Tissues
Goals and objectives
To discern and understand function of the parenchyma, collenchyma, and sclerenchyma cells and tissues
To identify water conducting cells and understand how they function
To gain knowledge and understand function of plant epidermis
We prepared wet mounts of many different specimens to observe their specified cells on a microscopic level using a compound microscope. We used Touidine Blue O and phloroglucinol-HCl to stain and highlight areas of interest and add clarity to specified cells.
Ex 1.) Thin sections of celery petiole (Apium Graveolens)
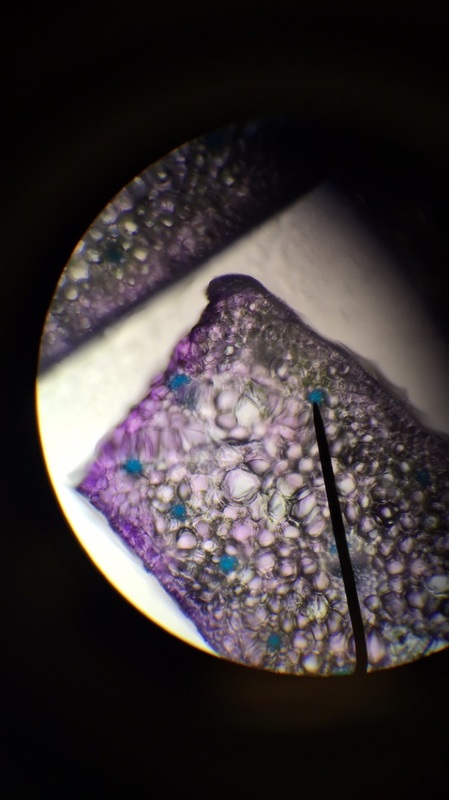
Cross sections of Apium graveolens, or AG, were cut and dyed with Touidine Blue O (TBO). The TBO stain will appear a pink-purple hue, because TBO tends to stain pectin rich, lignin deficient sections of a cell wall; when lignin is abundant, TBO will stain a blue, or blue-green hue.
 The firs picture of A.G. was taken at 40X magnification. The mass of purple, located on the left of the shot, are the pectin rich collenchyma cell bundles. The second picture is of parenchyma cells. The thin cell wall (Primary only) and color help identify the cell. The third picture is of parenchyma cells captured in 100X magnification, and the fourth is captured in 400X magnification.
The procedure, for prepping the sample, required several cross cuts of wet pieces of A.G., a wet thin razor was used to cleave thin portions and TBO was applied to the portion. The portion of A.G. was rinsed to remove the TBO stain and hydrated in order to view under the microscope.
Ex 2.) Sclerenchyma Cells of Ground Tissue
Sclerenchyma cells are primarily in mature organs that have stopped growing. They have a primary and thick secondary cell wall, the secondary being rich in lignin and having the property of elasticity for strength and resistance. To observe sclerenchyma cells created a wet mount of multiple plant species and stained them to take a closer look.
The pear fruit (Pyrus communis) was prepared by taking a cross section of the fruit and smashing it onto a slide with a drop of toluidine blue. After a minute of letting the stain penetrate the pear cells, we drew up the dye with a kim wipe added a drop of water and a cover slip.
The pear fruit (Pyrus communis) was prepared by taking a cross section of the fruit and smashing it onto a slide with a drop of toluidine blue. After a minute of letting the stain penetrate the pear cells, we drew up the dye with a kim wipe added a drop of water and a cover slip.

This is a 400x magnification of a sclerenchyma cell in a pear. The pin is on a stone cell which gives a pear its gritty texture. We can also observe the cell wall
The avocado fruit (Persea americana) wet mount was prepared by cutting a cross section and staining it on a slide with phloroglucinol-HCl. We did not draw off the stain or add water.
We prepared to wet mounts of the snake plant (Sansevieria trifasciata) with a cross section and longitudinal section staining each with TBO and waited for two minutes to allow the TBO to disperse throughout the plant. After two minutes we drew off the dye and added water and a cover slip to observe.
D) Sclerenchyma Fibers of Snake Plant (Sansevieria Trifasciata)
F) Longitudinal sections of Snake Plant(Sanseviera Trifasciata)
Check above with lab partners.: what is suppose to present is the elongated Sclerrenchyma Fibers, this portion would be present in conjunction with the xylem system of the plant. Sanceviera Trifasciata was stained with Toluidine Blue O, this offers contrast to better visualize the organism's cell structures.
Ex 3.) Dermal Tissues
The epidermis is the outer covering of the plant and can encompass a variety of cells. The pavement cells make up the majority of the epidermis but there can be guard cells, trichomes, or others. To observe the epidermis we prepared a a leaf of a Tradescantia zebrina (inch plant) by taking one of the leaves folding in its transverse plane and making a cross sectional cut along it. There is an upper epidermis and a lower epidermis. The easiest way to distinguish which is which is lower epidermis is purple because of the anthocyanin pigments in the vacuoles. We added a drop of water and observed the differences between the layers.
Ex 4.) Vascular Tissues
(The captions in this section will be encased in the pictures, please hoover over pictures for captions to appear)
The xylem is the water conducting tissues of plants composed of procambium and the vascular cambium. Xylem tissues contain parenchyma cells for storage and fibers for support. To observe the xylem, we cut cross sections and longitudinal sections of a coleus stem dye it with a little drop of TBO and water, added a cover slide and found these bundles of blue tissues. Stephen enjoyed observing the vascular system the most because it is comparable to the vascular system in humans with arteries and veins sending nutrients via oxygenated blood throughout the body.
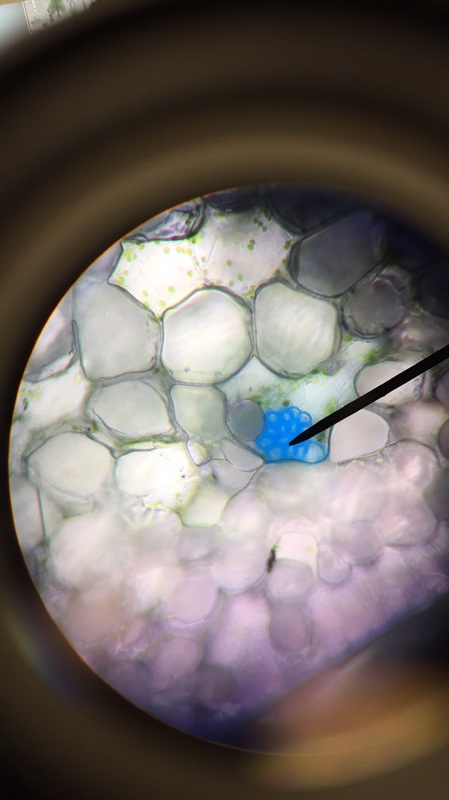
We also observed the vascular system of a wax plant (Hoya carnosa) stem. We made cross sections of the stem and dyed it with TBO and ploroglucinol-HCl to highlight the xylem in the stem.

Jonathan found the particular combination of both color and pattern of the parenchyma cells, to express a sincere mirth in the ascetic arrangement.
Exercise 5 GMO Investigation; Part 1
Objectives:
1.) Explain what a genetically modified organism is.
2.) Describe the process of extracting DNA from store-bought food products.
3.) Describe how polymerase chain reaction amplifies target DNA sequences.
4.) Discuss some of the implications for genetic engineering of agricultural crops, both positive and negative, in regards to plant biodiversity, ecosystems, co-evolution of plants and their pests, human health, and economics.
Chris, Stephen, and Johnathan used an investigator kit from BIO-RAD which utilizes PCR to test the presence of two different GMO-associated DNA sequences 35S promoter of the cauliflower mosaic virus (CaMV 35S) and the terminator of the napoleon synthase (NOS) gene of Agrobacterium tumefaciens. To provide validity to our tests we are also amplifying the 35S promoter and the photosystem 2 gene from template DNA provided by the kit (positive control). BIO-RAD also provided a certified non-GMO food control as a negative control to detect possible cross contamination. The food samples we intend to investigate are Tostitos scoops (chips) and Simply Balanced corn. We hypothesized that both will be present for GMO based on how heavily subsidized the market is for this crop.

Sample 1 Tostitos scoops. Tostitos is a family and friend friendly chip used nation if not world wide for dipping into salsas and is also one of the few corn based products Stephen saw in the Pirate Pantry
|

Sample 2 Simply Balanced Corn. The bag displays as a vegetable mix but we selected the corn out of the bag seeing that the most probable ingredient in the mix to be engineered is corn, we thought it best to test it.
|

1g Tostitos pre-muddled with 5ml of water
|

1g of Certified non-GMO oats before adding 5ml of water to mortar and pestle
|

After 2 minutes of grinding samples with 5 ml of water, we obtained this slurry. It is important break down our sample in this mechanical fashion to get DNA from the plant tissue
|

After grinding up our samples, we added 50ul of InstaGene Matrix and boiled them for 5 minutes in a dry bath at 95 degrees Celsius. The matrix is made up of negatively charged which inhibit enzymes (DNAses) to degrade the DNA we extracted. The heat is then used to destroy these enzymes.
|

In preparation for PCR, we added Master Mixes to the appropriate samples to give us our desired outcome (validity of controls/confirmation presence of GMOs). We added two different Master Mixes, the difference being the red mix containing GMO-associated primers, and the green mix containing plant primers specific for chlorophyll. Both Master Mixes also include Taq polymerase and extra nucleotides.
|

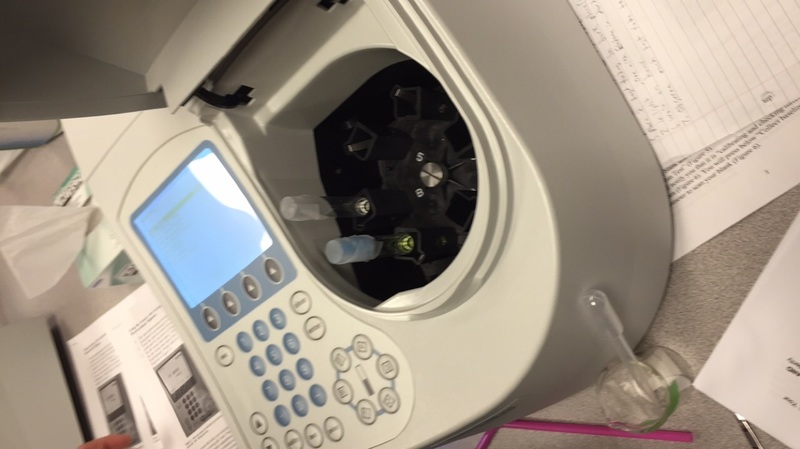
The thermocycler is a 3 step process of heating up our samples to 94 degrees Celsius to denature double stranded DNA into single stranded. Then it cools the samples to 59 degrees C to allow the primers to anneal to the DNA. Then it heats back up to 72 degrees C to allow DNA polymerase to optimally function. The thermocycler does these 3 steps multiple times (40 ideally)
|
This is the end of part 1 of our GMO investigation. We will reconvene next week to confirm/reject our hypothesis of which foods has GMOs present.
Exercise 5 Continued: GMO Investigation; Part 2
Objectives:
1.) Explain the process of electrophoresis
2.)Interpret the results of gel electrophoresis of your PCR samples from last week
3.) Describe how both positive and negative controls were necessary in order to assess the validity of our results for this investigation.
4.) Discuss some of the implications for genetic engineering of agricultural crops, both positive and negative, in regards to plant biodiversity, ecosystems, co-evolution of plants and their pests, human health, and economics
Chris, Stephen, and Jonathan obtained our PCR from week prior and added 10ul of orange G loading dye to each sample. We then loaded 20ul of each PCR sample in lanes 1-8 and then 20ul of molecular weight ruler in lane 9 into a 2% agarose gel, and ran a gel electrophoresis at 150 volts for 30 minutes. We learned how to run a gel electrophoresis; and how to compare band lengths of our samples and controls to the molecular weight ruler to confirm/reject GMO present foods.

Our gel electrophores carries a positive current that feeds down to the bottom. The nitrogenous base of DNA carries a negative charge, these oppoostie charges attract the samples downward. The specific primers are present at specific bands; Plant master mix primer (PMM) is present at 455 BP and GMO master mix (GMO-MM) is present at 200 BP.

Our results from the PCR being run for 35 minutes and the gel electrophoresis confirms that GMO's are present in Tositios corn based chips and is negative Simply Balanced frozen corn.
Results:
1.) Our test foods were Tostitos chips and Simply Balanced frozen corn
2.) The Tostitos chips tested positive but the Simply Balanced frozen corn did not generate a primer band at the 200bp level
3.) GMOs are present in Tostitos Chips
4.) The negative controls group lane 1 and 2 and lane 5 and 6 are positive controls. An error occurred in lane 6 where two bands were present instead of one. Lane 6 was the positive control for GMOs present but another band showing that PMM was also present, this is human error. Although cross contamination is occurred, it still proves the band length for GMO in our test samples.
5.) To help generate a better result, human error could have been prevented by a few measures. For one we would be more attentive to procedures. Not cross contaminating lane 6 would make for a better yield. Also a band wasn't present for lane 1 when there was suppose to be. Lane 1 is our negative control and tells that our plant DNA was extracted correctly and is indeed a plant. Lane 2 is suppose to have no band at all and a faint band is present.
Lab 8 Bryophytes (Non-Vascular) and Ferns (Seed-Free Vascular)
Objectives:
1.) Recognize representatives of the Phylum Bryophyta and the Phylum Hepaticophyta (non-vascular plants)
2.) Recognize representatives of the seed-free vascular plants-the Monilophytes (Ferns) at both the microscopic and macroscopic level
3.) Use the nomenclature, both scientific and common, associated with each nonvascular taxon observed
4.) Describe the sequence of events that occur during the life cycles of each taxon observed and recognize the gametophyte and sporophyte generations
5.) Describe the general characteristics of the nonvascular taxa observed, and how those characters are used in their classification.
Using both a dissecting microscope and a compound microscope, our group was able to observe several the sexual reproductive features of several plants. Alteration of generations is an important component in the life cycle in plants and being able to explore reproductive structures is key to understanding this cycle and how successful/efficient reproduction is for them. We also observed the inner structures of non-vascular plants. Before this lab most of our plants observed have had lignin present and this lab allowed us to stain plants that were absent of this important compound that allowed plants to form structures that increased fitness. Our group learned and were most impressed with the anatomy and physiology of the hermaphroditic ferns.
A.) Observations of Moss Spores
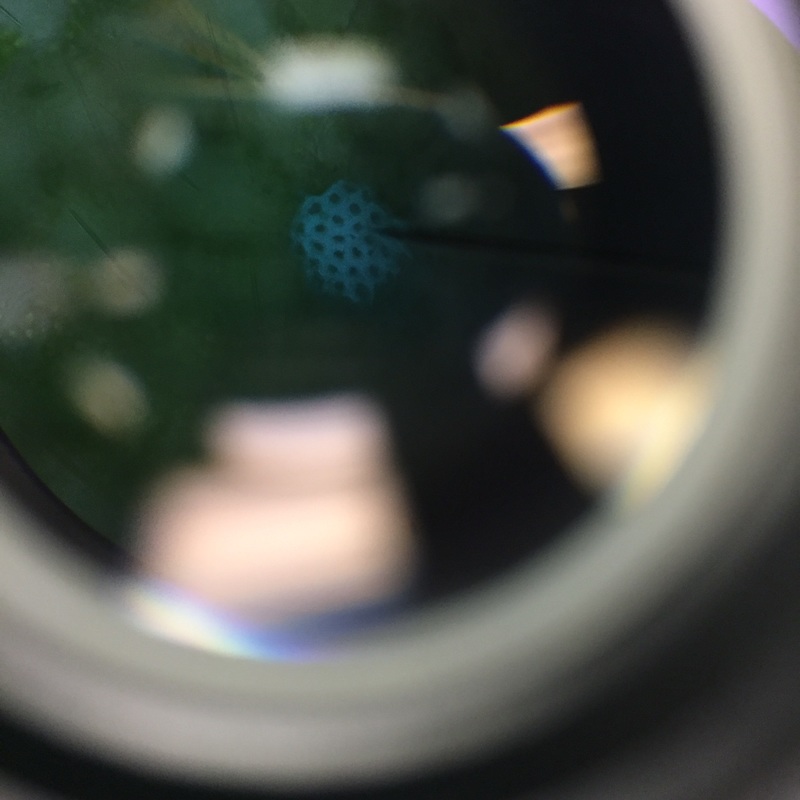
The first observation is of the Moss spores of Polytrchum sp. Looking into a compound microscope at 400x magnification we were able to see these little spores that look like 3 circles within each other. The outer being green, a yellowish brown circle inside the green circle and then a reddish circle inside that one. The size difference is staggeringly minute, in comparison to the C-Fern (Phylum Monilophyte).
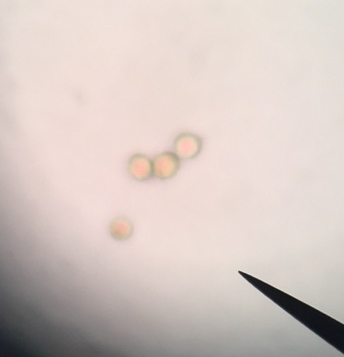
Spores are located in the sporophyte generation of the life cycle of plants. They grow from sporangia by meiosis and grow into the gametophyte generation
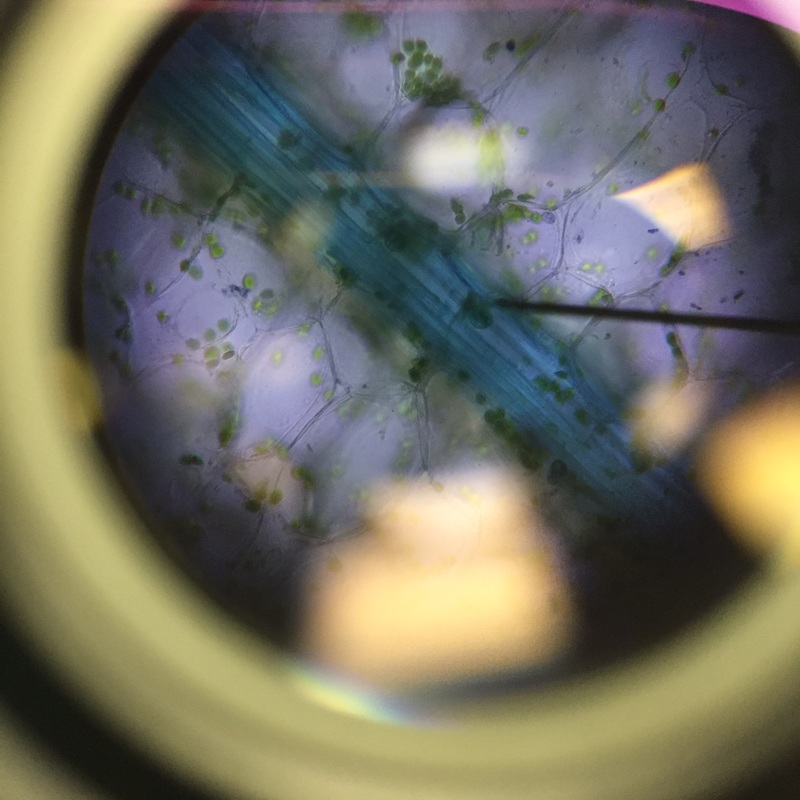
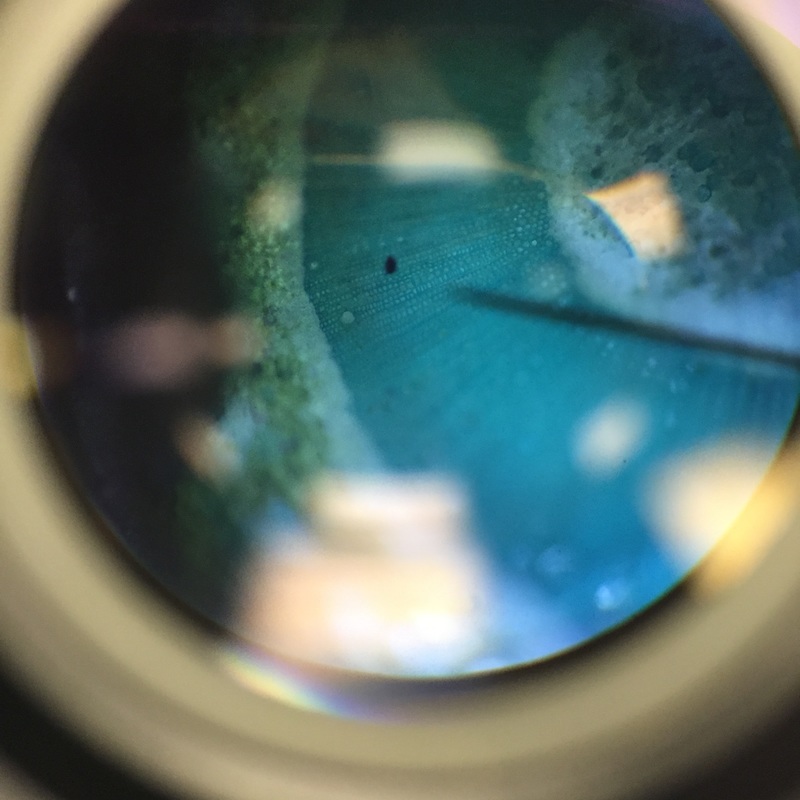
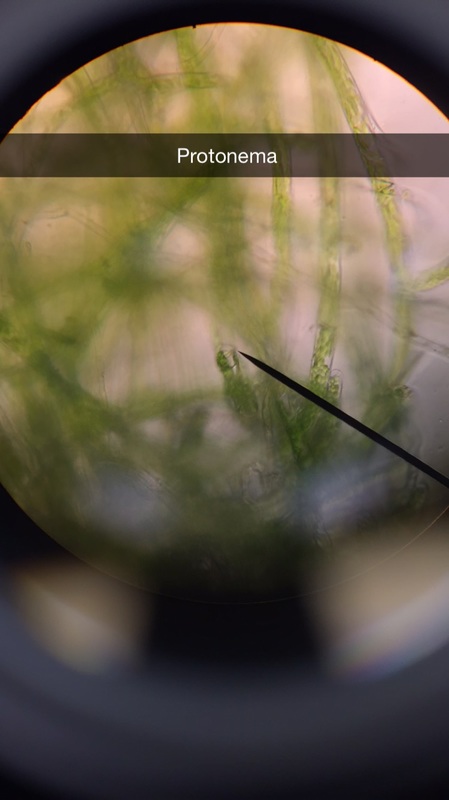
B.) Observations of Moss Protonema
If you are viewing the moss protonema with your naked eye,or a dissection microscope, it will appear like a small patch of fuzzy carpet, but under 400X magnification is where you will gain a gander at the haploid germinating spore. The photos capture a bud forming, the spherical mass of green cells is the site of the young formed gametophyte.
|
|
Grow Baby grow!
C.) Observation of Moss, Living specimens
Here is a a photo and drawing of an unidentified sample of a living moss (Phylum Bryophyta). The bud shown prior will continue to growThe sporophyte is clearly identifiable from the female gametophyte, by the long stalk (Seta) and the capsule which is the site of the sporangium; it is here that meiotic division converts one fertilized diploid into four haploids, and the cycle starts again renewed.

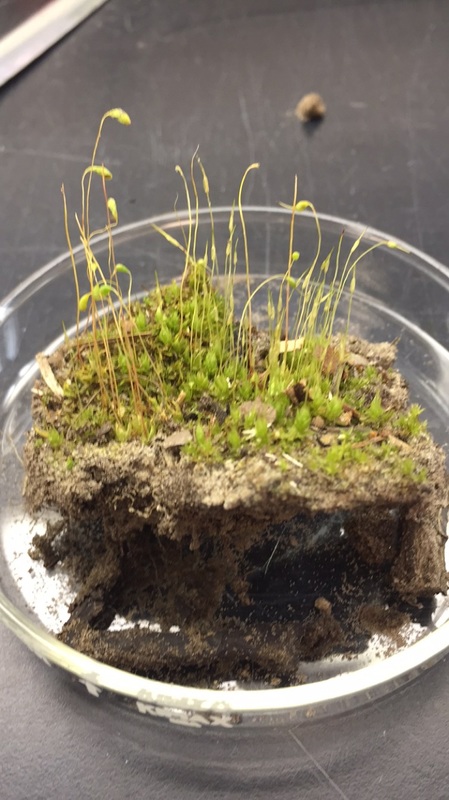
Photo Cred: Chris
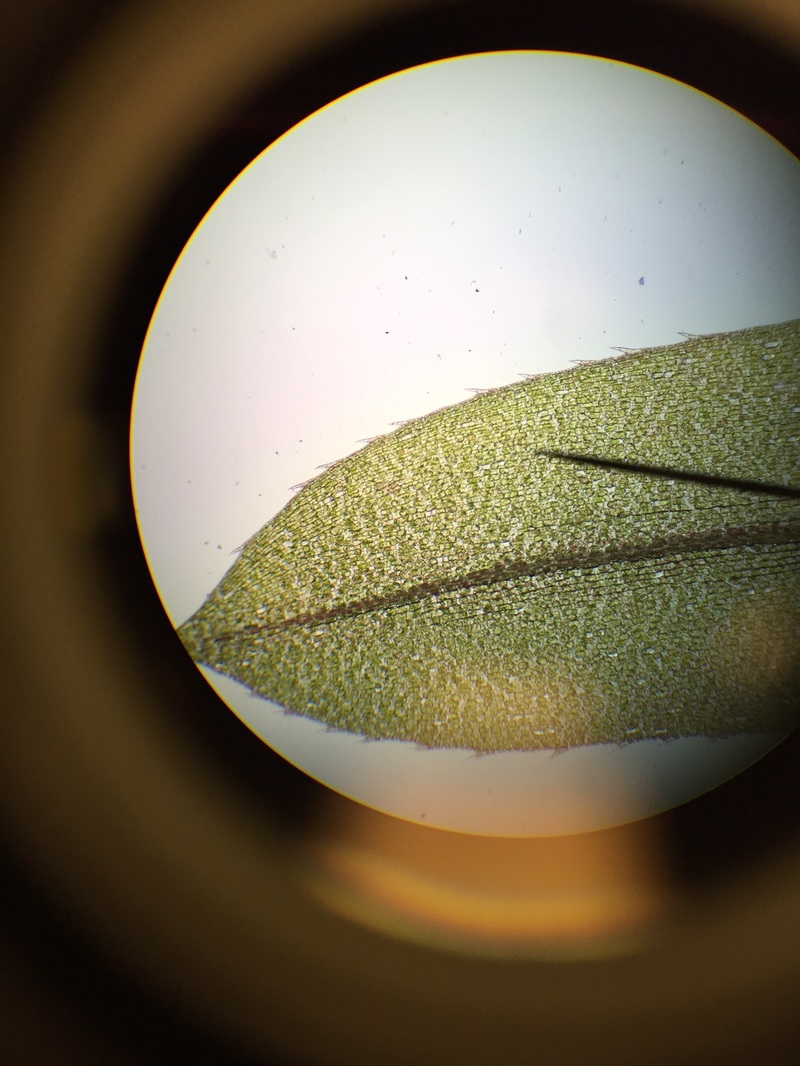
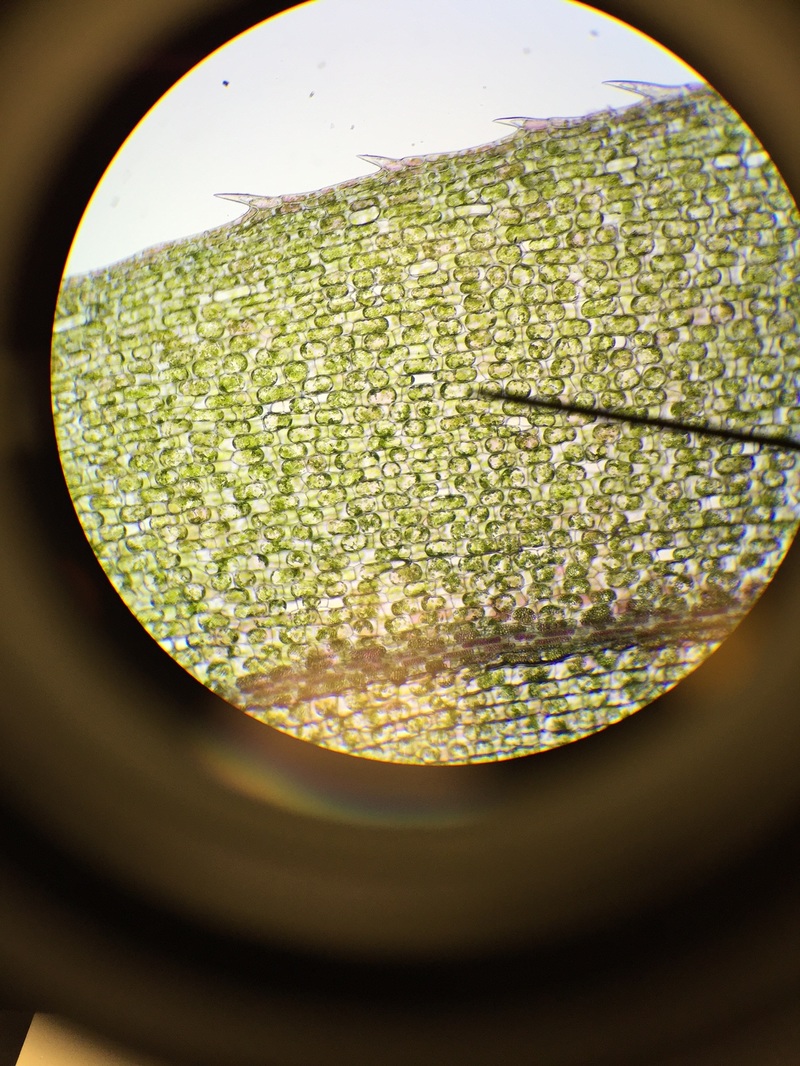
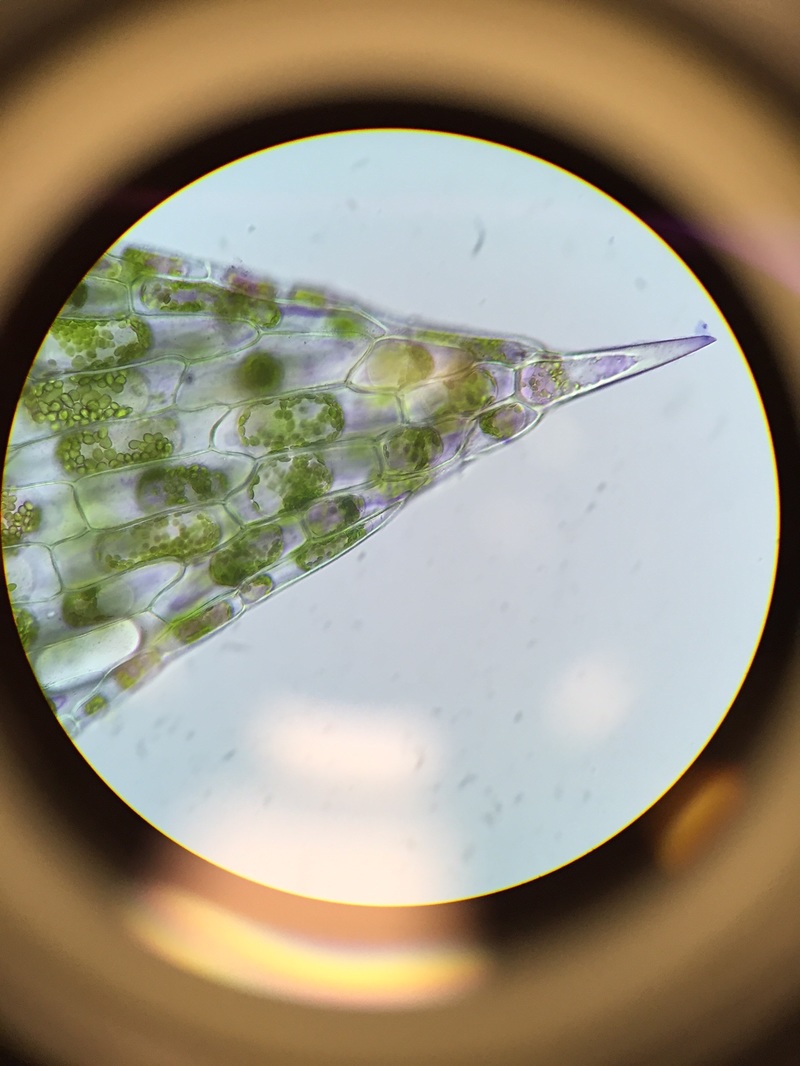
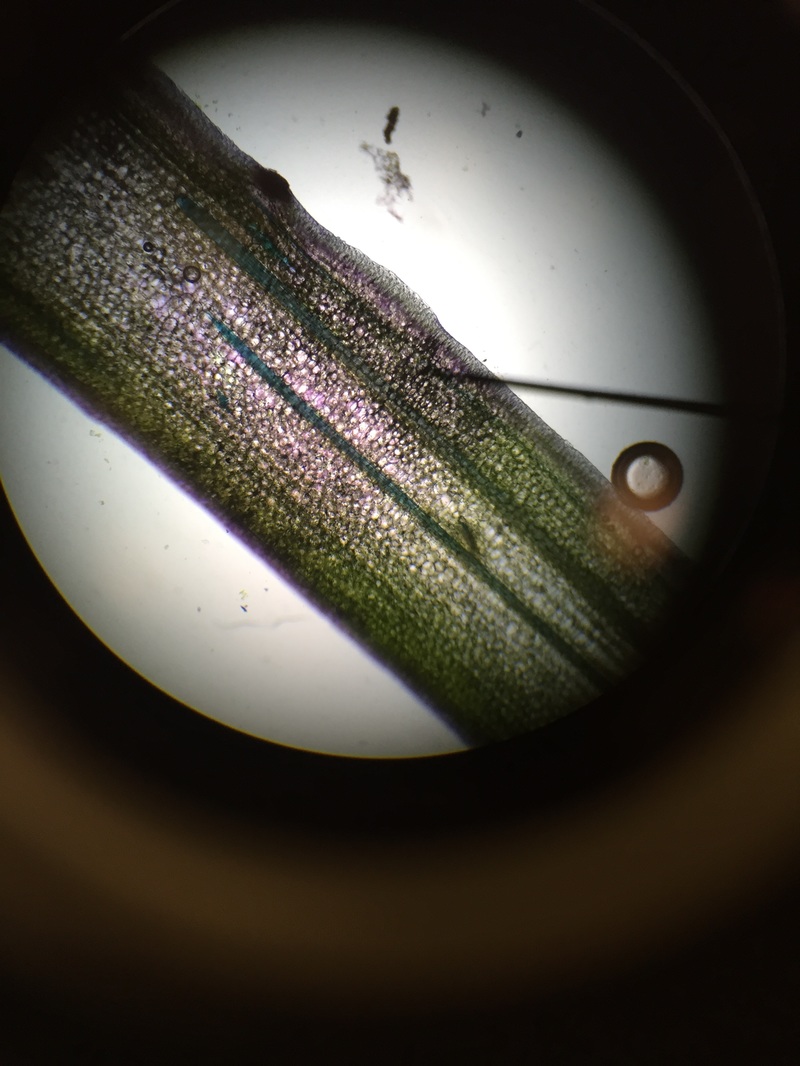
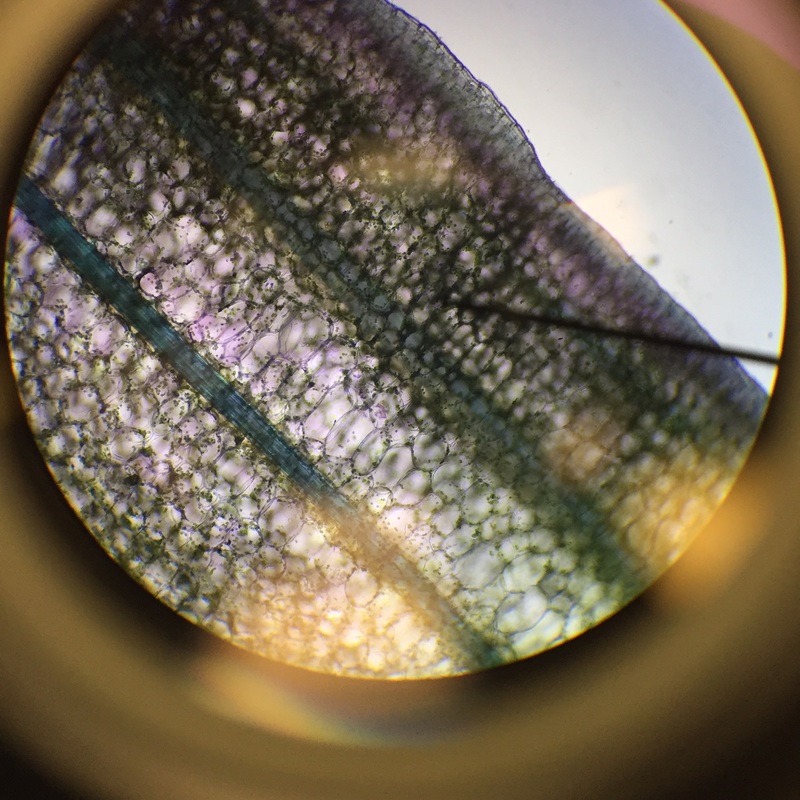
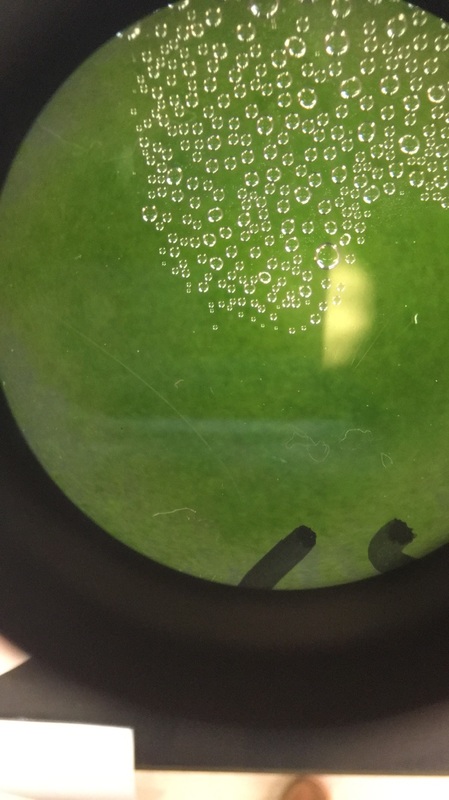
D.) Observation of Sphagnum Moss gametophyte tissue
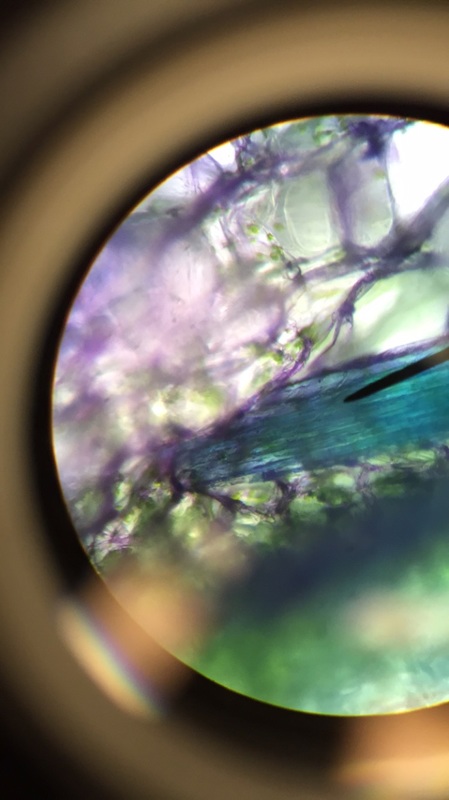
Sphagnum lacks a true leaf system, which is comprised of three different tissues layers: dermal, ground and vascular. Unlike the other Embryophytes (Lycophytes, Ferns, Gymnosperms, and Angiosperms), Bryophytes lack a true vascular system and therefore lack lignin cells. This is supported with the addition of the stain Toluidine Blue or TB, TB adheres to lignin cells, and since Bryophytes lack lignin, the stain did not bound.

|

|
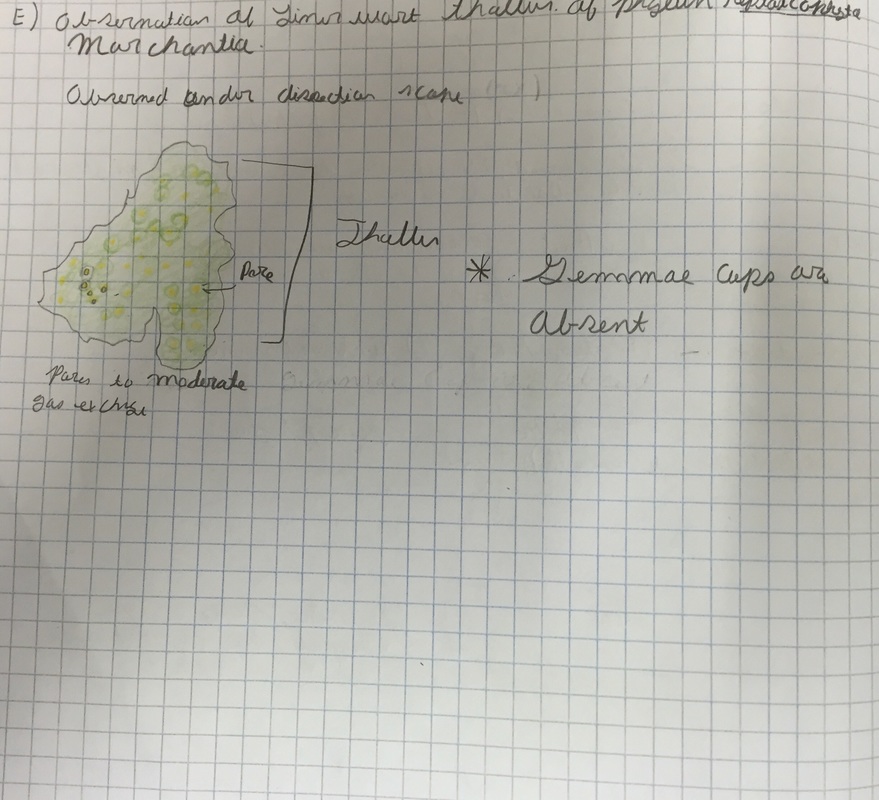
E.) Observations of a liverwort thallus
Liverworts, and some hornworts, do not have posses differentiated bodies, but a a single structure that regulates water uptake and gas exchange, this is known as a thallus.
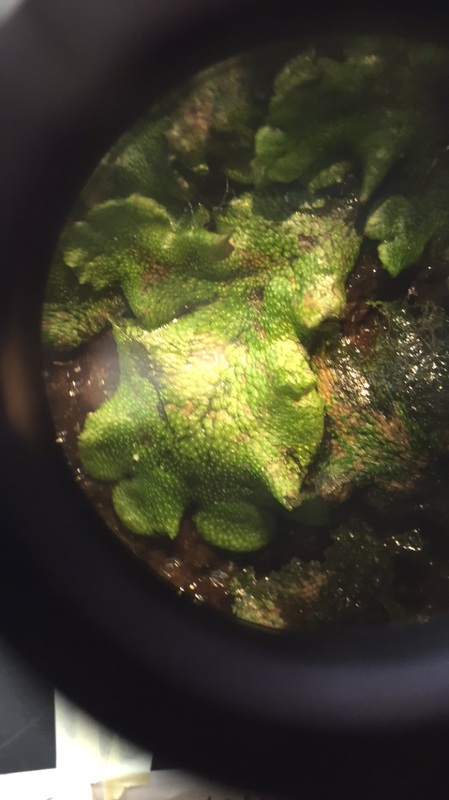
The photo is a capture of marchantia, the many pores are present, but the gemmae cups are absent. photo cred: Chris
|
|
F.) Observation of Ferns, the Sporophyte Generation
In this this exercise we examined the living specimens of ferns on display.

|
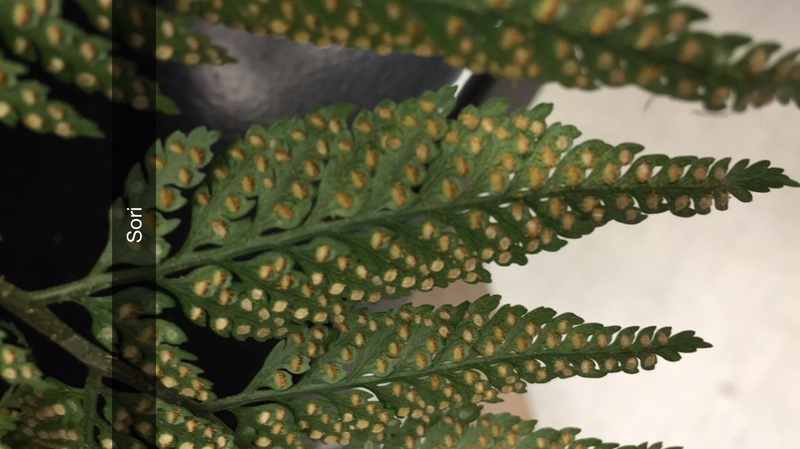
Here is an image of the sori of Rabbit's Hair (Davillia) Fern.
|

|
G.) Observations of Fern Frond with Sori, dissecting scope(Chris)
The observations of the fern's (Crytomium Falcutum) frond with Sori was preformed under a dissection microscope (10x magnification). The blade sample was collected in the fern garden in front of Jenkins Hall, located at Armstrong University's main campus.
H.) Cut cross sections of stem sections - Then perform Lignin test
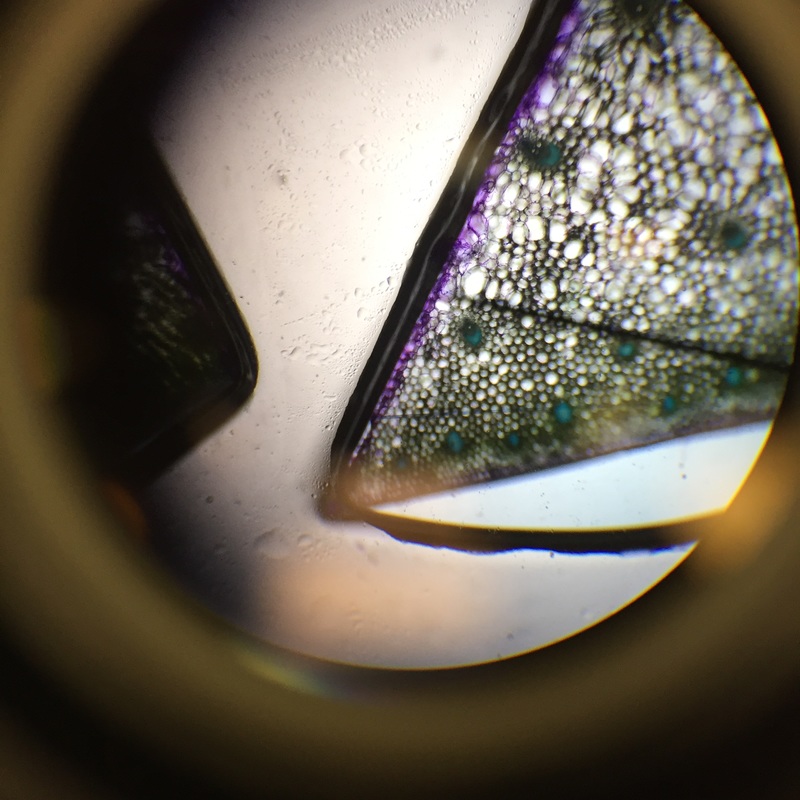
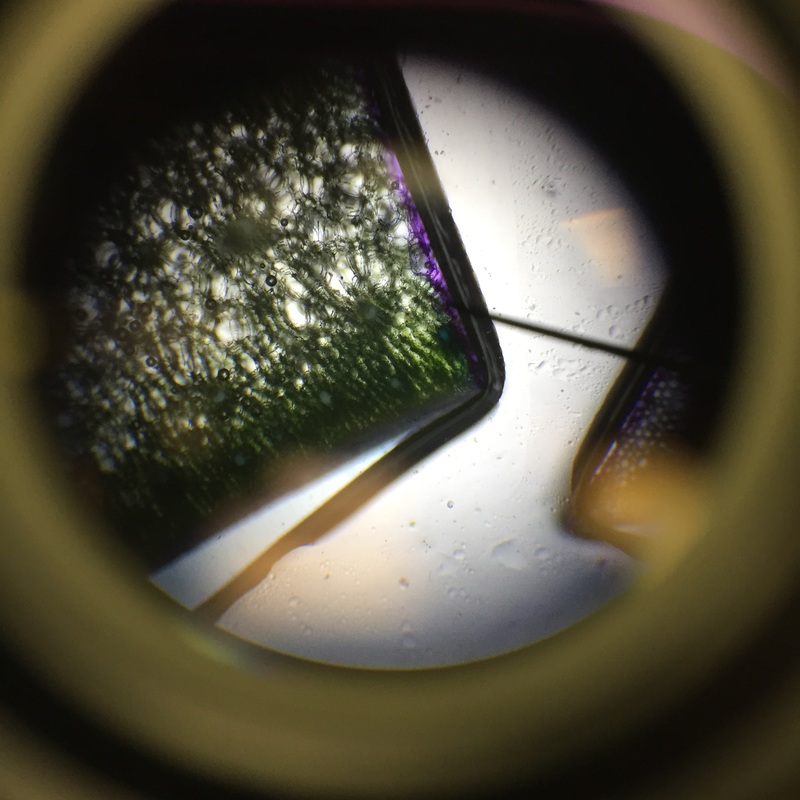
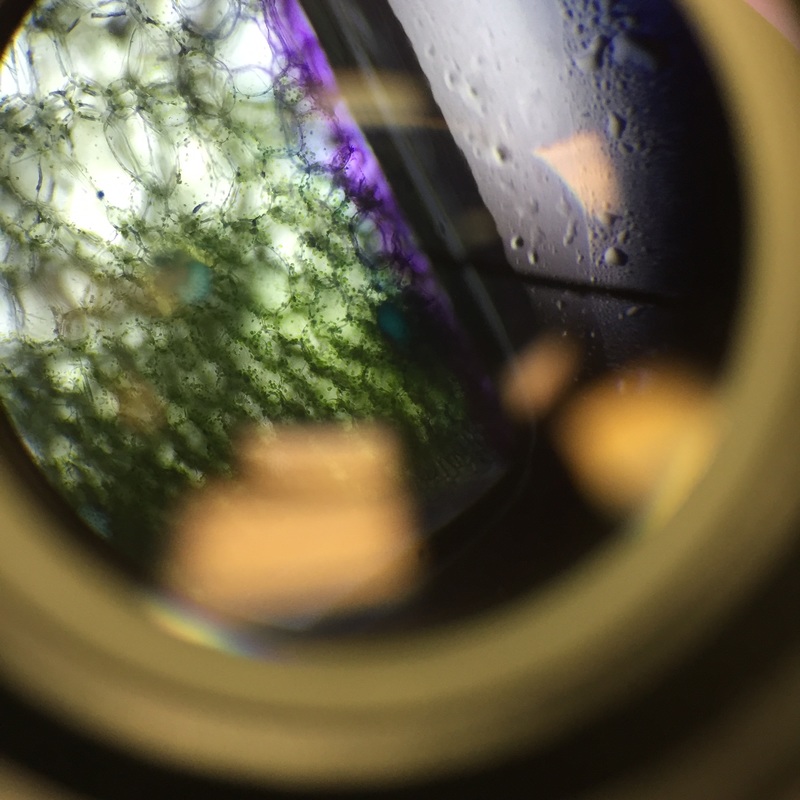
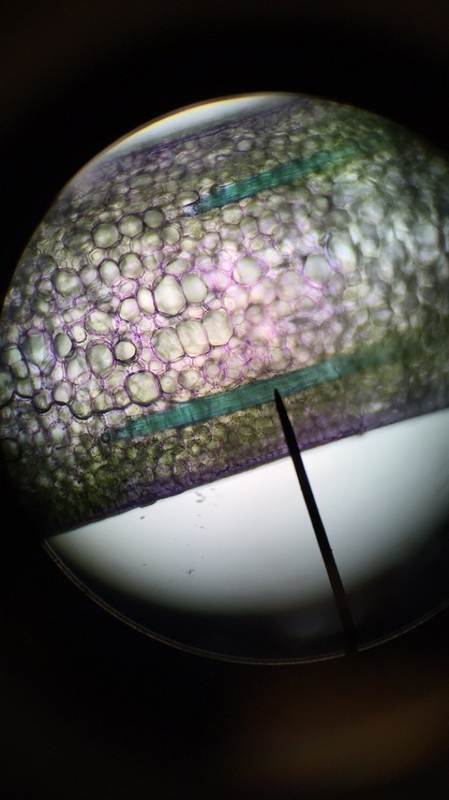
In the photo below we observed the tracheids(water conducting tissue), Phloem(food conducting tissue), and the numerous sclerenchyma fibers(with thick, lignified cell walls for support) that surround the vascular tissue.

|

|
I.) Observations of Other Ferns(Chris)
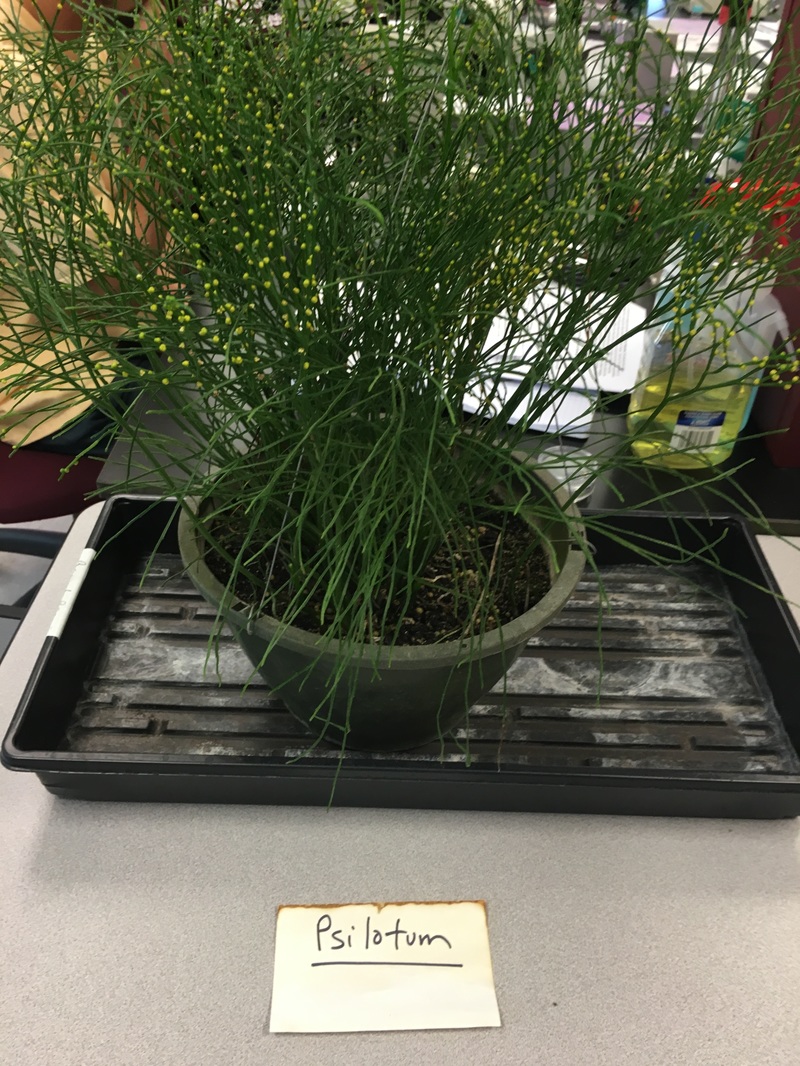
This is a whisk fern (Psilotum nudum)
|
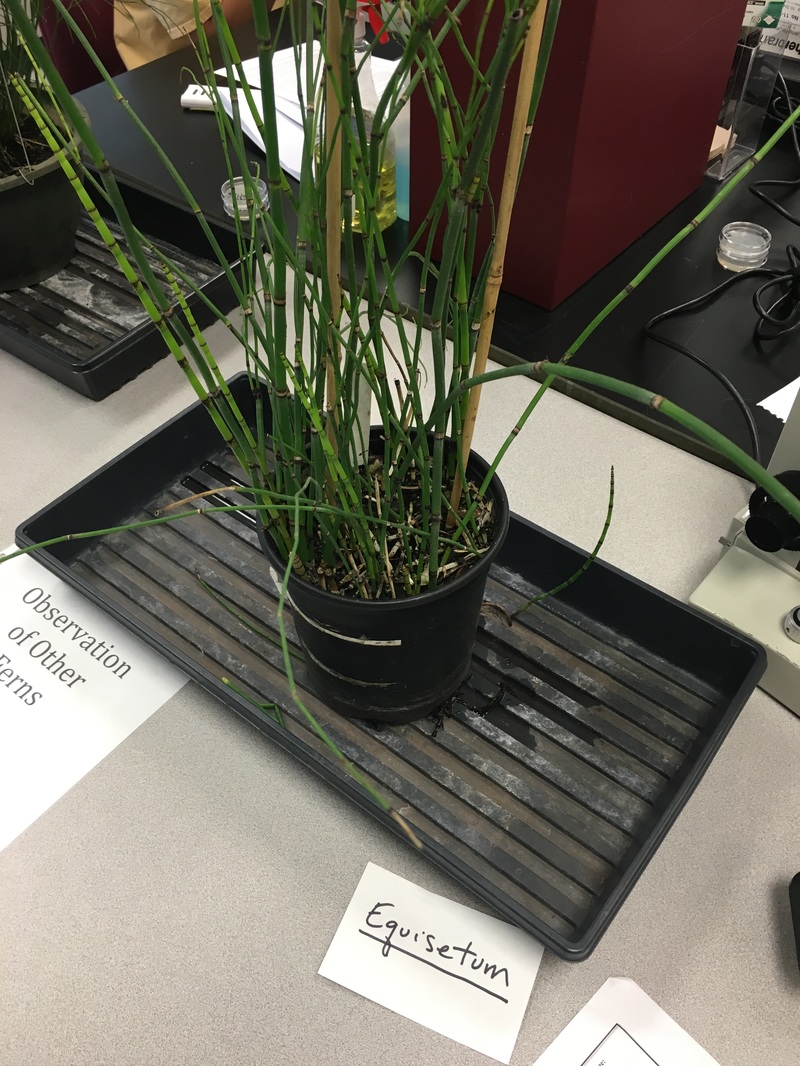
This is a horsetail fern (Equisetum sp.)
|
J.) Observations of C-Fern Gametophytes in Culture Plates(Chris)
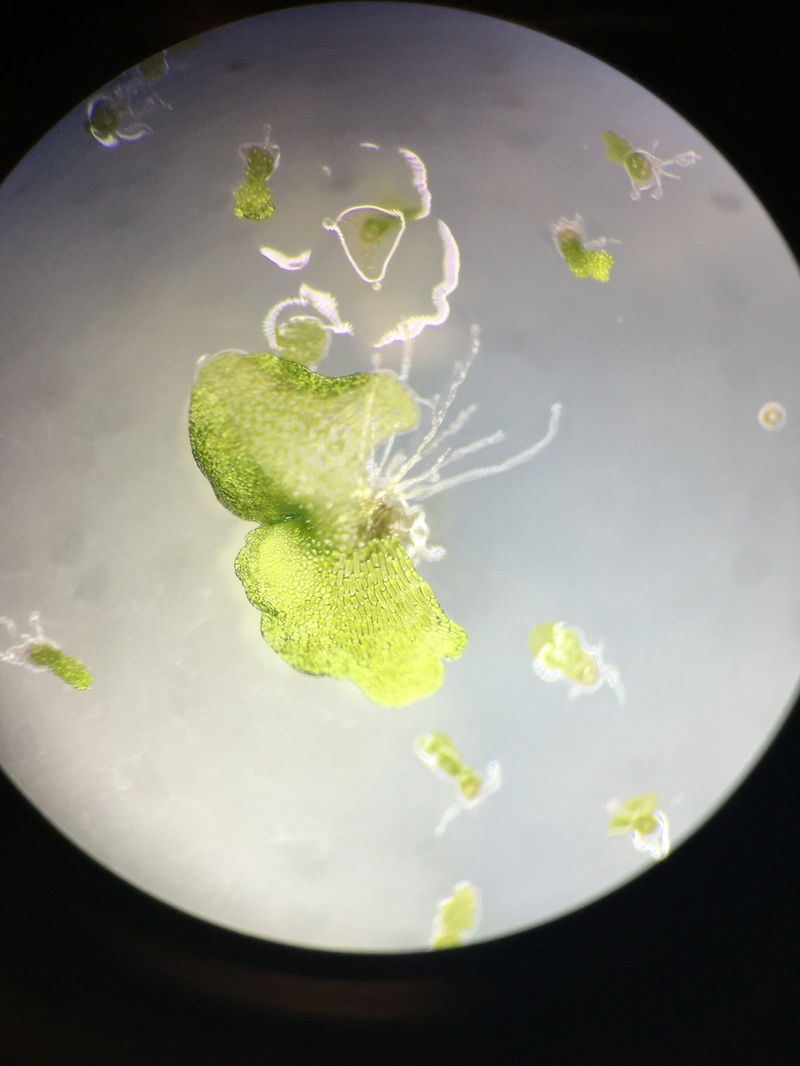
In this picture it shoes some gametophytes growing out of the remnants of a spore case.
|
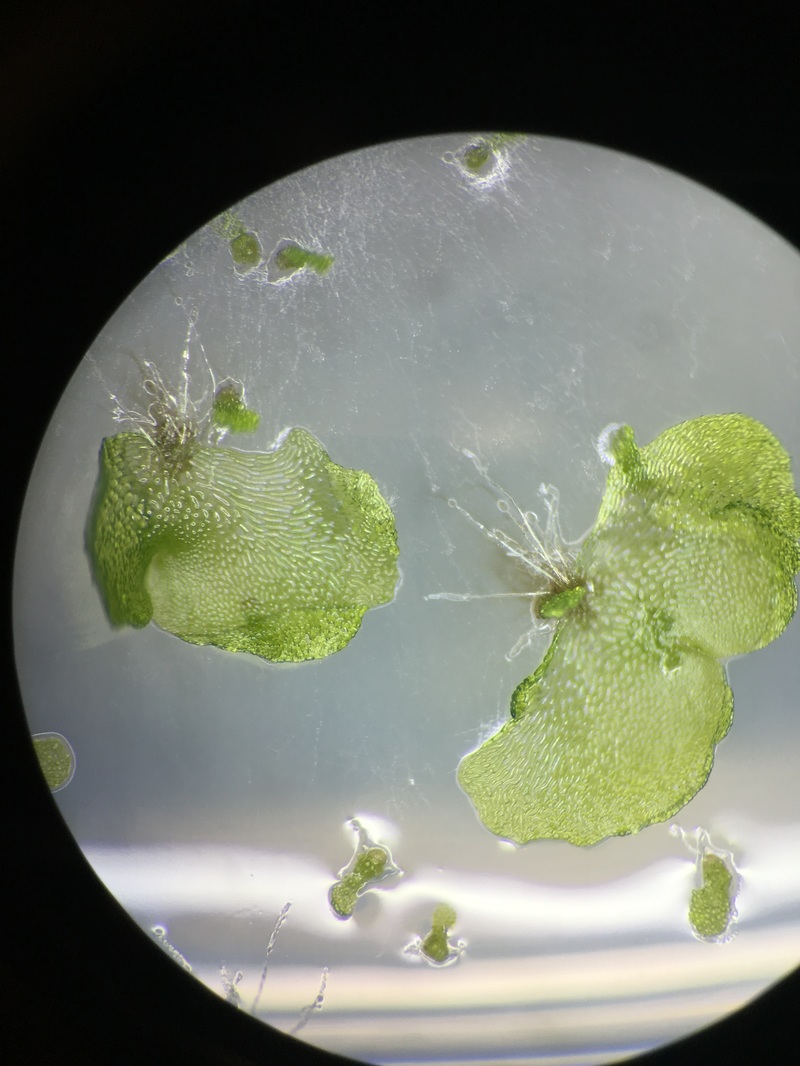
Another photo under the dissecting microscope from one of my culture plates with hermaphradites presents along with some gametophytes.
|
K.) Observations of C-Fern Sperm(Chris)
Using a toothpick, I gently placed two to three male gametophytes on a clean microscope slide, added a drop of water, and coverslip then observed and recorded the video below, is the observation of flagellated sperm swimming around and attracted to the hermaphradites.
Lab 9: Gymnosperms and Angiosperms(Chris)
Objectives:
1.) Recognize representatives of the gymnosperms and angiosperms
2.) Describe the sequence of events that occur during the life cycles of each taxon observed and recognize the gametophyte and sporophyte generations
3.) Identify the parts of a flower and describe their functions
4.) Understand the terms related to ovary position, presence and absence of floral organs, and floral symmetry-and be able to use them to describe a specimen
5.) prepare diagrams to record important features revealed during a floral dissection.
We learned a vast difference between images in books and going out and seeing the real thing. We went on an adventure around Armstrong's campus and saw a variety of trees and their reproductive structures. Upon collecting a specimen and bringing it back into the lab under the dissecting microscope was the real treat to understanding the inner workings.
Microscopic and Macroscopic Examination of Representatives of the Gymnosperms
Observations of a Female Cone (Johnathan)

This is a female cone of a Pinus Sabiniana (Digger Pine). Whole mount
|

This is a scale that has the two depressions whole the ovaries lay. whole mount
|
Observations of a Pine Mature Embryo (Stephen)

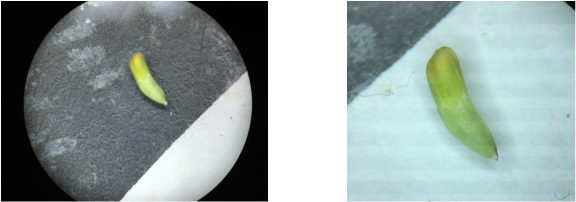
This is a mature Pinus (sp) embryo at 30x magnification
Observation of Pine Mature Male Cone
Kelsey and Athena were gracious enough to allow our group to present an image of a prepared slide of Mature Male Pine (Pinus sp. ) Cone. The image was captured by using a Compound Microscope, set at 40X Magnification - Photo Credit: Credit: Athena Downes (3-30-2016)
Observations of Other Gymnosperms
These are whole mount preparations of other gymnosperms: Cycadophyta, Genetophyta, Ginkgophyta. (Stephen)

Cycas sp. whole mount
|

Gntophyta (Ephedra sp.). Whole mount
|
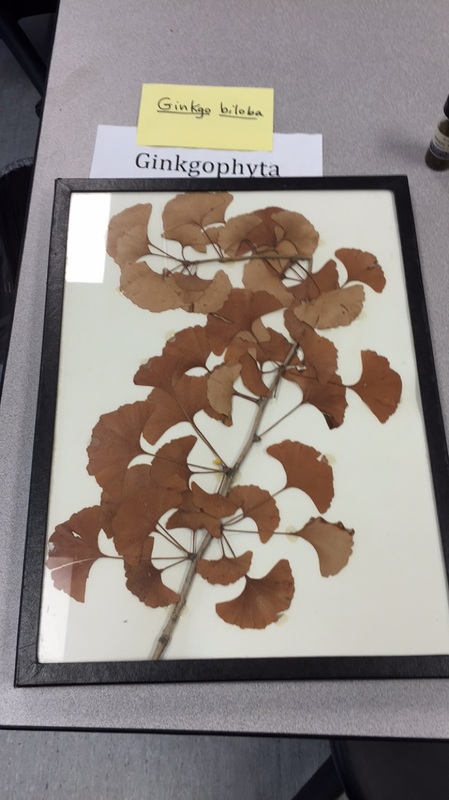
Gingko Biloba. whole mount
|
Microscopic and Macroscopic Examination of Flowers (Anthophyta)
Flower Dissections
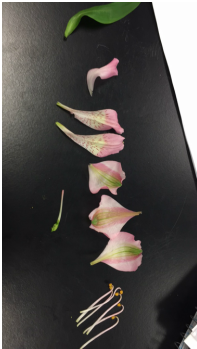
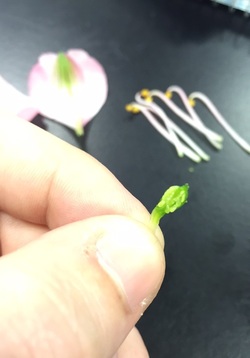
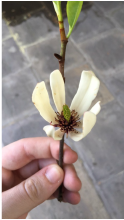
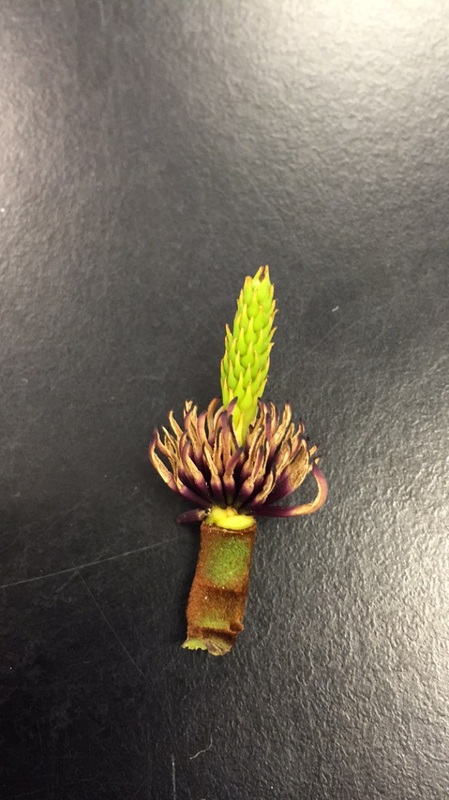
This unidentified angiosperm was given to us by Dr. LP. We broke off the sepals (green leaf) the corolla (pink body) the anthers (the 6 long skin male parts) and the carpels which is shown in the second picture below. We then cut the ovule on the longitudinal plan (3rd picture) to show the ovules. This flower was zygomorphic, complete, perfect, and had a superior ovary (stephen)
|
|

|
Longitudinal Sections of Carpels
Michelia x Foggii "Jack Fogg"
Banana Shrub
-Stephen
|
Petals removed. Anthers and Carpels remain
|

Banana Shrub with only the carpels remaining
|

Longitudinal Section of carpels whole mount of Banana Shrub at 7.5x magnification on dissecting microscope
|
Flower Dissection of Camellia Sinensis, the Small Leaf Tea Camellia
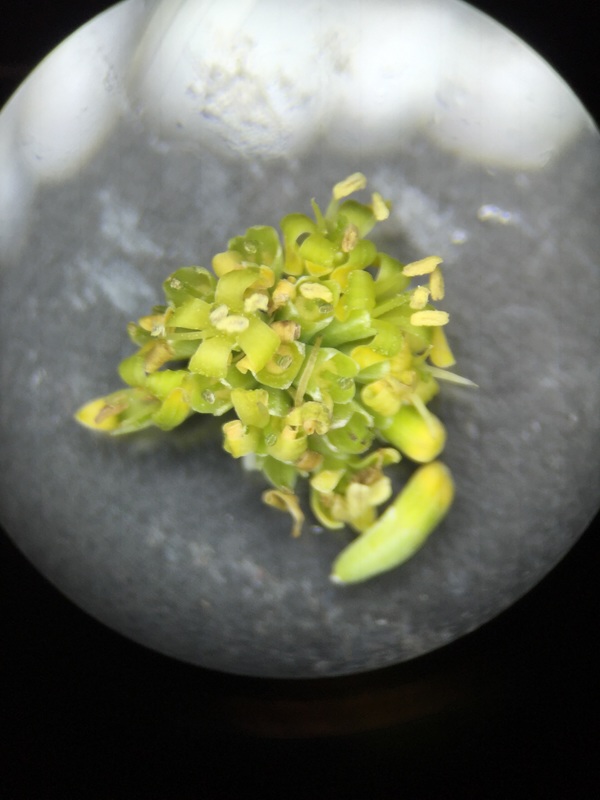
Here is a pleasant overview of the delious C. Siniensis body, which is used to make delicious tea. This beautiful body is not what is seems, the flowering body is not what you think.
By using the an IPhone 6, Jonathan was able to capture a pic of a the cluster of the true flowering body at half zoom.
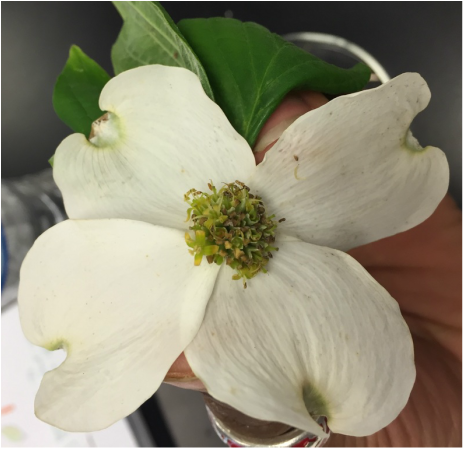
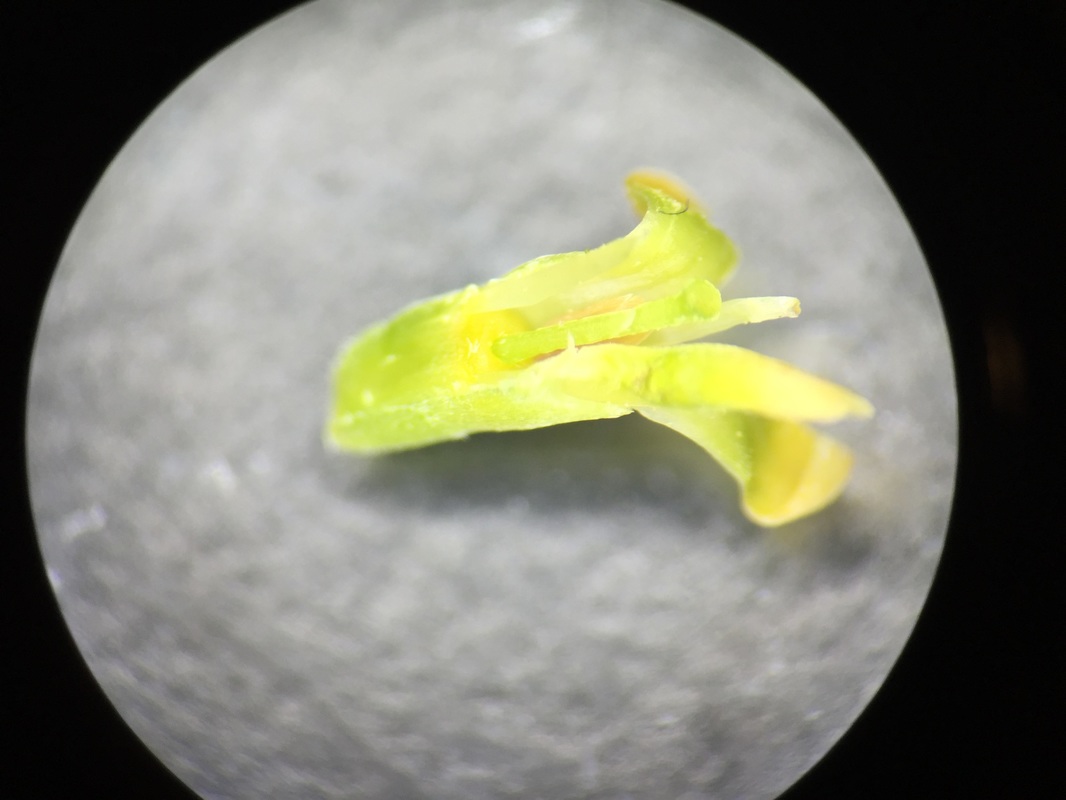
 Here is an image of a single flowering body: C.Sinensis is an anthropomorphic, complete, and perfect flower. The sepal and petals are present in the image. Here is an image of a single flowering body: C.Sinensis is an anthropomorphic, complete, and perfect flower. The sepal and petals are present in the image.
|
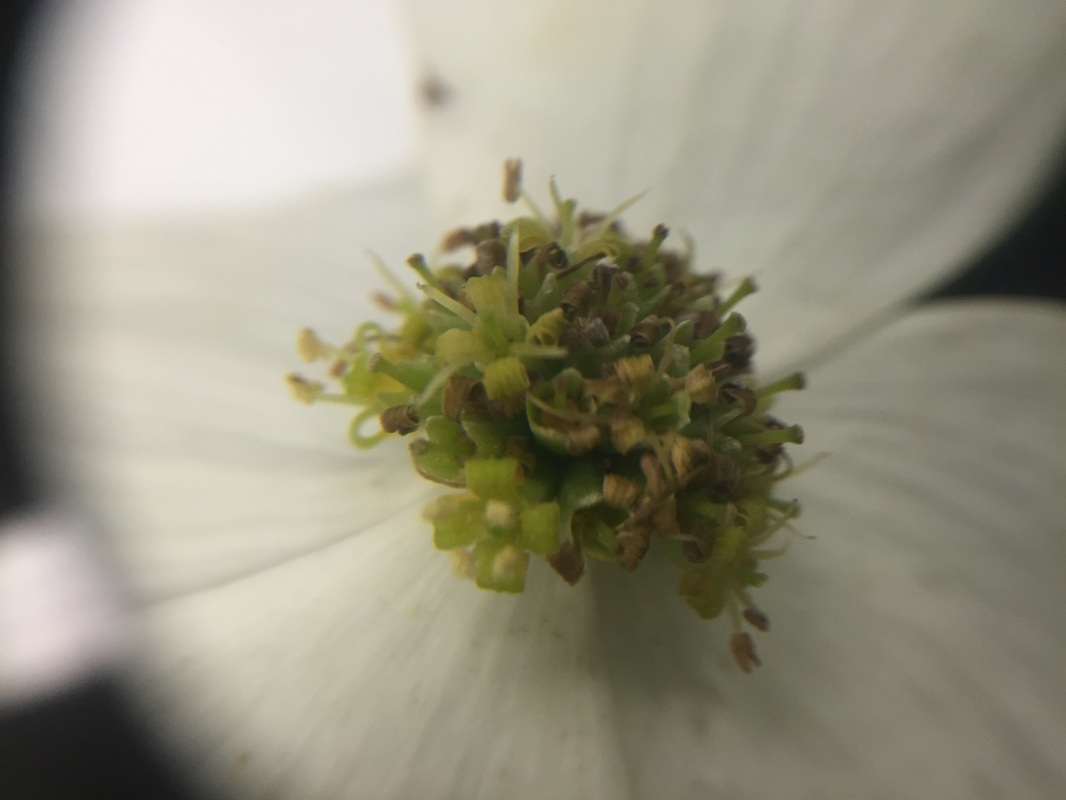
Switching to a dissection microscope with a 10X magnification, here one may gain a view of the stamen (microsporoangium) jutting out towards the sky. Dehiscence (opening) of the anther has occurred, freeing the pollen to world.
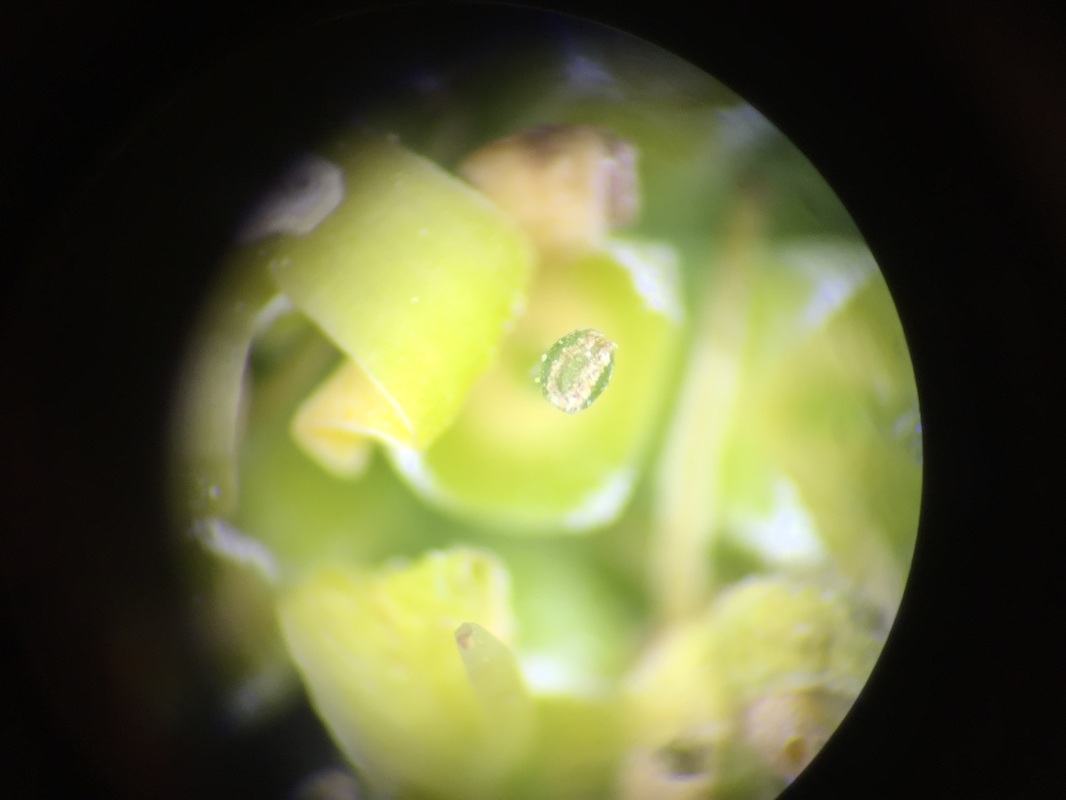
Here is an above view of the stigma of the Carpol captured at 40X magnification with a dissecting microscope.
Here lines the picture of the ovary, which was captured at 30X magnification with a dissection microscope. The position of the ovary above the sepal and petal means that C. Sinensis has a superior ovary.
|
Lab 10: Roots & C-Fern Observations (& Shoot Cuttings)
This portion of the lab will cover:
1) The internal and external features of a plant root system.
2) The internal anatomy of plant root system.
3)Observations internal anatomy and external morphology of monocots and dicots.
4) Understanding the principle functions of a root systems.
We learned about the different root systems and their growth patterns. Stephen enjoyed c-fern transplanting because we observed them growing over the weeks.
A) Observations of Monocot and Dicot Roots, various stages of seedlings
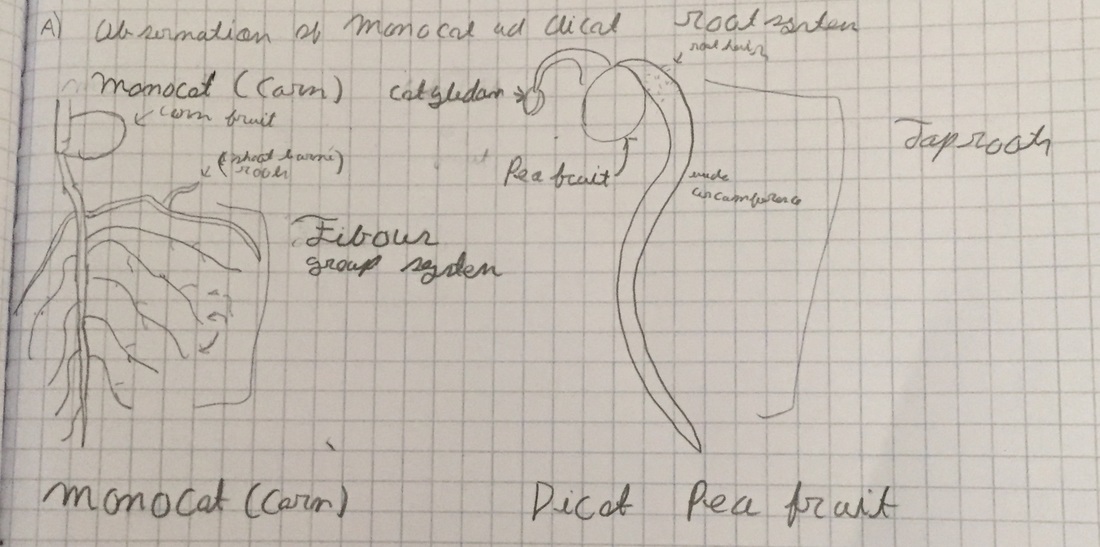
The image depicts the fibrous root system of the monocot (corn fruit) and the taproot (Primary root) of the dicot (pea fruit). The sketch was drawn by Jonathan.
B) Observation of C-Fern Roots (Chris and stephen)
The fruits of labor; what stared as a tiny spore has morphed into a sporophyte, that is just from the remains of the gametophyte. Wow, the things we do for family.

|

photo cred: Chris
|
Exercise 2. The Root Apical Meristem
C.) Allium Cepa (onion) mitotic root tips (stephen and chris)
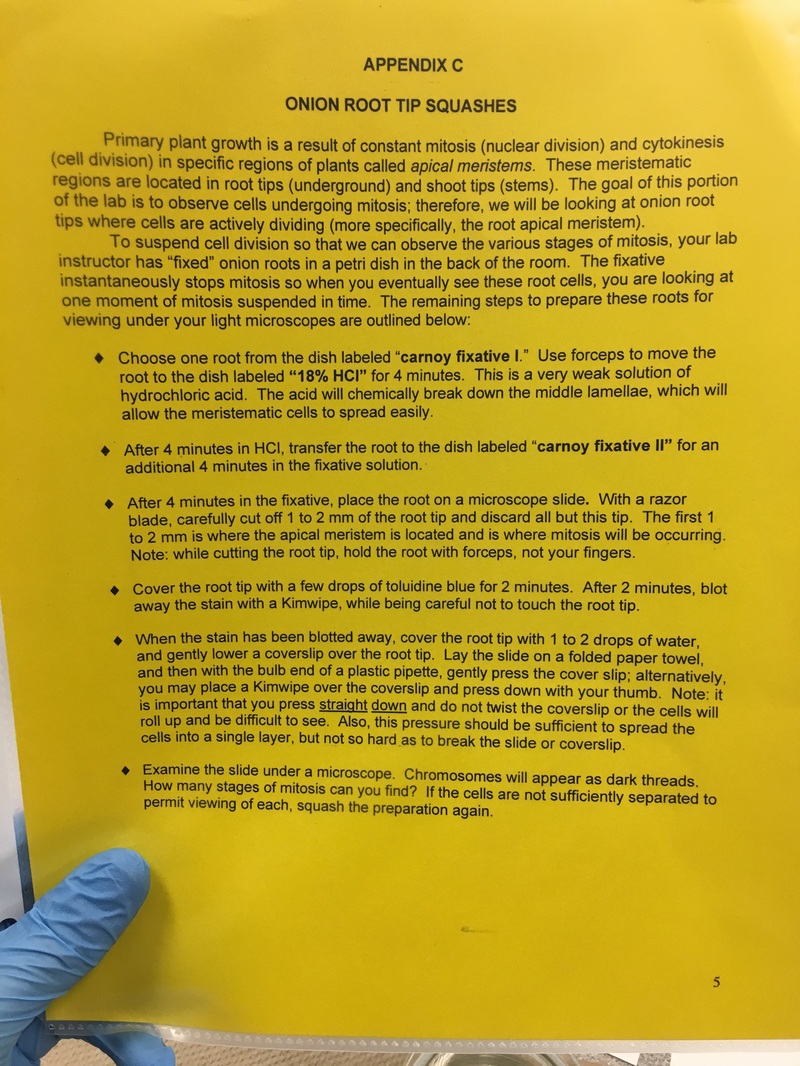
procedure of onion root tip, photo cred: chris

Allium cepa, Phylum Anthophyta @ 400x magnification. You can see the mitotic spindles during anaphase pulling chromosomes apart
|

|
Cross Section of a Monocot Root and a Dicot Root (Stephen)

Corn (Zea Mayes) is a monocot. The vascular tissue is observable with the xylem being the big holes in the middle and phloem being on the outer boarders of the xylem
|

Pea (Pisum sativum) is a dicot. The vascular tissue is clumped in a different pattern than the monocots, but the grouping of xylem is still visible in 3 groups.
|
Inch Plant (Tradescantia Zebrina) Shoot Cutting: Forming Adventitious Roots (Stephen)

C-fern Sporophyte & Transplanting (Johnathan, Stephen and Chris)
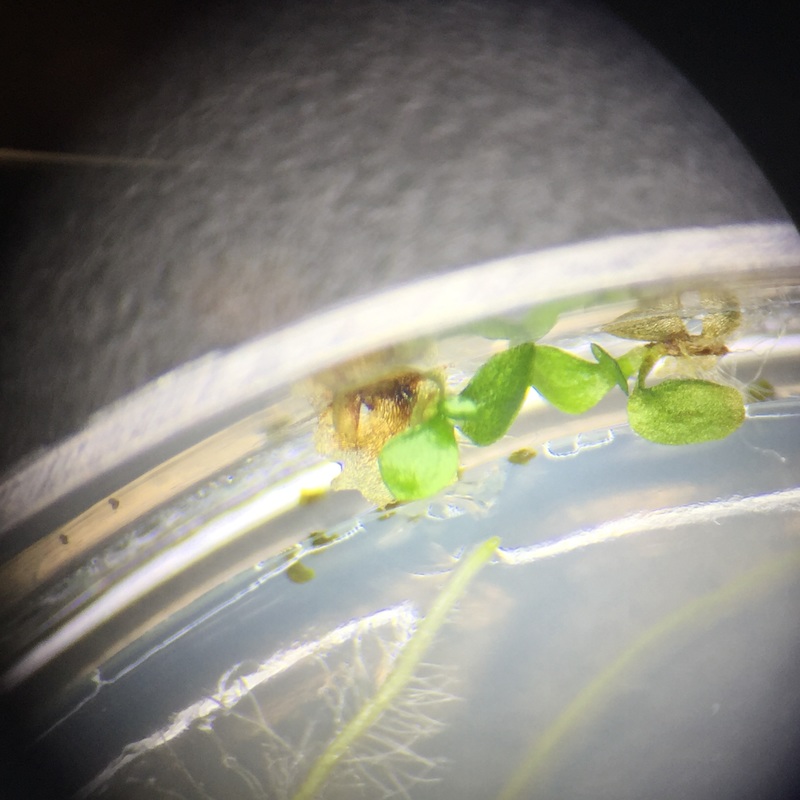
A picture of Johnathan's C-Fern (Phylum: Monilophyta) from above showing the leaves sporophyte generation and the primary root of the sporophyte. Rhizoids were semi visible. you can make them out of the root growing from the bottom of the picture off the lateral roots.
|

We transferred our C-ferns into potting media to group
|
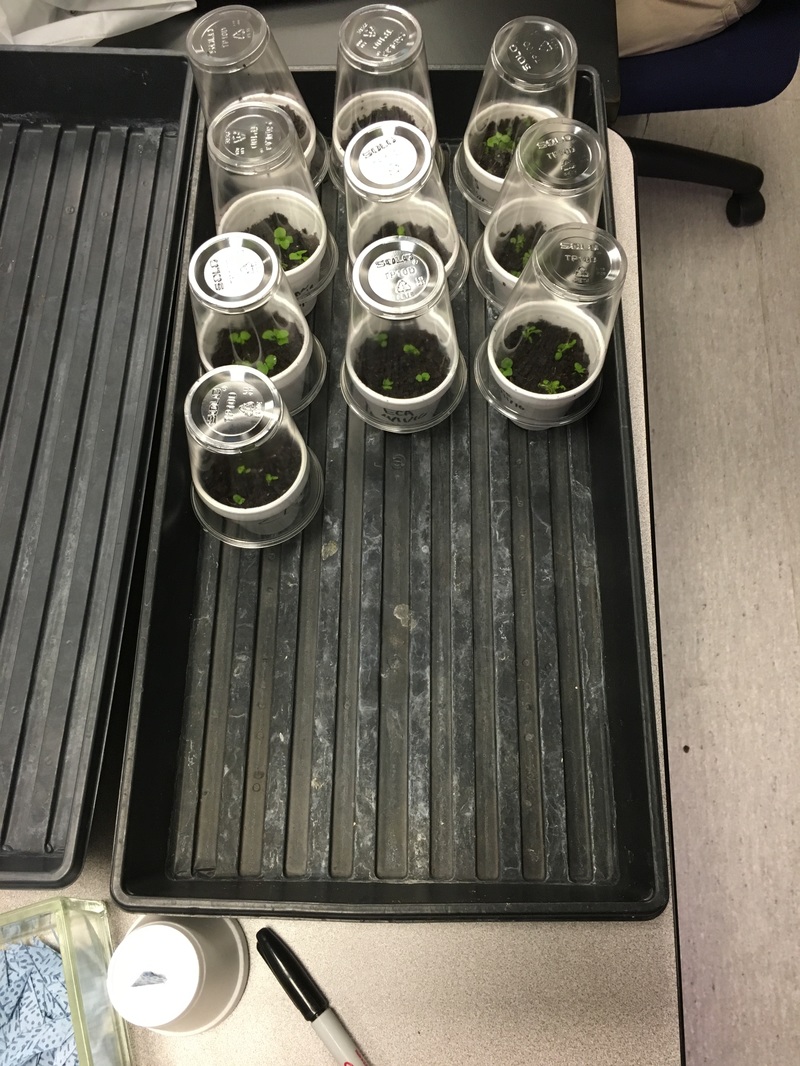
2 weeks later, came back and our c ferns were flourishing. photo: chris
